Crafting a custom cutting board represents the perfect blend of functional necessity and artistic expression in woodworking. From the timeless elegance of end-grain maple to the striking aesthetics of epoxy river designs, each project offers unique opportunities to enhance your kitchen while showcasing your craftsmanship. Whether you're a novice woodworker seeking a straightforward weekend project or an experienced artisan ready for complex patterns, these twenty distinctive cutting board designs transform ordinary meal prep into an elevated culinary experience. The possibilities extend far beyond basic rectangular shapes, inviting exploration into personalized creations that serve both as practical tools and conversation pieces.
Classic Maple End-Grain Board
Creating a classic maple end-grain cutting board remains one of the most rewarding woodworking projects for both novice and experienced craftsmen. You'll love how the end-grain pattern showcases maple's natural beauty while providing a durable cutting surface. By arranging wood blocks vertically, you create a surface that's gentle on knife blades and resistant to wear, making it perfect for your busy kitchen.
Geometric Pattern Walnut Board
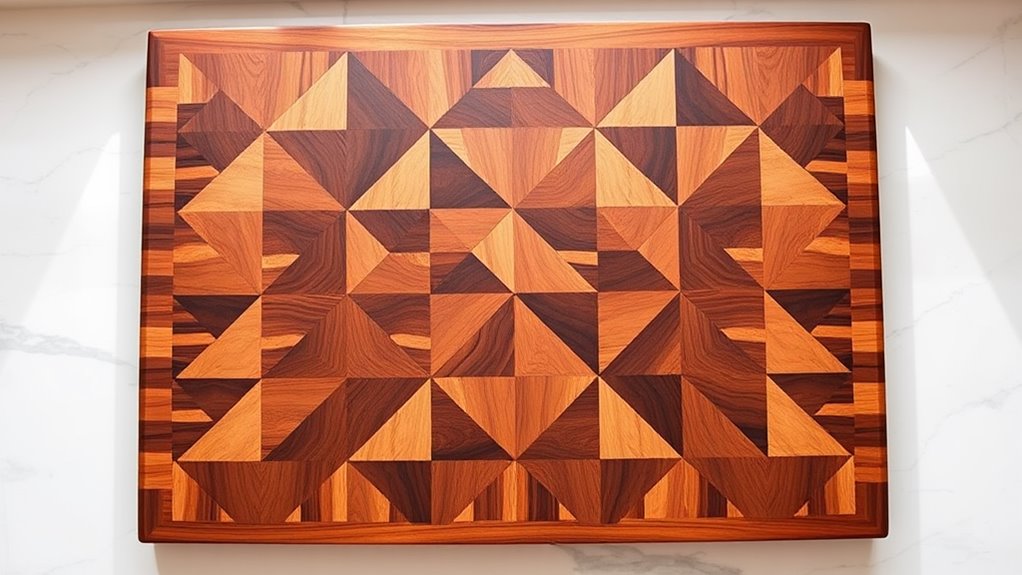
While maple boards offer timeless appeal, a geometric pattern walnut board brings striking visual drama to your kitchen workspace. By combining strips of richly-colored walnut at various angles, you'll create eye-catching designs like chevrons, diamonds, or basketweave patterns. Your friends will be amazed when you tell them you made it yourself! Just remember to align your wood grain carefully for maximum strength.
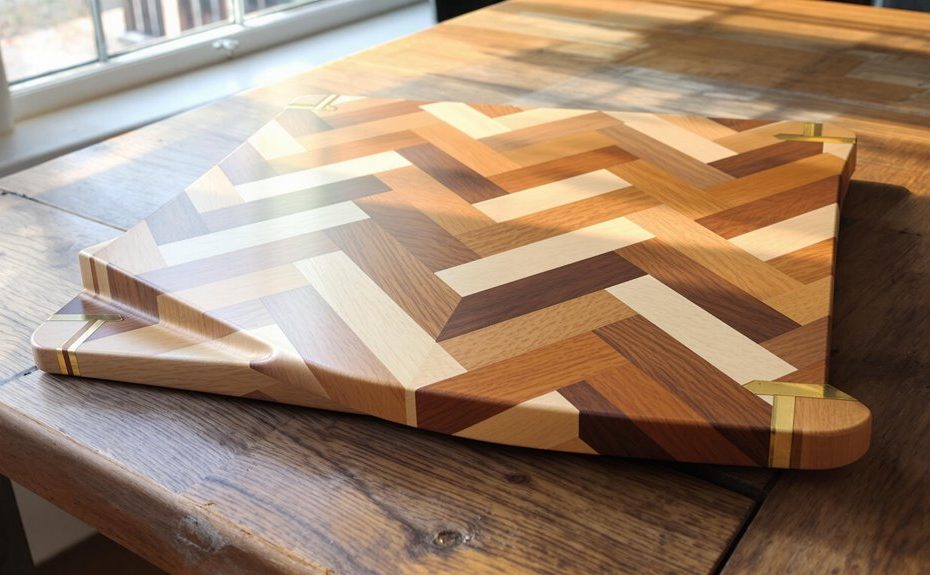
Herringbone Design
Although herringbone patterns have adorned European floors for centuries, this classic design brings timeless elegance to cutting boards. You'll love creating this eye-catching pattern by arranging small wooden strips at 45-degree angles. To make your own, simply cut equal-sized pieces of contrasting woods like maple and walnut, then arrange them in alternating directions for a stunning zigzag effect.
River of Blue Epoxy
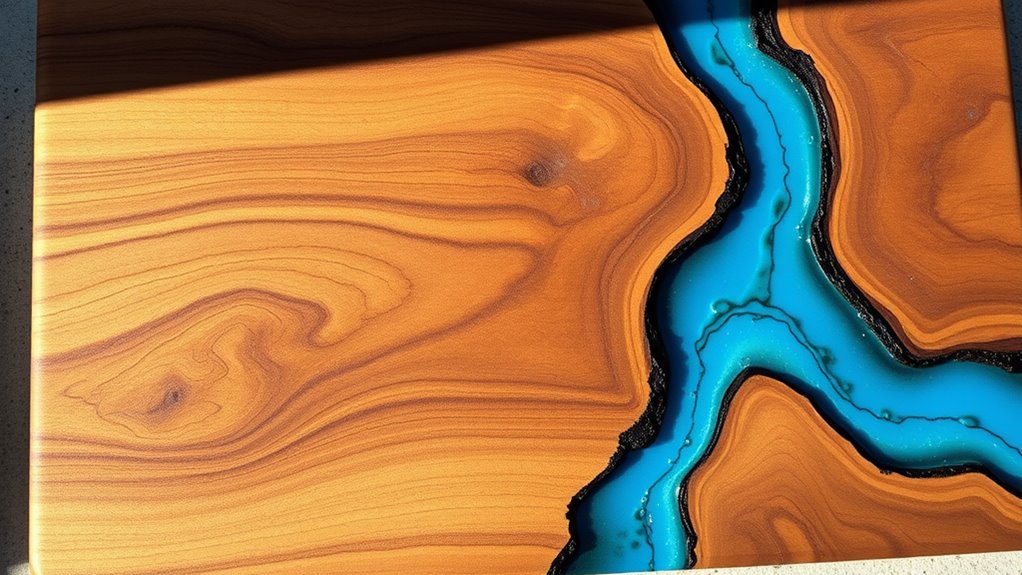
The mesmerizing blue epoxy river design has become increasingly popular among woodworking enthusiasts. You can create this stunning effect by arranging two wood pieces with a wavy gap between them, then pouring vibrant blue epoxy resin to form a flowing "river." The translucent blue creates a beautiful contrast against the natural wood grain, making your cutting board a conversation starter in your kitchen.
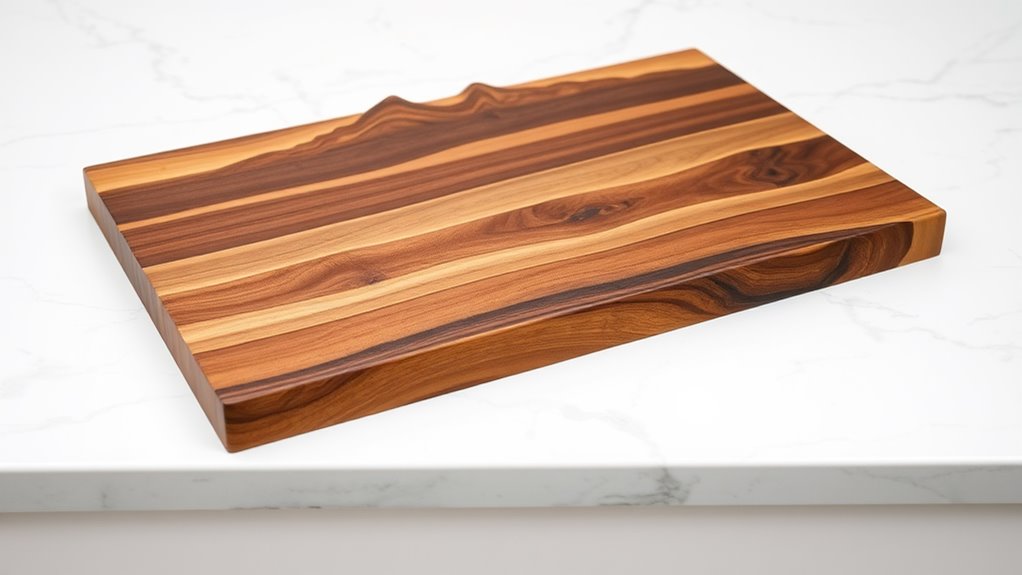
Mixed Wood Species Board
Creating a mixed wood species board showcases nature's diverse palette through carefully selected hardwoods like maple, walnut, cherry, and purpleheart.
When you combine different woods, you'll create stunning patterns that make each cutting board unique. The contrasting colors and grain patterns will catch everyone's eye. Just remember to choose woods with similar hardness levels to guarantee even wear and a long-lasting cutting surface.
Live Edge Serving Board
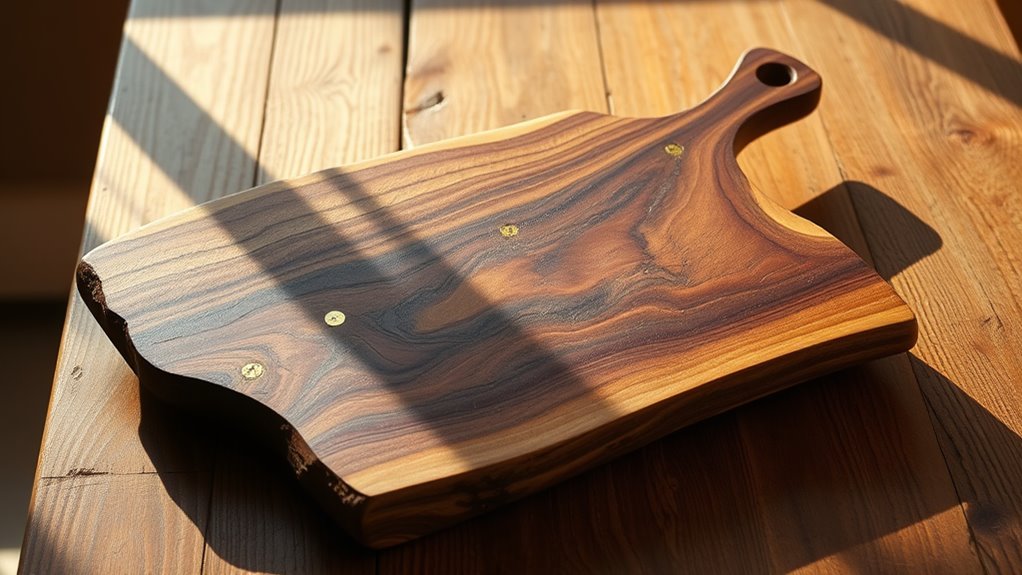
Beyond traditional hardwood combinations, live edge serving boards offer a striking departure by preserving nature's organic curves and raw beauty. You can create your own by selecting a hardwood slab with an attractive natural edge, carefully sanding the surface while maintaining the bark-free edge, and finishing with food-safe oil. These boards make perfect conversation pieces for your kitchen or dining room.
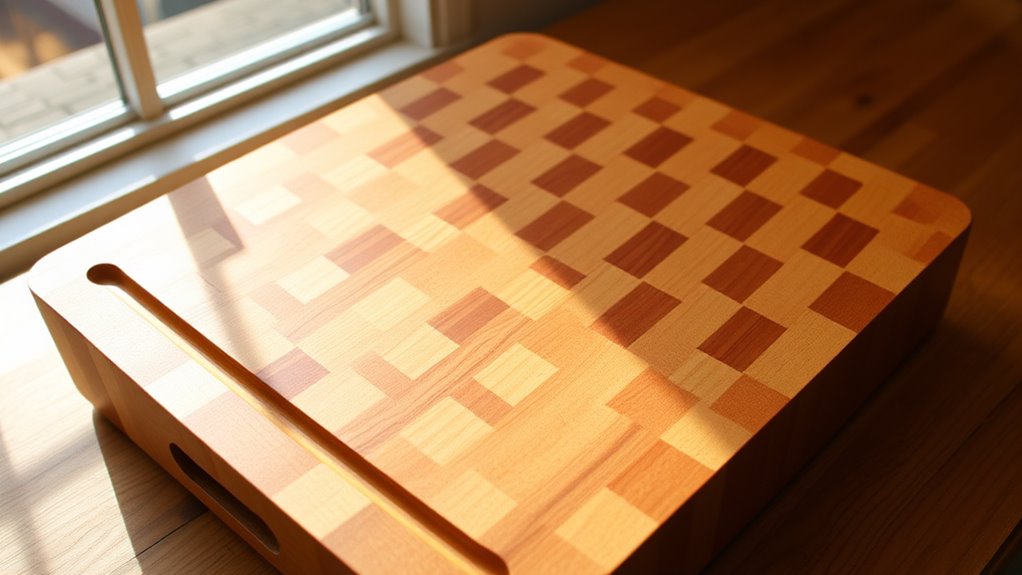
Butcher Block Style
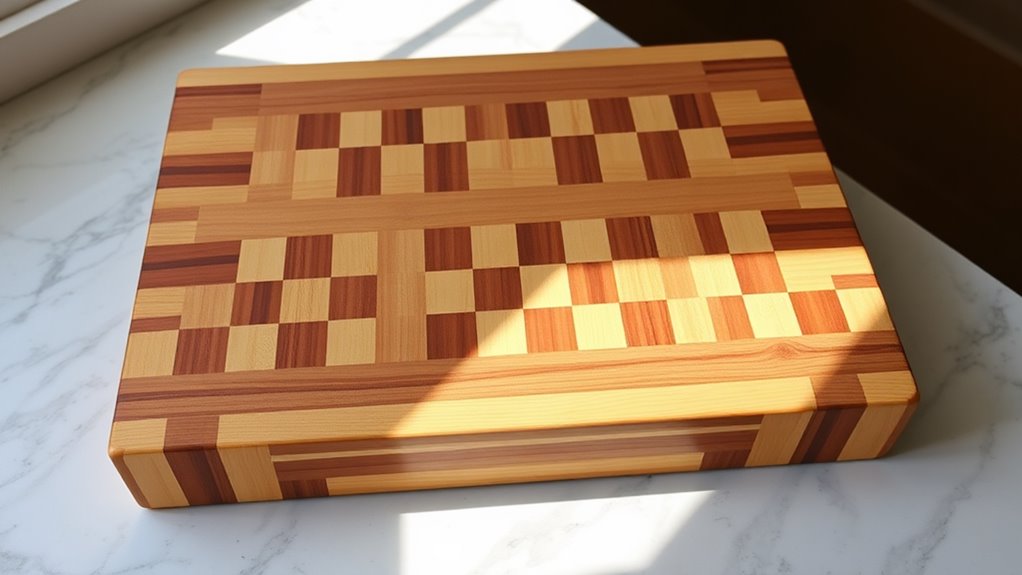
Butcher block style boards represent one of the most durable and visually appealing cutting board designs, featuring end-grain or edge-grain wood pieces arranged in a distinctive checkerboard pattern. You can create your own by carefully selecting hardwoods like maple or oak, cutting them into uniform pieces, and gluing them together. The result is a sturdy cutting surface that'll last for years while adding beauty to your kitchen.
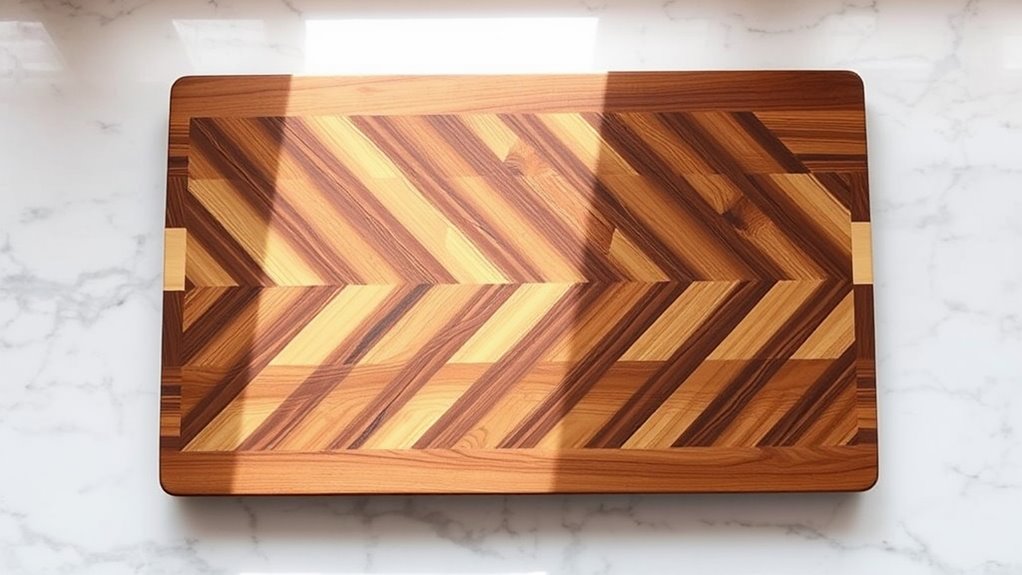
Chevron Pattern Design
While traditional cutting boards often feature straight lines and simple patterns, the chevron design adds a striking visual element that transforms a functional kitchen tool into an artistic centerpiece.
To create this eye-catching pattern, you'll need to cut wood pieces at 45-degree angles and arrange them in a V-shape. You can mix different wood types like maple and walnut for a stunning contrast that'll make your cutting board truly unique.
Round Chopping Block
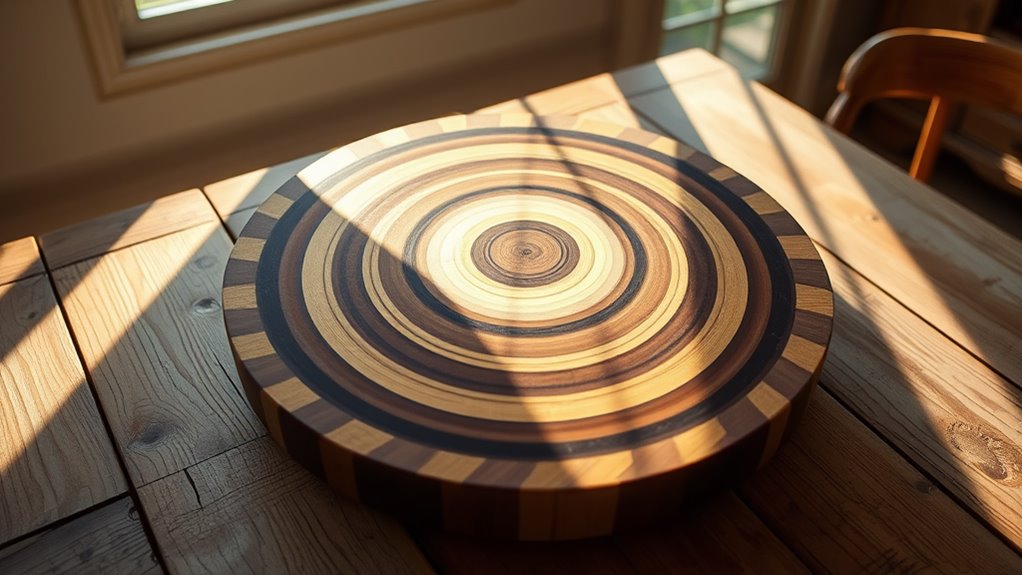
Creating a round chopping block offers a revitalizing departure from conventional rectangular designs, making it an excellent choice for both food preparation and serving. You'll need a solid piece of hardwood, like maple or walnut, cut into a circle. The natural curves make it perfect for rolling pizza dough or serving cheese and charcuterie at your next gathering.
Personalized Monogram Board
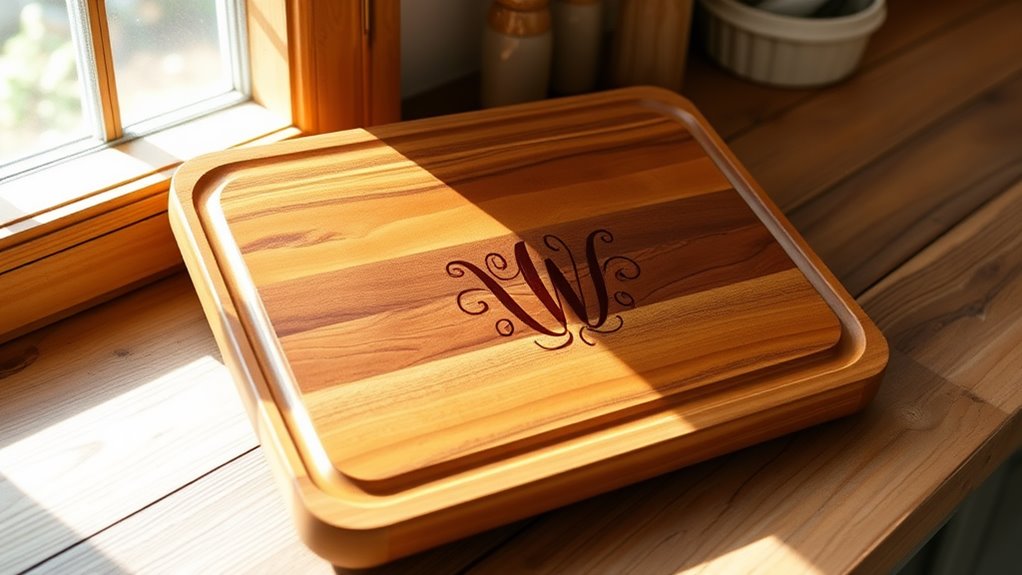
A personalized monogram board transforms an ordinary cutting surface into a cherished keepsake perfect for special occasions or thoughtful gift-giving. You can create one using wood-burning tools or laser engraving to add names, dates, or meaningful messages. Choose high-quality hardwood like maple or walnut, and consider adding decorative elements around your monogram for extra flair.
Wine Bottle Shape Board
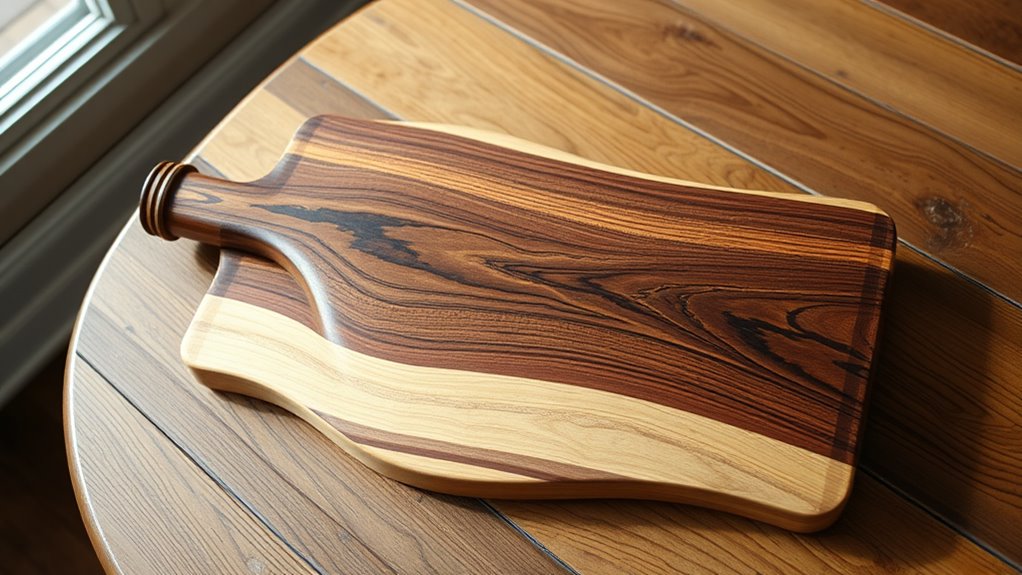
This wine bottle-shaped cutting board design offers a perfect blend of functionality and visual appeal for wine enthusiasts and home entertainers. You can use it to serve cheese and appetizers alongside your favorite wines, creating an eye-catching presentation. Simply trace a wine bottle outline onto your chosen hardwood, cut it out with a jigsaw, and sand the edges until smooth.
Inlay Accent Board
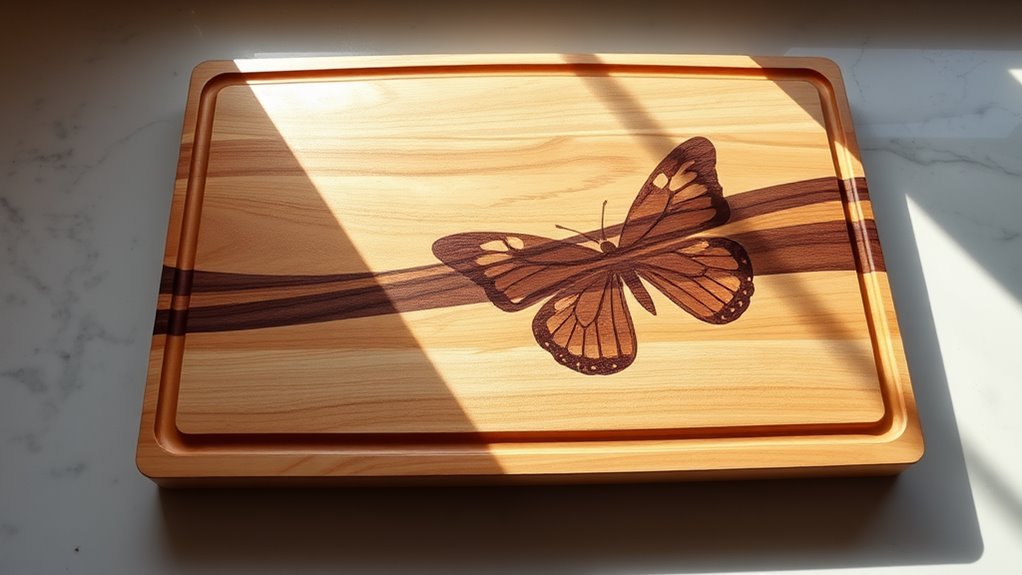
Beautiful handcrafted cutting boards become even more striking when adorned with decorative inlay accents. You can create stunning designs using contrasting wood species like maple and walnut, or add colorful epoxy inlays for a modern twist. Try simple geometric patterns, initials, or even nature-inspired motifs. Just remember to keep your inlays food-safe and level with the board's surface.
State Outline Design
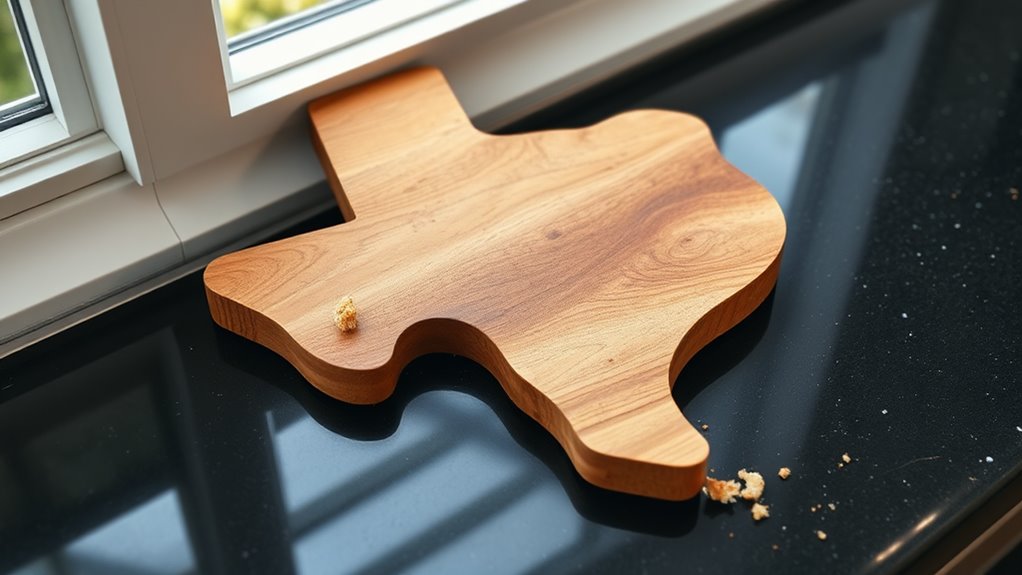
Looking to showcase your state pride in a functional way? Create a cutting board featuring your state's outline! Using a template, trace your state's shape onto your chosen hardwood, then carefully cut it out with a jigsaw. Sand the edges smooth and finish with food-safe oil. You can even add a small heart or star to mark your hometown's location.
Heart Shaped Board
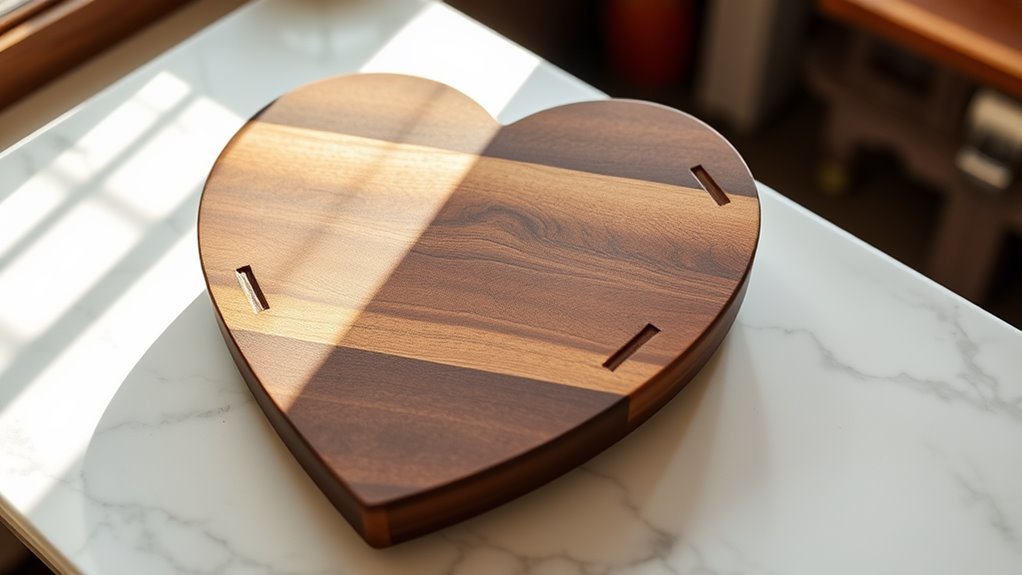
Creating a heart-shaped cutting board adds romantic charm to any kitchen while serving as a functional tool for food preparation. You can easily make one using hardwood like maple or walnut. Start by drawing or tracing a heart pattern on your wood, then cut along the lines with a jigsaw. Sand the edges smooth, and finish with food-safe mineral oil for a beautiful, love-inspired kitchen accessory.
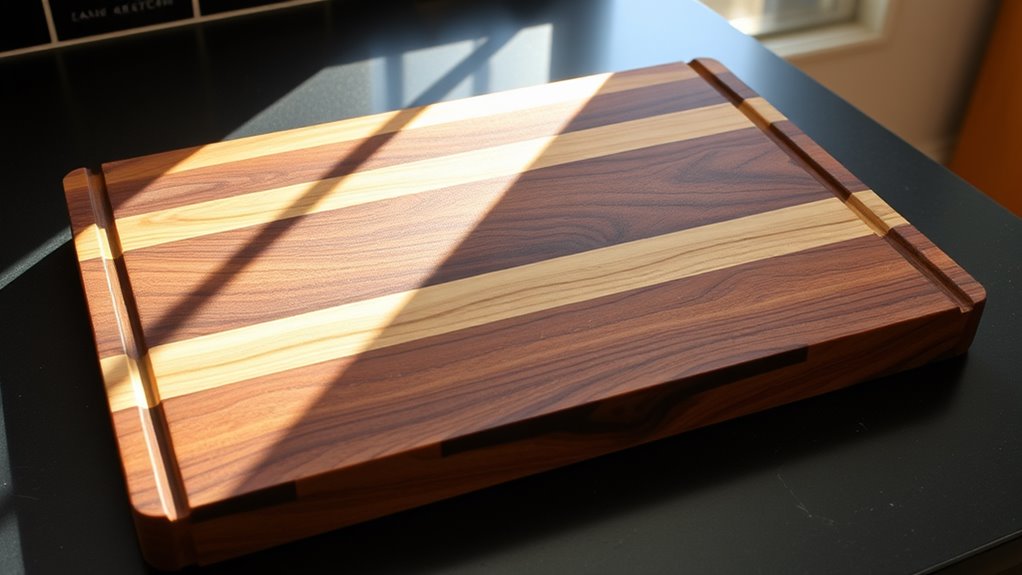
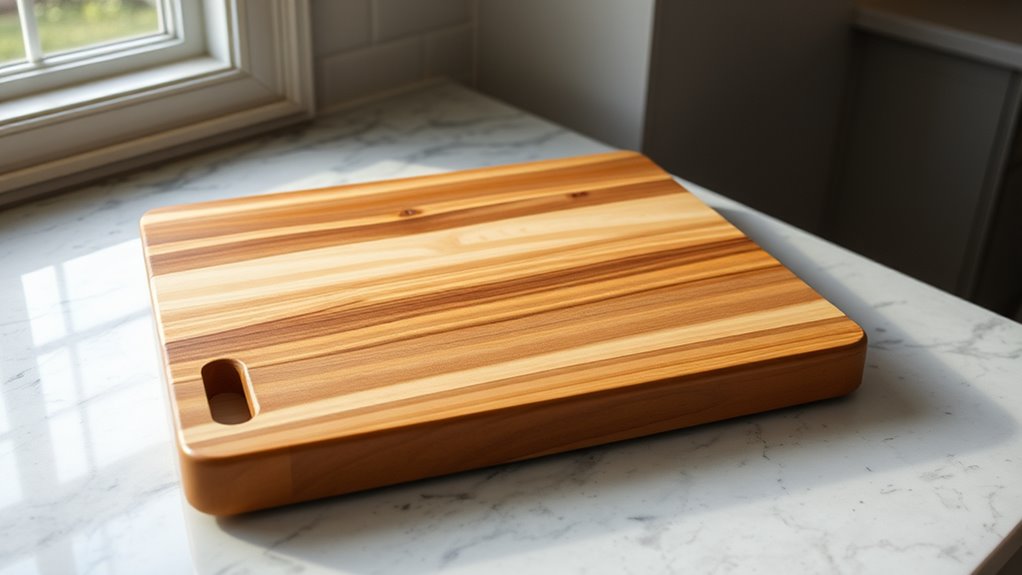
Striped Pattern Board
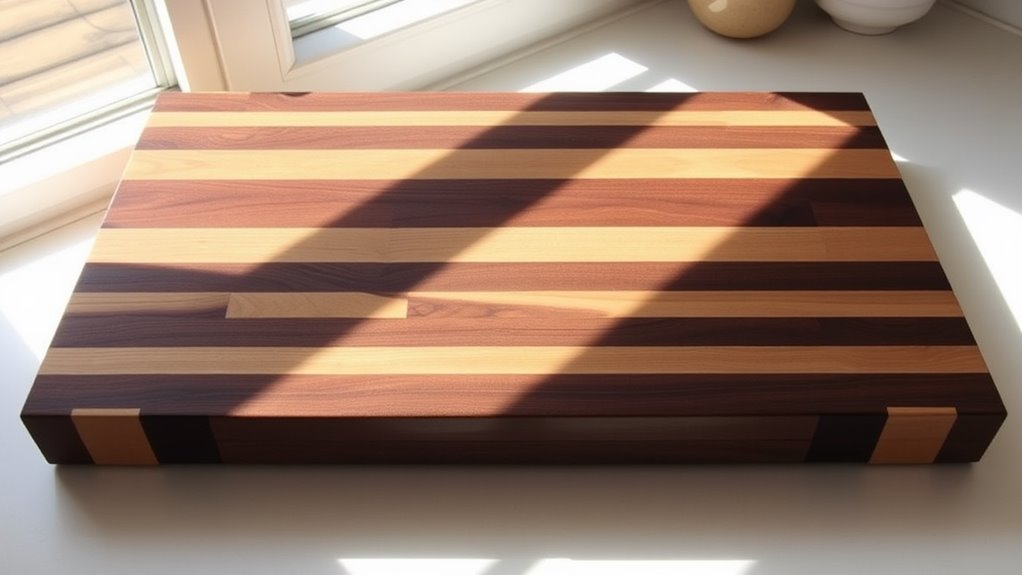
A striped pattern cutting board combines multiple wood species to create visually striking parallel lines across the surface. You can mix woods like maple, walnut, and cherry to make stunning contrasts. The fun part is choosing your pattern – go for thin stripes, thick bands, or alternate different woods. Just remember to align your wood grain in the same direction for strength.
Puzzle Piece Design
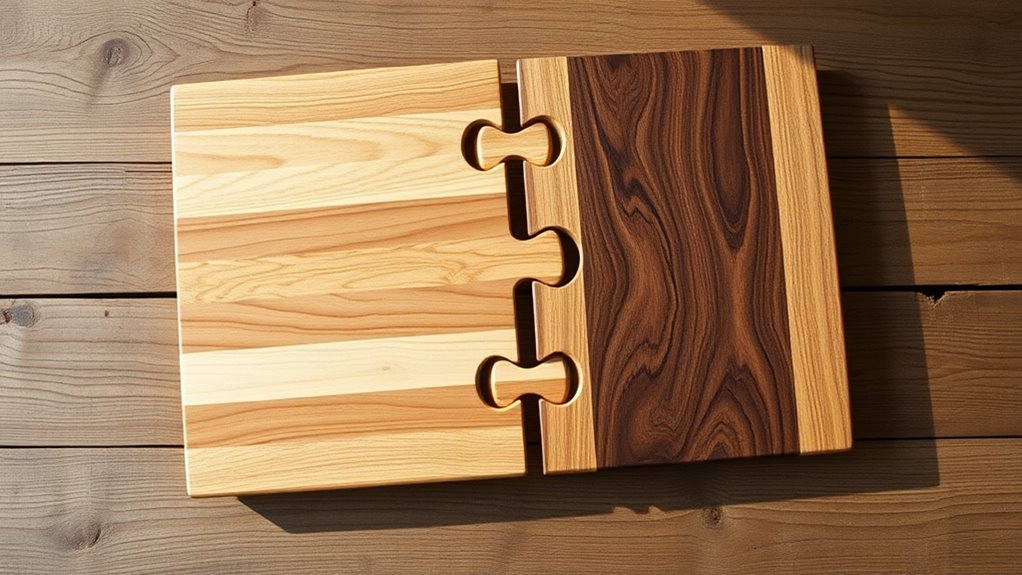
Turn your cutting board into a conversation piece by crafting an interlocking puzzle design. Using contrasting woods like maple and walnut, cut puzzle-shaped pieces that fit together perfectly. You'll need a jigsaw and patience, but the result is worth it. Start with just two or three large pieces for your first attempt – it's easier to manage and still looks amazing.
Mountain Range Board
While puzzle designs showcase intricate woodworking, mountain range patterns offer a striking visual that captures nature's majesty. You can create this eye-catching design using different wood species like walnut and maple. Simply cut angled pieces to form jagged peaks, then arrange them to mimic your favorite mountain landscape. It's a perfect way to bring outdoor inspiration into your kitchen.
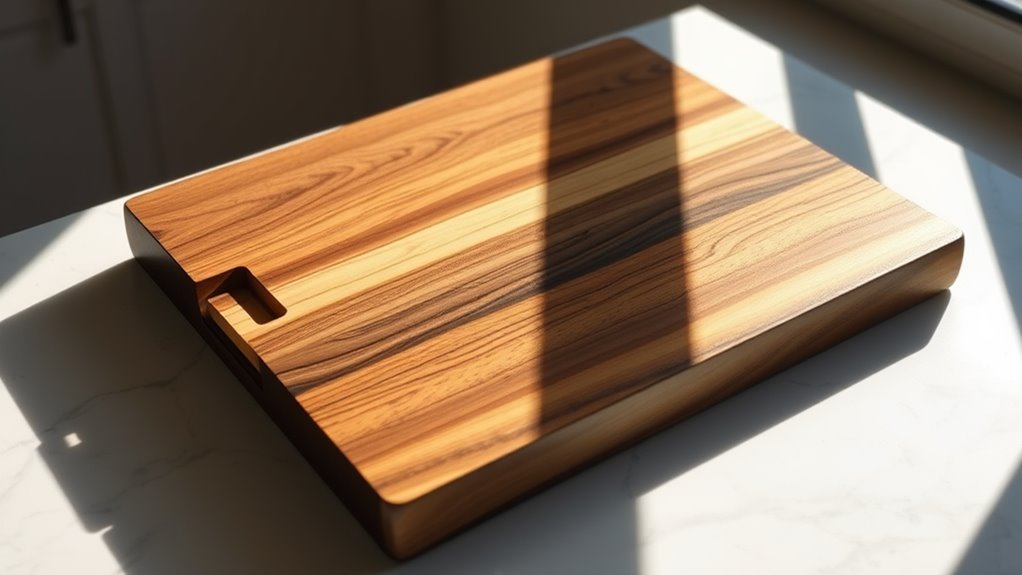
Handle Grip Board
Many home chefs appreciate the practicality of built-in handle grips when crafting their cutting boards. You can create these handy grips by routing shallow grooves along the sides or carving curved indentations at both ends. This simple addition makes your board easier to lift, carry, and store vertically. Plus, it adds a professional touch that elevates your DIY project.
Wave Pattern Design
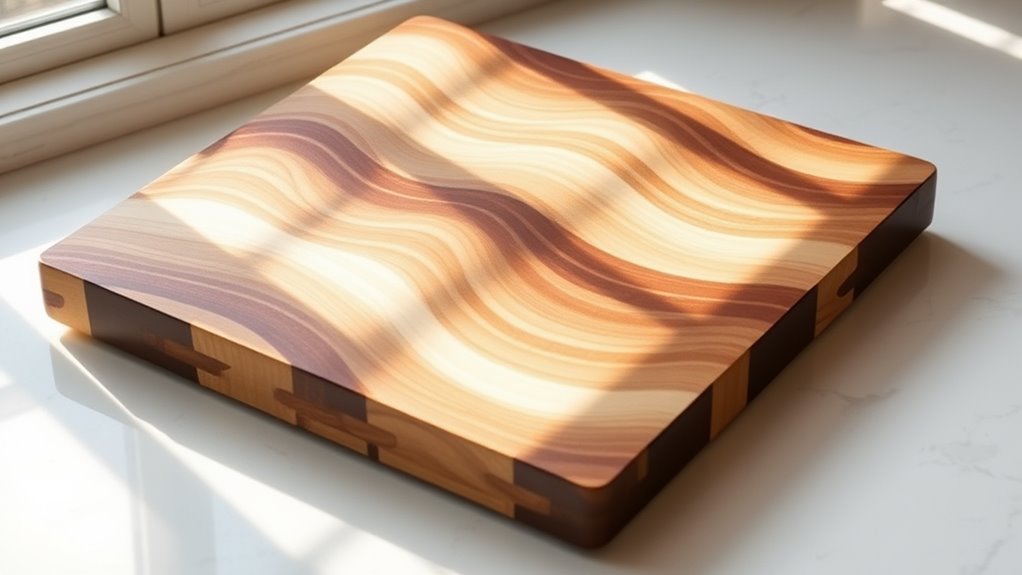
Beyond functional features like handle grips, cutting boards can showcase stunning decorative elements through wave pattern designs. You can create mesmerizing wave patterns by alternating strips of light and dark wood, like maple and walnut. When glued together and sanded smooth, these strips form a flowing design that adds natural beauty to your kitchen while making each board uniquely yours.
Reversible Two-Tone Board
A reversible two-tone cutting board offers dual functionality by incorporating contrasting wood species on each side. You can use light maple on one side and dark walnut on the other, creating a stunning visual contrast. This design allows you to keep one side dedicated to meat and the other for vegetables, preventing cross-contamination while adding style to your kitchen.
Frequently Asked Questions
How Long Should I Wait Before Using a Newly Oiled Cutting Board?
After oiling your cutting board, you'll want to let it dry completely before use. Generally, wait 24-48 hours to allow the oil to fully penetrate the wood and cure. You can test if it's ready by touching the surface – if it feels dry and non-sticky, you're good to go. Just remember, rushing this process might leave you with a greasy mess on your food!
Can I Put My Wooden Cutting Board in the Dishwasher?
Decidedly dangerous and definitely destructive – putting your wooden cutting board in the dishwasher is a big no-no! Hot water and harsh detergents will cause your board to warp, crack, and split. The excessive moisture will also encourage bacterial growth and mold. Instead, hand wash your board with mild soap and warm water, dry it thoroughly, and occasionally treat it with food-grade mineral oil to keep it in prime condition.
What's the Best Way to Remove Deep Knife Marks?
To remove deep knife marks from your cutting board, start by sanding the surface with medium-grit sandpaper (around 120), then work your way to finer grits (220-320) for a smooth finish. Move in the direction of the wood grain, applying even pressure. Once smooth, wipe away dust with a damp cloth, let it dry completely, and finish with food-grade mineral oil to protect the wood.
How Often Should I Sand and Refinish My Cutting Board?
Picture your cutting board as a hardworking kitchen companion that needs regular pampering. You should sand and refinish your board every 3-6 months, depending on how often you use it. If you notice the wood feeling rough, looking dull, or repelling water instead of beading it, it's time for some TLC. A quick test: if water soaks in rather than sits on top, start sanding!
Why Is My Cutting Board Warping and How Can I Prevent It?
Cutting boards typically warp when exposed to moisture and temperature changes. When one side gets wet while the other remains dry, the wood expands unevenly. To prevent warping, avoid soaking your board or leaving it in standing water. Instead, clean it quickly, dry it thoroughly, and store it upright in a room-temperature space. Regular oiling helps create a moisture barrier that keeps the wood stable.
