I’ve got six amazing DIY home decor projects that’ll make your space look incredible without costing a fortune.
You can create farmhouse-style wall shelves using reclaimed wood, transform ordinary jars into elegant candle holders, add personality with hand-painted floor designs, craft natural wood plant stands, make stunning fiber art from simply wrapped yarn, and design budget-friendly photo displays using twine and Command hooks. These projects only need basic tools and materials you might already have at home.
The best part? Each project can be completed in the afternoon, and I’ll show you exactly how to tackle them step by step.
Farmhouse Style Wall Shelves
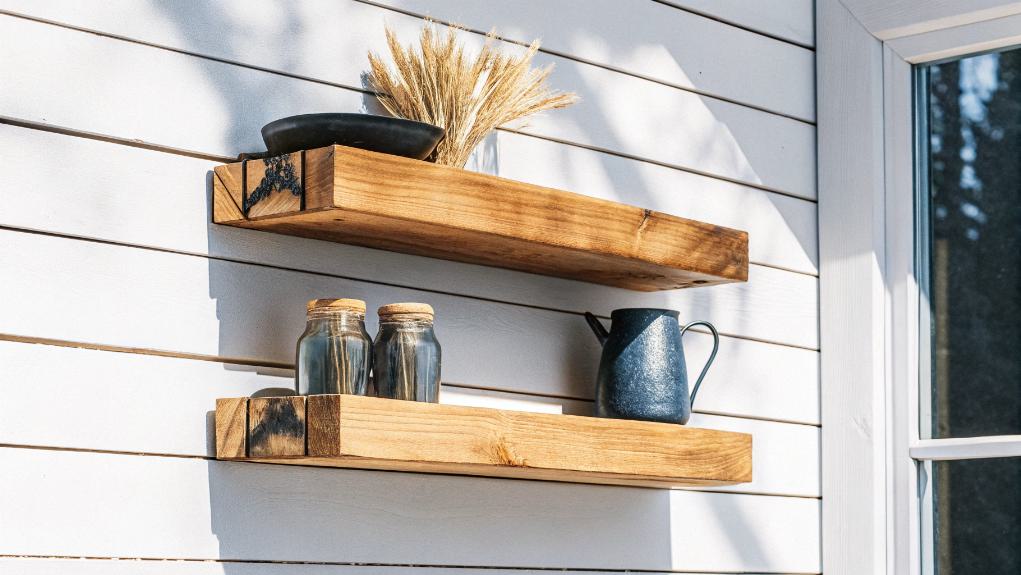
Creating farmhouse style wall shelves can transform any room into a cozy, rustic retreat while providing functional storage space. I’ll show you how to build these charming shelves using materials like pine, cedar, or even reclaimed barn wood – perfect for that authentic farmhouse feel.
First, I use a stud finder to locate wall supports and mark shelf positions with painter’s tape. Trust me, this step saves a lot of headaches later! For most spaces, I’ve found that 64-inch or 24-inch widths work beautifully, but you can adjust based on your room’s needs. I recommend using three support brackets for longer shelves to ensure maximum stability. I always recommend choosing sturdy brackets that complement your style – whether that’s decorative corbels or simple L-brackets.
When it comes to the fun part, I love distressing the wood with a wire brush to give it that lived-in look. After sanding, I apply stain and polyurethane for protection. Here’s a pro tip: before loading up your shelves, give them a quick test run with some weight – better safe than sorry! With proper installation into wall studs, these shelves aren’t just pretty; they’re practical enough to hold your favorite decor pieces and everyday items.
Elegant Upcycled Candle Holders
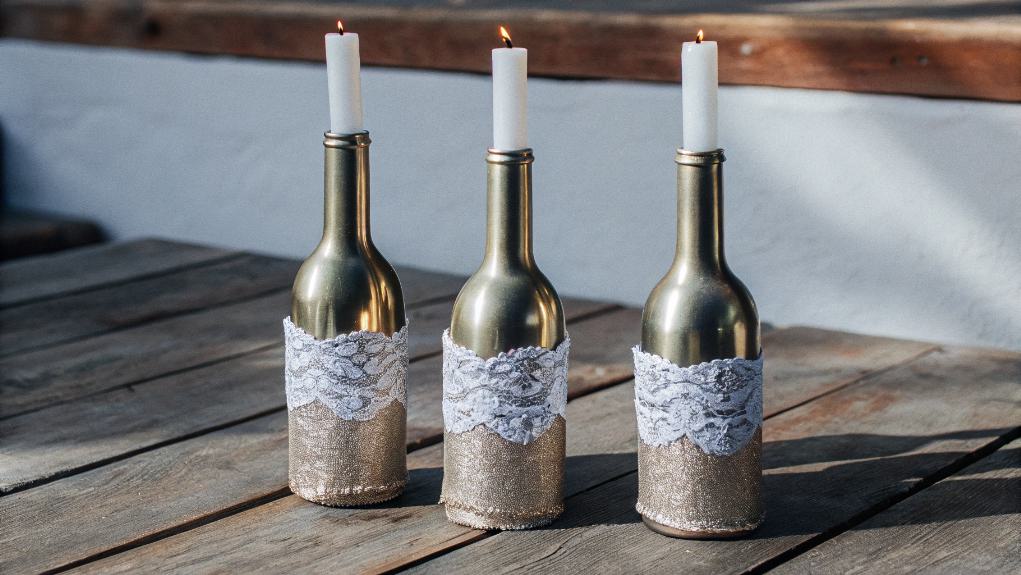
Over the years, I’ve discovered that elegant candle holders don’t require expensive materials – just imagination and everyday items from around your home. I’m always amazed at how ordinary objects like coffee creamer bottles, glass yogurt jars, and even old chair spindles can transform into stunning candlesticks with a bit of creativity. Using clear round marbles adds a stunning decorative element that catches the light beautifully.
My favorite technique involves giving wooden candle holders a faux concrete finish – it’s a clever way to achieve that high-end look without the hefty price tag. For a touch of sparkle, I’ll sometimes coat the inside of glass containers with glitter and mod podge. Trust me, your guests won’t believe these started as recycled items!
When I’m feeling particularly crafty, I’ll turn antique insulators or copper pipes into industrial-chic candle holders. Just remember to wear safety gear when working with these materials. I’ve learned that adding a protective coating to wooden pieces is essential for longevity. Whether you’re going for rustic charm or modern elegance, there’s an upcycled candle holder project that’ll fit your style – and your budget!
Hand-Painted Floor Designs
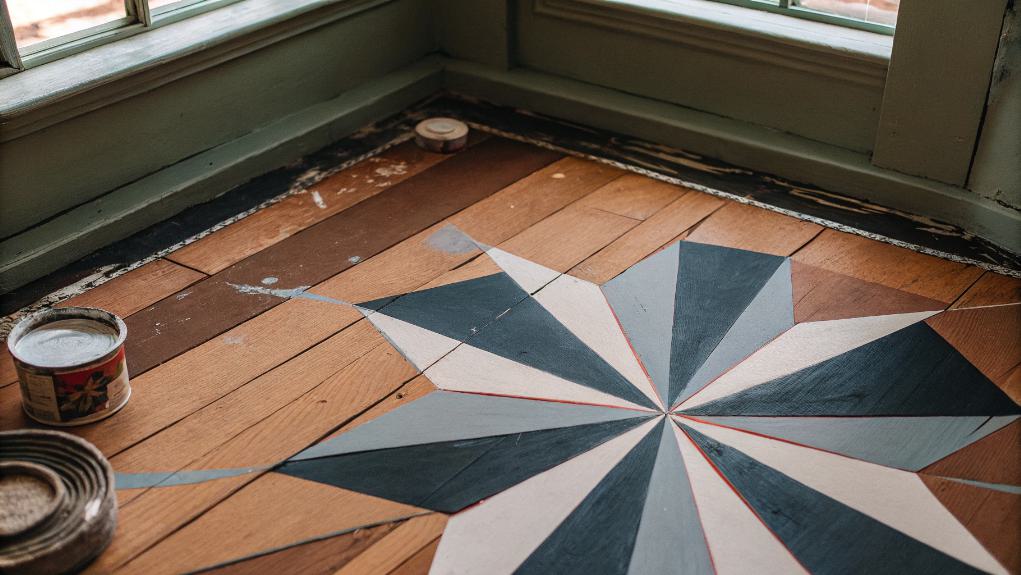
While candle holders can brighten up a room from above, I’ve found that some of the most striking home transformations start from the ground up. I’ll show you how to turn your boring floors into works of art with some paint and creativity. Trust me, your guests won’t believe it’s the same floor!
Before you grab that paintbrush, let’s talk preparation. I always start by thoroughly cleaning and sanding the floor – it’s like giving yourself a blank canvas. Don’t skip the primer if you want your masterpiece to last! I’ve learned (the hard way) that working in sections makes the whole process much more manageable. Consider adding a vinyl decal design if you’re decorating a child’s room for a playful touch.
| Style | Difficulty | Best For |
|---|---|---|
| Marble | Advanced | Large spaces |
| Granite | Beginner | Kitchens |
| Stripes | Easy | Hallways |
| Faux Carpet | Intermediate | Living rooms |
Here’s my favorite trick: use a hairdryer between coats to speed up drying time – it’s a real game-changer! For the finishing touch, don’t forget to seal your work with a hard-wearing varnish. I recommend yacht varnish for high-traffic areas; it’s like giving your floor a suit of armor!
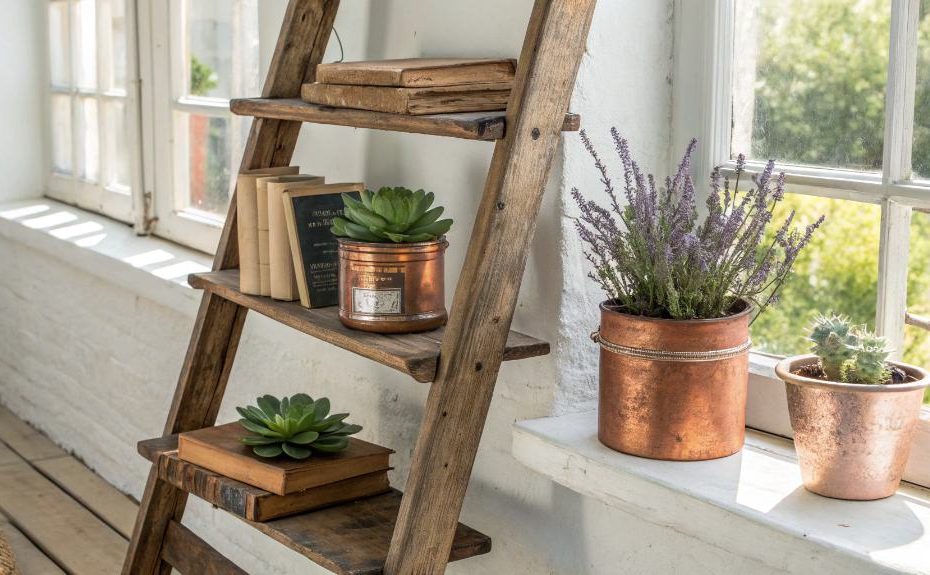
Natural Wood Plant Stands
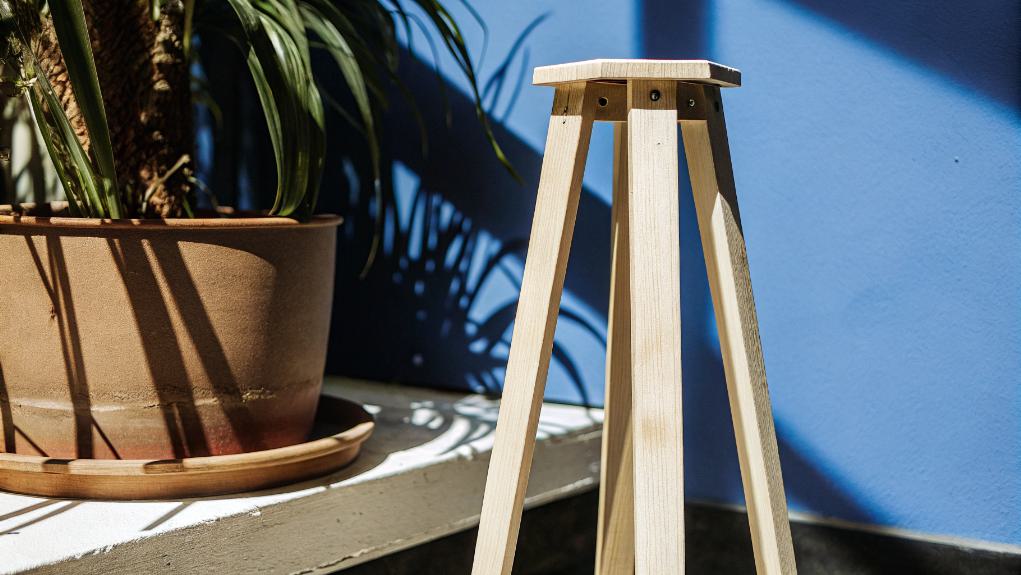
Since plants deserve to be displayed as beautifully as they grow, I’ve discovered that natural wood plant stands can transform any indoor jungle into an artistic arrangement. I love using different wood types like hobby pine and birch for my projects, and I always opt for FSC-certified plywood to keep things eco-friendly. The Hand tools and sander make this project accessible for any DIY enthusiast.
Let me tell you, creating these stands isn’t rocket science! With basic tools like a hand saw and drill, you’ll be crafting in no time. I start by measuring carefully (measure twice, cut once is my motto!), then cut and sand the pieces until they’re smooth as silk. You can customize the look with Minwax Golden Oak stain or get creative with different paint colors.
What’s really cool about these stands is their versatility. I design mine in various heights to create visual interest, and some even stack for easy storage. Plus, they’re not just pretty – they’re practical too! The elevated design helps protect your floors from water damage, and you can add drainage features if you’re prone to overwatering (aren’t we all sometimes?).
DIY Wrapped Fiber Art
Fiber art’s cozy charm makes it a perfect DIY project for adding warmth to any wall space. I’m excited to show you how to create your own wrapped fiber art piece using simple materials you can find at any craft store. You’ll need some macrame cord, craft wire, yarn, and a tapestry needle to get started.
Let me walk you through the process. First, I’ll have you cut five bundles of cord, making the outer ones slightly longer for that lovely curved effect. Once you’ve wrapped each bundle with wire (leaving some fringe at the bottom for that perfect boho look), you’ll shape them into graceful arcs. Gently tuck wire ends inward to prevent any sharp edges from poking through. Here’s where the fun begins – you’ll wrap each bundle with yarn, and I love how you can play with different color combinations here.
The trickiest part is joining the bundles together, but don’t worry! I’ve found that starting from the middle and working your way out makes it much easier. Once you’ve secured everything with some strong stitches, add a hanging loop, and voilà – you’ve created a stunning piece of wall art that’ll have your friends asking, “Where did you buy that?”
Budget-Friendly Photo Display Solutions
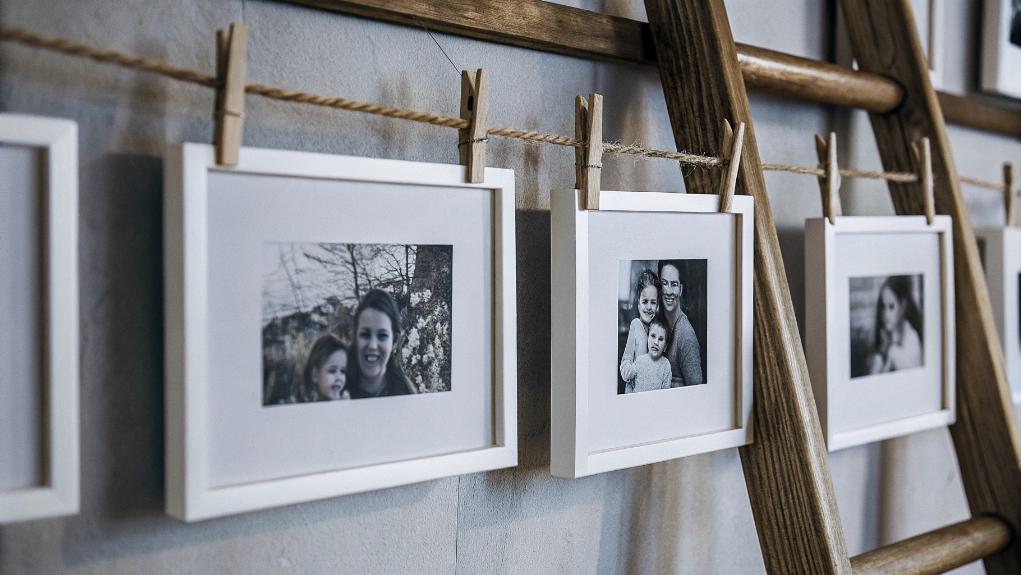
Looking to showcase your cherished memories without breaking the bank? I’ve got some creative solutions that’ll transform your space into a personalized photo gallery. Let’s start with some everyday items you probably already have lying around!
One of my favorite approaches is using Command Hooks and twine to create a charming display. I’ll string the twine between hooks and use mini clothespins to clip photos – it’s that simple! For a more structured look, I love turning old clipboards into rustic photo holders.
Here are my top four tips for creating an eye-catching gallery wall:
- Mix frame sizes and shapes for visual interest
- Paint mismatched frames in coordinating colors
- Arrange photos in a geometric pattern for modern flair
- Include both horizontal and vertical orientations
If you’re feeling extra creative, try transforming a wooden hula hoop into a circular photo display. Just attach your photos with small clips around the edge – it’s an unexpected conversation starter! For those who prefer a more tech-savvy approach, consider investing in a digital frame like the Aura Mason Luxe. It’s perfect for rotating your favorite shots without the need for physical prints.
Frequently Asked Questions
How Long Should I Wait for Paint to Dry Between DIY Projects?
Since latex paint dries 6x faster than oil-based, I recommend waiting 4 hours between coats for latex and 24 hours for oil-based paint to guarantee proper drying.
What Safety Equipment Is Essential When Working With Power Tools?
I always use safety glasses, hearing protection, steel-toed boots, and a dust mask when working with power tools. I’ll also wear snug-fitting clothes and remove any dangling jewelry.
Can These DIY Projects Be Done in Rental Properties?
You’re in luck! I’ve given many rentals a facelift using these projects. Just stick to removable solutions like command strips, temporary wallpaper, and textiles to avoid losing your deposit.
Which Projects Are Best for Beginners With No Crafting Experience?
I’d recommend starting with decorated candlesticks, egg carton flowers, or fabric twine planters. They’re simple, require basic materials, and you can’t really mess them up too badly.
How Do I Prevent Mold Growth in DIY Bathroom Decor Items?
While you’re crafting beautiful bathroom decor, I know mold’s plotting to ruin it. I’ll help you win: use waterproof materials, seal properly, and maintain good ventilation in your space.
