I’ll show you how to create a stunning upholstered headboard for just $54 in materials. You’ll need some basic tools like a jigsaw, staple gun, and rubber mallet, plus materials including plywood, foam padding, batting, and your choice of fabric. Start by measuring your bed and cutting the plywood base about 6 inches wider than your mattress. After securing the frame with 2x4s, layer on foam and batting, then wrap it all in your chosen fabric, working from the center outward for a professional finish. Let’s transform your bedroom with this weekend-worthy project that’ll make your friends think you splurged at a designer store.
Planning Your Headboard Design
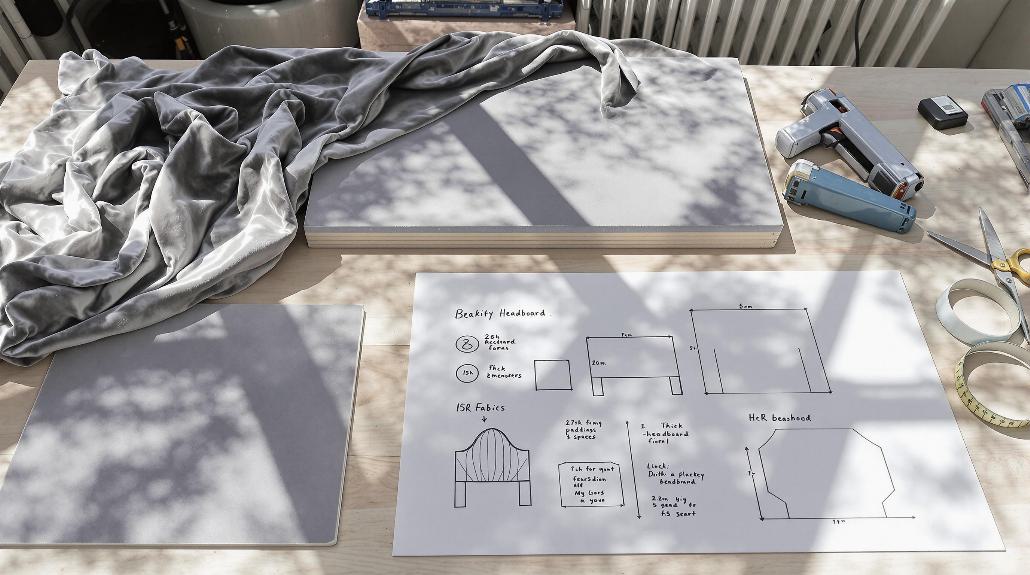
Anyone can create a stunning upholstered headboard with proper planning and preparation. I’ll help you get started with the essential design decisions that’ll make your project a success.
First, let’s tackle the size. I always recommend measuring your bed’s width and height – trust me, you don’t want to end up with a headboard that looks like it’s playing dress-up in your kid’s clothes! The average project cost is approximately $54 for all materials needed.
For a single bed, you’ll want something modest, while king-sized beds can handle those dramatic, statement-making pieces. Don’t forget to look up, too – if you’ve got high ceilings, you can totally rock a taller headboard that’ll make your room feel more balanced.
Next, let’s think about style and comfort. I’m a big fan of adding thick padding if you’re like me and enjoy reading in bed (no more sore backs!).
You can choose from endless fabric options – maybe a bold pattern that makes you smile or a classic neutral that’ll age gracefully. And don’t forget those fun extras like tufting or nailhead trim that can turn your headboard from “nice” to “wow, you made that?”
Gathering Essential Materials
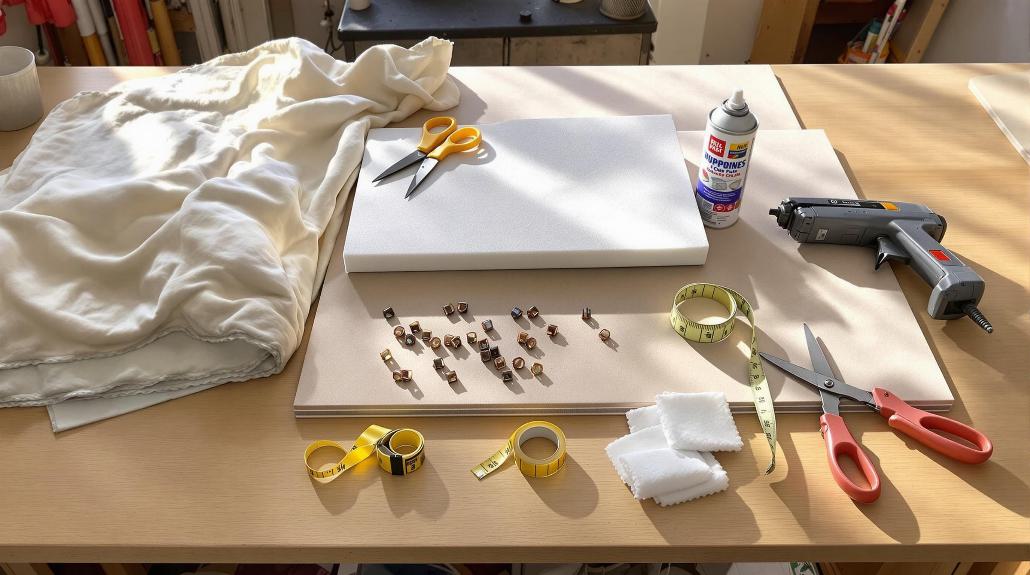
Getting your materials organized is the key first step to creating a professional-looking upholstered headboard. I’ll help you break down exactly what you’ll need, and trust me, having everything ready will make this project so much smoother!
For your base, you’ll want to grab a ½″ sheet of MDF or plywood – I prefer MDF since it’s less likely to warp. You’ll also need some 2x4s for the legs and wood screws to attach them. Don’t forget your jigsaw for cutting out that perfect headboard shape you’ve planned. With a total materials cost of around eighty-three dollars, this project is incredibly budget-friendly compared to retail options.
Now for the fun part – the upholstery materials! You’ll need 2″ medium-firm foam (your back will thank you), plenty of batting for that cloud-like smoothness, and your chosen fabric. I can’t tell you how many times I’ve seen people skimp on fabric quality – don’t make that mistake!
You’ll also need adhesive spray, a sturdy staple gun, and staples.
For tools, grab a rubber mallet (your new best friend), a Quick Nailer Spacer, and sharp fabric scissors. If you’re feeling fancy, those brass upholstery nails can add some serious wow-factor to your finished piece.
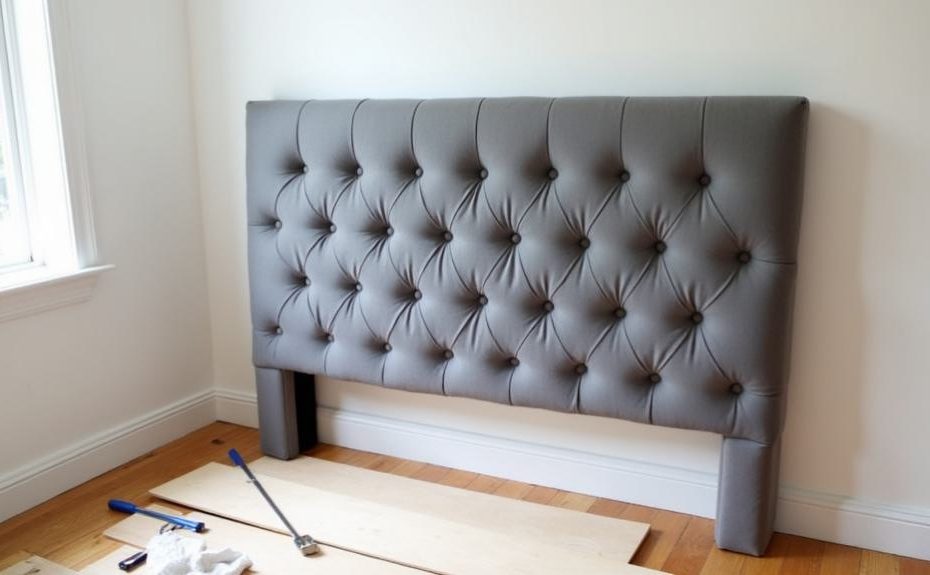
Building The Frame
Creating your headboard’s frame is one of the most essential steps that will determine the final look and stability of your piece.
The frame should extend 6 inches wider than your bed frame dimensions for proper visual impact.
I’ll walk you through the process, starting with cutting your plywood or MDF board. You’ll want to make it a few inches wider than your bed for that perfect visual weight.
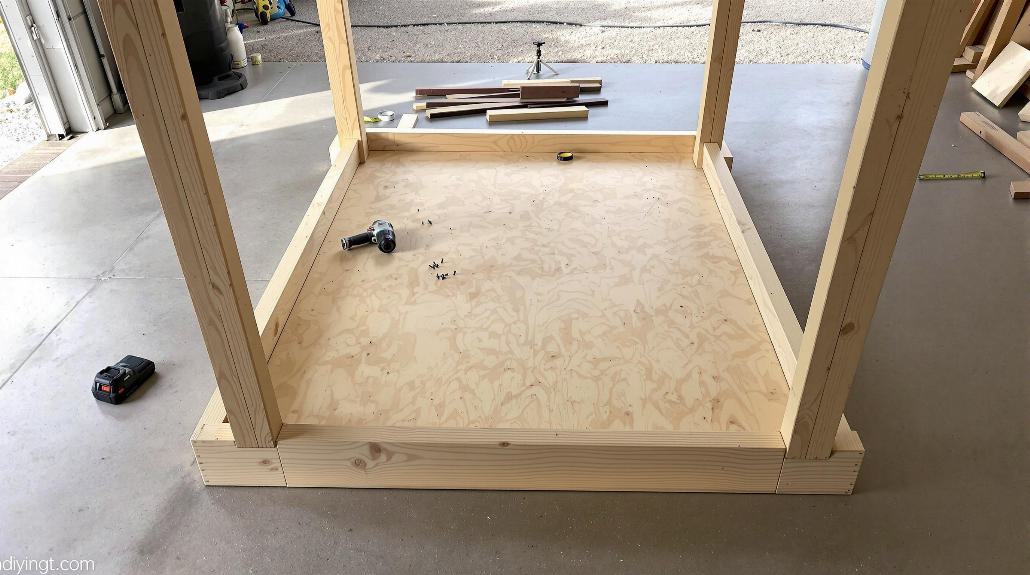
I recommend using a jigsaw for cutting out your frame shape – it’s perfect for those curved edges if you’re going for something fancy!
First, trace your design onto the plywood (I like using a plate as a template for curved tops), and don’t forget to check for symmetry.
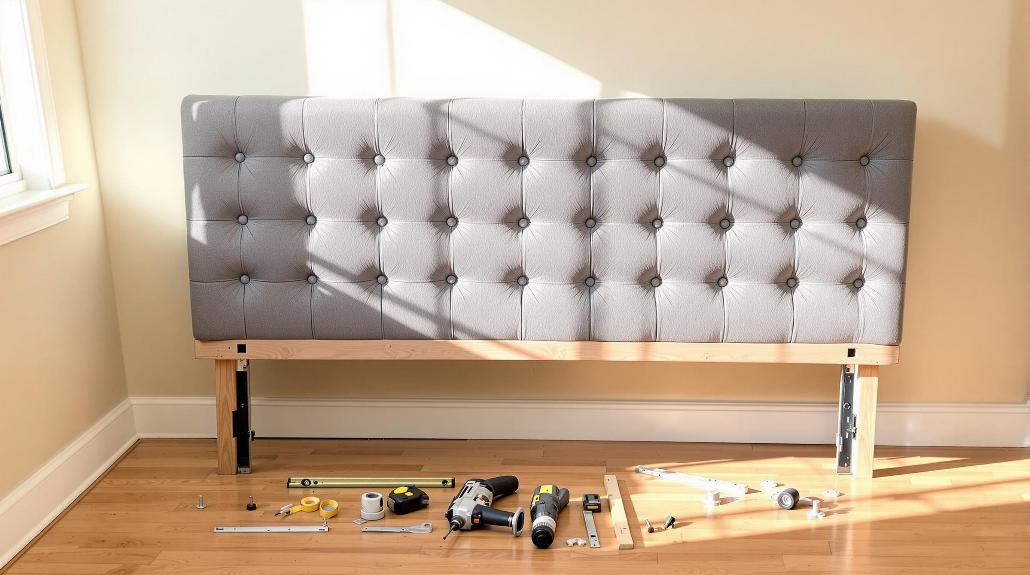
Once you’ve got your shape cut out, it’s time to reinforce it. I’ll attach 2x4s to the back using wood screws to create a sturdy frame that won’t wobble or bow.
Adding Foam And Batting
Now that you’ve built a solid frame, let’s move on to making your headboard soft and comfortable. I’ll walk you through adding layers of foam and batting that’ll transform your plywood base into a cozy backdrop for your bed.
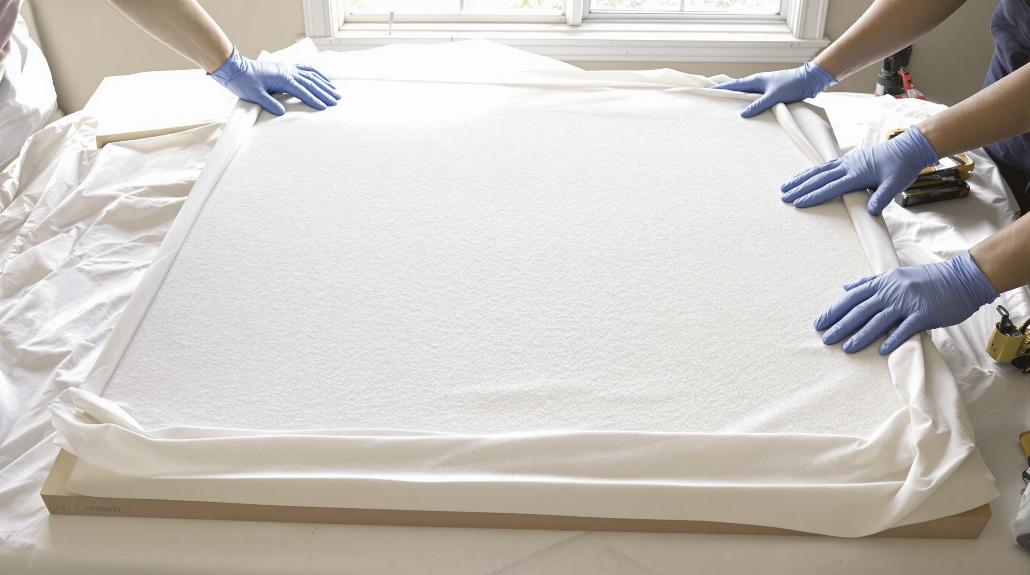
Start by cutting your foam slightly larger than your plywood base – I recommend using 1-inch or 2-inch high-density foam, depending on how plush you want it. Using spray adhesive, coat both the plywood and foam surfaces evenly. I like to use a few upholstery pins to hold everything in place while the adhesive sets – trust me, it makes life easier!
Once your foam is secure, it’s time for the batting layer. Think of batting as the secret sauce that’ll give your headboard that professional, cloud-like finish.
Cut your batting a few inches larger than your foam-covered base. Starting from the center of each side, pull the batting taut and staple it to the back of the plywood. When you reach the corners, fold them neatly – like you’re wrapping a present – to avoid any unsightly bunching.
Don’t be shy with those staples; more is definitely better here!
Upholstering Your Headboard
The fabric-covered finale of your headboard project begins with selecting the perfect material. I’ve found that linen and cotton are great starter options – they’re budget-friendly and easy to work with, though you’ll need to be prepared for some wrinkles.
If you’re feeling fancy, velvet creates a luxurious look, but be ready for more challenging maintenance.
Once you’ve chosen your fabric, I’ll guide you through the fun part. Cut your material with about 5 inches of extra allowance on all sides – trust me, you’ll thank me later for this wiggle room!
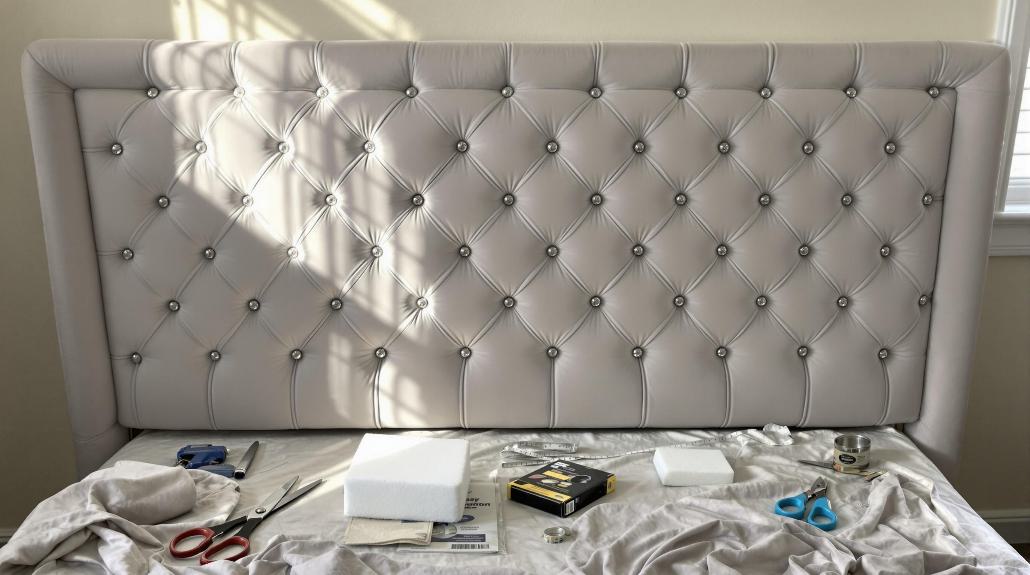
Center your fabric on the headboard, making sure any patterns are perfectly aligned. I always start stapling from the middle of one side, then work my way to the opposite side while keeping the fabric taut. Think of it like wrapping a present – you want those corners neat and crisp.
For that professional touch, I love adding decorative elements like nailhead trim or tufting. Just remember to double-check your work as you go along, smoothing out any wrinkles or bubbles that might try to crash your DIY party.
Mounting And Installation Tips
Mounting your headboard can feel like a puzzle, but I’ll help you get it right the first time. Before you start, let’s make certain you’ve got all the planning steps covered, as proper preparation will save you lots of headaches later.
- Decide on your mounting method – I typically recommend French cleats for heavier headboards, while lighter ones can use simple wall brackets.
- Mark your wall studs with painter’s tape – trust me, you’ll want that extra support.
- Get yourself a mounting buddy – these things can be awkward to handle solo.
- Double-check all your measurements twice (I learned this one the hard way!)
Position your headboard against the wall where you want it, and use a level to mark the outline – I like using painter’s tape for this step because it’s easier to adjust.
Once you’ve got your mounting hardware in place, take your time sliding the headboard onto the wall mounts. Don’t rush this part!
If you’re working with a particularly heavy piece, I always suggest using additional support legs that connect to your bed frame.
Finally, give it a gentle shake test to verify everything’s secure.
Frequently Asked Questions
Can I Reupholster an Existing Headboard Instead of Building From Scratch?
Yes, I’ll walk you through reupholstering your existing headboard – it’s a great way to save money and materials!
First, you’ll need to remove the old fabric and check the foam underneath. If the foam’s still good, you can reuse it.
Then, wrap new batting and fabric around the headboard, stapling everything securely in place.
I’ve done this several times, and it’s definitely simpler than starting from scratch.
How Do I Remove Stubborn Stains From My Upholstered Headboard?
Did you know that 80% of headboard stains can be removed with simple household items?
I’ll help you tackle those stubborn spots. Start by vacuuming thoroughly, then mix lukewarm water with mild detergent.
For oil-based stains, I’ve found baking soda works wonders – just sprinkle it on and let it sit for an hour.
If that doesn’t do the trick, I’d use a fabric cleaner, but always test it on a hidden spot first.
What’s the Best Way to Store an Upholstered Headboard During Moves?
I’d recommend disassembling your headboard first and storing all hardware in labeled bags.
Wrap the main piece in bubble wrap, then cover it with moving blankets secured with tape. If you’ve got a large box, that’s ideal – if not, heavy-duty trash bags work too.
Always store it upright to prevent warping, and don’t stack anything on top.
Trust me, your future self will thank you for taking these precautions!
How Often Should I Clean or Maintain My Upholstered Headboard?
I recommend weekly maintenance for your upholstered headboard to keep it looking fresh.
Use a vacuum with an upholstery attachment to remove dust, especially in tufted areas, and run a lint roller over the surface.
For deeper cleaning, I’d suggest using baking soda every six months – just sprinkle it on, let it sit for an hour, then vacuum.
Don’t forget to spot-clean any stains immediately!
Can I Add LED Lighting Behind My Upholstered Headboard After Completion?
Yes, I can add LED lights to your completed upholstered headboard, though it’s a bit tricky.
I’d recommend attaching LED strip lights to the back using a staple gun or strong adhesive.
You’ll want to create a small gap between the wall and headboard for the lights to shine through.
Just make sure to test the lights first and neatly conceal any wires for a clean, professional look.
