You can create your own comfortable mattress at home without breaking the bank. Popular DIY options include traditional cotton floor mattresses, natural wool futons, and memory foam layer designs. For eco-friendly choices, try buckwheat hull sleeping mats or upcycled denim bed rolls. Basic materials like cotton batting, wool, or foam can be found at thrift stores or through community swaps. Most DIY mattresses require simple construction techniques like sewing, stapling, or tying layers together. Regular maintenance keeps your creation fresh and lasting. With these budget-friendly alternatives, you’ll discover countless ways to customize your perfect sleep surface.
Traditional Cotton Floor Mattress
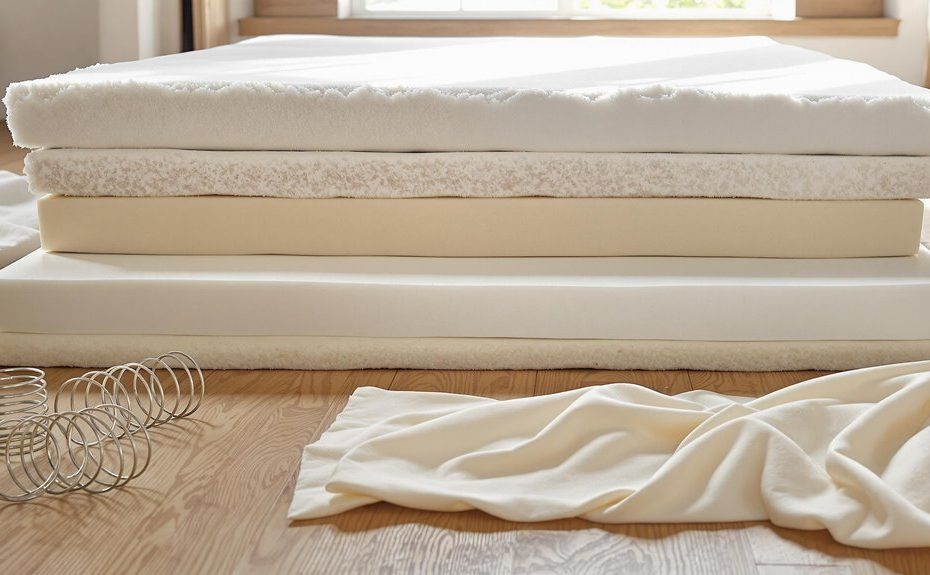
As an economical alternative to conventional mattresses, a traditional cotton floor mattress offers both simplicity and comfort through its basic yet effective design.
You’ll need several layers of cotton batting, a sturdy cotton fabric for the cover, and basic sewing supplies to create your own. Start by laying out your cotton batting sheets, stacking them evenly until you reach your desired thickness (usually 4-6 inches). Make sure each layer is smooth and wrinkle-free before adding the next.
To assemble your mattress, you’ll want to create a simple envelope-style cover using two large pieces of cotton fabric. Sew three sides together, turn it right-side out, and stuff your layered cotton batting inside. Once you’ve got everything positioned just right, hand-stitch the final side closed.
Here’s a handy tip: You can add tufting throughout your mattress using a long upholstery needle and strong thread. This keeps the cotton layers from shifting and bunching up when you use it. Your finished mattress will be easy to roll up for storage and perfect for guests, meditation spaces, or your own minimalist bedroom setup.
Natural Wool Futon
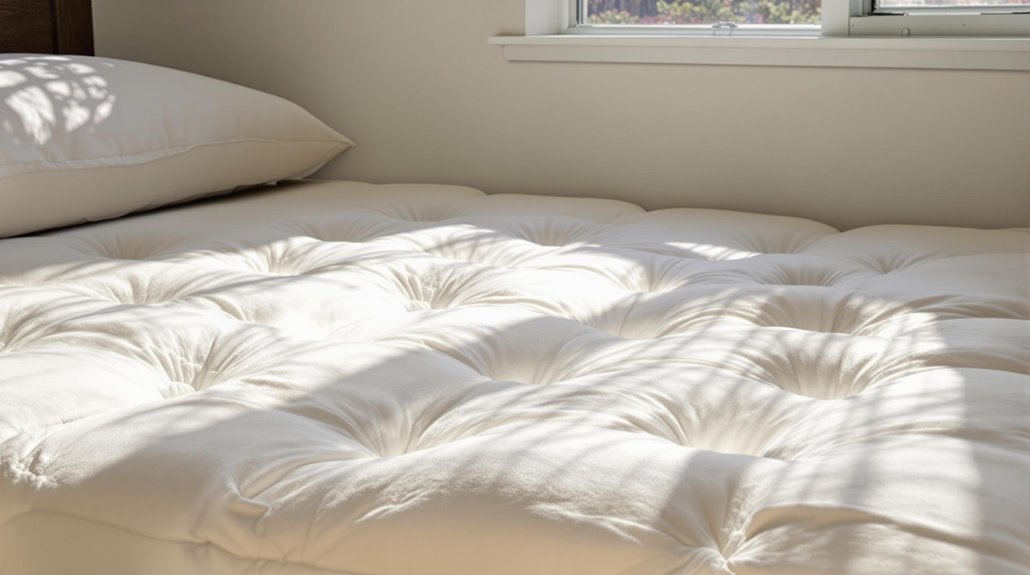
Natural wool futons provide exceptional comfort and durability while offering superior temperature regulation compared to synthetic alternatives. When you create your own wool futon, you’ll enjoy a breathable sleeping surface that keeps you cozy in winter and cool in summer.
To make your DIY wool futon, you’ll need several pounds of clean, carded wool batting, sturdy cotton fabric for the cover, and basic sewing supplies. Start by laying out multiple thin layers of wool batting, crisscrossing each layer to prevent clumping. You want the layers to be even and approximately 6-8 inches thick when compressed.
The key to success is taking your time with the tufting process. Create a grid pattern of tufts every 8-10 inches to keep the wool in place and prevent shifting. Think of it like creating a fluffy, cloud-like quilt that you can sleep on! Wrap everything in a pre-sewn cotton cover, and you’ve got yourself a natural, chemical-free sleeping solution that can last for years.
Remember to air out your wool futon regularly and give it a good sunbath every few months to maintain its freshness.
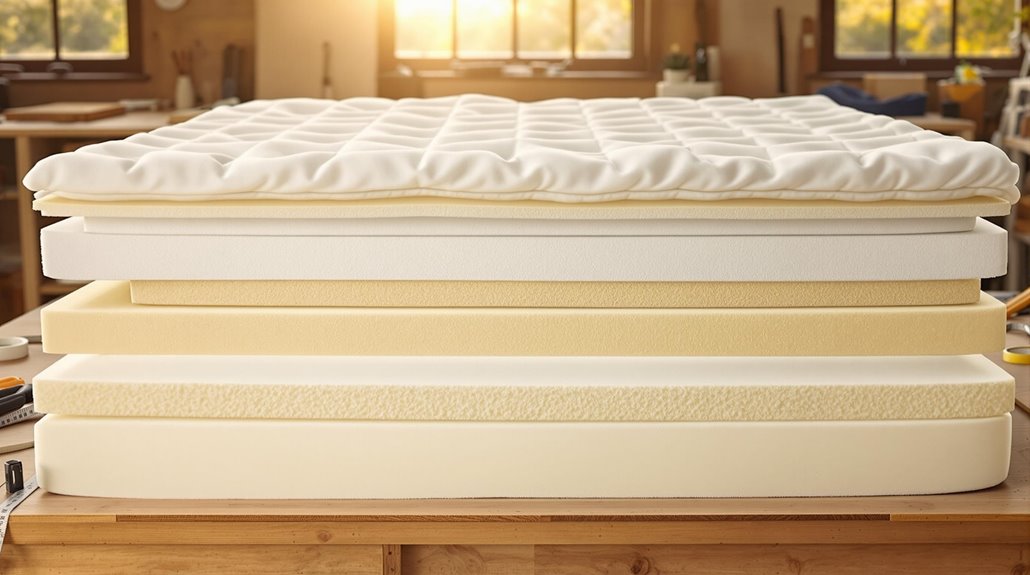
Memory Foam Layer Mattress
While traditional mattresses rely on springs or natural materials, a DIY memory foam layer mattress offers exceptional comfort through strategic layering of different foam densities. You can create your perfect sleep surface by combining various thicknesses of memory foam, each serving a specific purpose in your custom design.
Start with a firm 6-inch base layer of high-density foam for support, then add a 2-inch middle layer of medium-density foam for pressure relief. Top it off with a 2-inch layer of soft memory foam that’ll cradle your body just right. You’ll need to wrap these layers in a breathable, removable cover that you can easily wash.
The best part? You can adjust the firmness by switching out layers until you find your sweet spot. Remember to use adhesive spray between layers to prevent shifting, and let the foam air out for 48 hours before use. While this project requires some initial investment in materials, you’ll save money compared to store-bought memory foam mattresses. Plus, you’ll have the satisfaction of creating a mattress that’s perfectly tailored to your comfort preferences.
Buckwheat Hull Sleeping Mat
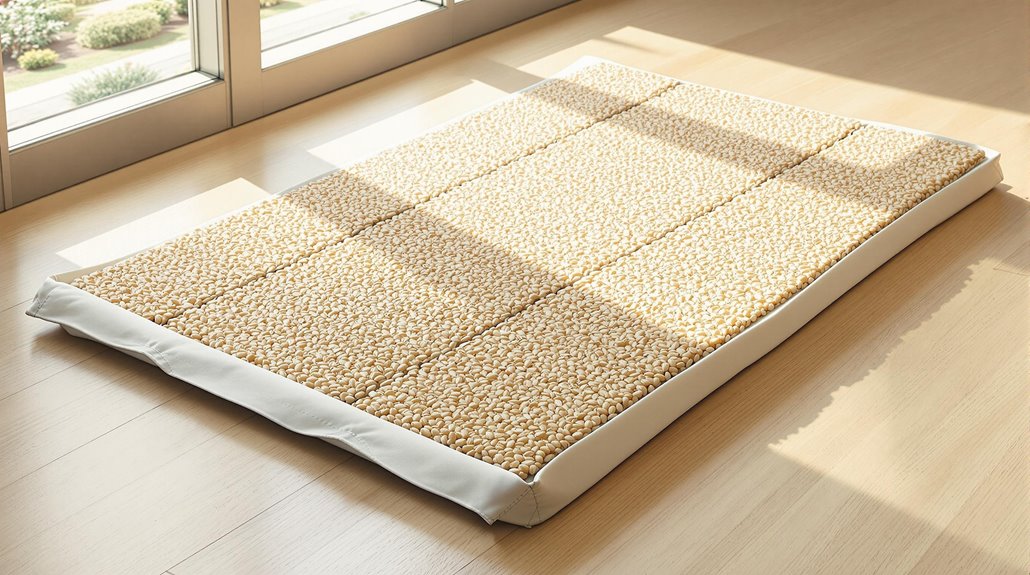
Traditional Japanese-inspired buckwheat hull sleeping mats offer an eco-friendly alternative to conventional mattresses, combining both comfort and sustainability. You’ll love how these natural hulls conform to your body’s shape while providing excellent support for your spine and joints.
Creating your own buckwheat hull mat is surprisingly simple. You’ll need organic buckwheat hulls, sturdy cotton or linen fabric, and basic sewing skills. Start by sewing a large rectangular case with a zipper closure – think of it as making a giant pillowcase! Fill it with buckwheat hulls until you reach your desired thickness, usually about 3-4 inches.
What’s great about these mats is that you can adjust the firmness by adding or removing hulls. They’re also naturally cooling since air can flow between the hulls, making them perfect for hot sleepers like you! Plus, if any hulls wear out, you can easily replace them without tossing out the whole mat.
Remember to air out your mat regularly in the sunlight to keep it fresh. With proper care, your DIY buckwheat hull sleeping mat can last many years while providing you with a natural, comfortable sleep surface.
Upcycled Denim Bed Roll
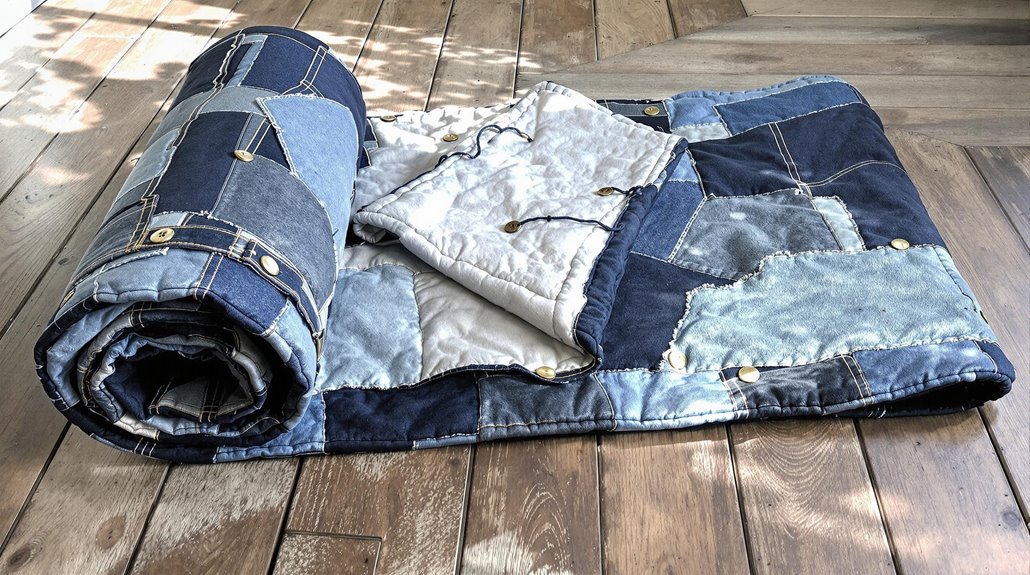
Recycling old jeans into a comfortable bed roll offers an innovative way to repurpose denim while creating a portable sleeping solution. You’ll need about 8-10 pairs of old jeans, batting material, and basic sewing supplies to get started. The durability of denim makes it perfect for this project, and you probably already have some worn-out pairs lying around.
To create your bed roll, start by cutting the jeans into large rectangular pieces, removing seams and pockets. Layer these pieces together, alternating the direction of the fabric for added strength. Place batting between every few layers of denim to add cushioning and comfort. You’ll want to sew the layers together using a heavy-duty needle and strong thread, creating a quilt-like pattern that holds everything in place.
Add straps or ties at one end so you can roll it up when not in use. The finished product will be surprisingly comfortable and perfect for camping trips, sleepovers, or as an emergency guest bed. Plus, you’ll feel great knowing you’ve given those old jeans a second life while saving money on expensive camping gear.
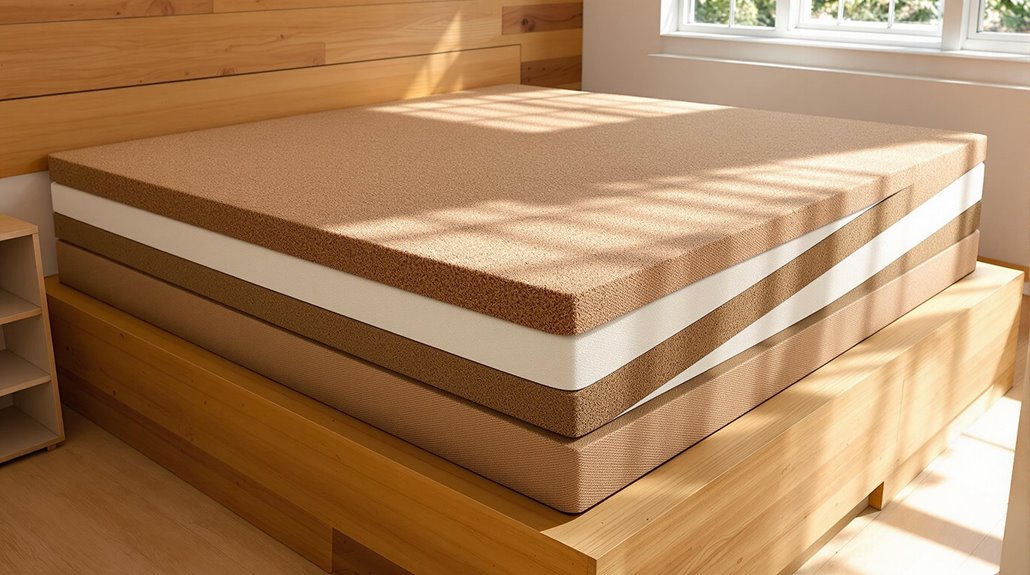
Latex and Cotton Hybrid
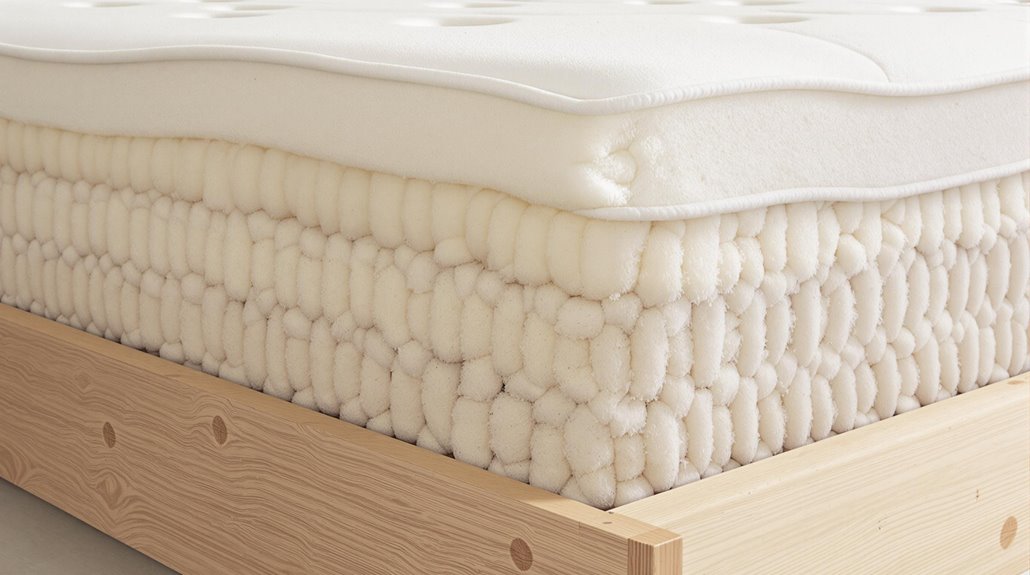
Creating a latex and cotton hybrid mattress at home offers a more sophisticated approach to DIY bedding. You’ll combine the springy support of natural latex with the soft comfort of cotton to achieve a premium feel without the hefty price tag. The key is layering these materials strategically to create the perfect balance of comfort and support.
To get started, you’ll need several 2-inch thick latex foam pieces and multiple layers of organic cotton batting. Start by creating your foundation layer with the firmest latex piece, then add a middle layer of cotton batting for cushioning. Top it off with a slightly softer latex layer and another cotton batting layer for that cloud-like feeling.
Don’t forget to wrap your creation in a breathable, organic cotton cover that you can remove for washing. You’ll want to secure all layers together using natural wool ties or cotton twine – this prevents shifting while you sleep. The best part? You can adjust the firmness by adding or removing cotton layers until you find your sweet spot. Plus, both latex and cotton are naturally resistant to dust mites and mold, making your DIY mattress a healthier choice for your bedroom.
Japanese Style Floor Bed
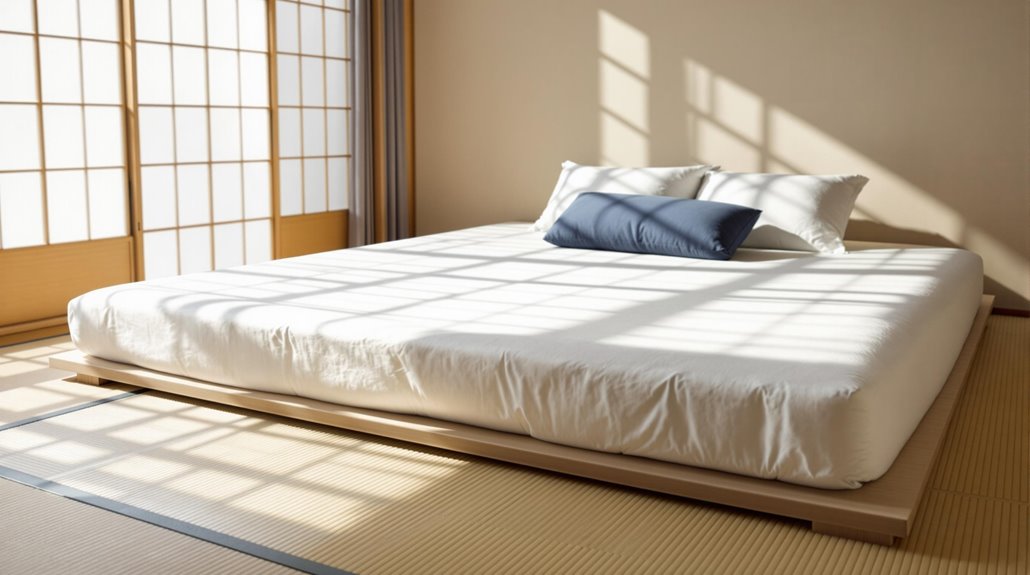
Modern minimalists are increasingly drawn to Japanese-style floor beds, which combine simplicity with practical comfort. Creating your own Japanese floor bed is surprisingly straightforward and budget-friendly. You’ll need a firm base layer of cotton batting or wool, followed by softer layers that match your comfort preferences.
To start your DIY project, lay down a moisture-resistant tatami mat or wooden platform as your foundation. Next, stack three to four layers of 2-inch thick cotton batting, securing each layer with simple stitching to prevent shifting. You can add a natural wool layer on top for temperature regulation and comfort.
The beauty of this style is that you can roll it up during the day to create more living space. Your materials will cost roughly $150-200, much less than traditional mattresses. Plus, sleeping closer to the ground can help with back alignment and create a peaceful, zen-like atmosphere in your bedroom.
When washing is needed, you can take it outside to air out or spot clean individual layers. With proper care, your Japanese-style floor bed can last several years while providing a healthy, natural sleeping solution.
Compressed Hay Mattress
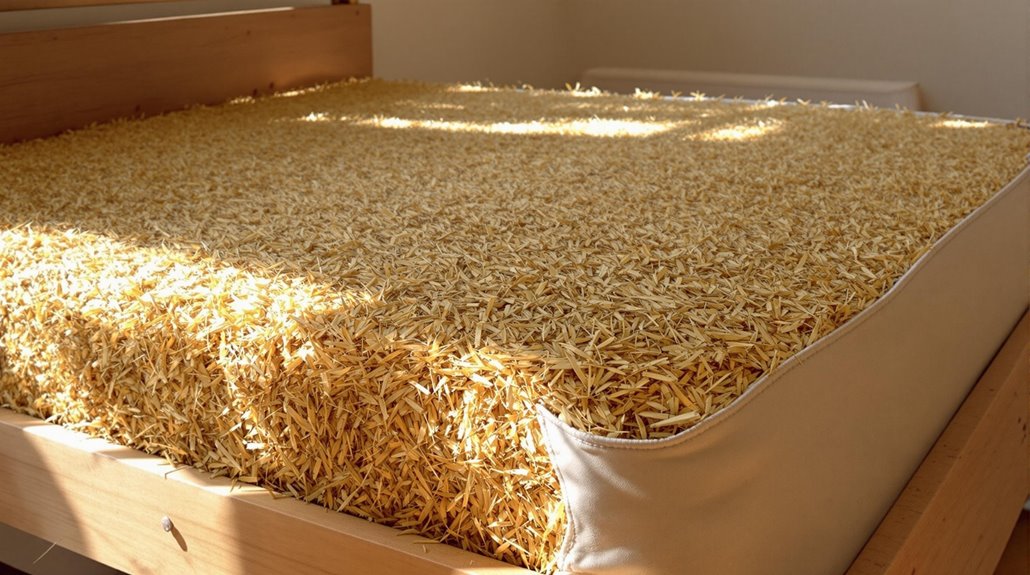
While traditional mattresses rely on synthetic materials, a compressed hay mattress offers an eco-friendly alternative that dates back centuries. You’ll be amazed at how simple and cost-effective this option can be, especially if you have access to fresh hay or straw.
To create your hay mattress, you’ll need clean, dry hay and a sturdy cotton or linen cover. Start by selecting the freshest hay possible – it should smell sweet and be free from mold. Layer the hay inside your cover, compressing it firmly as you go. You’ll want to pack it tightly enough to prevent lumps but not so tight that it loses its natural springiness.
The beauty of a hay mattress is that you can easily refresh it by replacing old hay with new material. Plus, when the hay eventually loses its bounce, you can compost it! While it might take some getting used to, many people find hay mattresses surprisingly comfortable and appreciate their natural smell. Just remember to change the hay every few months and keep it dry to prevent any unwanted visitors from making themselves at home.
Canvas Drop Cloth Bedding
Canvas drop cloth bedding represents a budget-friendly mattress option that transforms ordinary painting supplies into a durable sleeping surface. You’ll find these heavy-duty canvas drop cloths at most hardware stores, and they’re perfect for creating a sturdy mattress cover that can withstand years of use.
To create your canvas mattress, you’ll need several layers of drop cloths, which you’ll sew together to form a strong exterior shell. Inside, you can use materials like cotton batting, wool, or even recycled clothing to create comfortable padding layers. The beauty of using canvas is that it’s naturally resistant to wear and tear, and it becomes softer with each wash.
When assembling your canvas mattress, make sure to double-stitch the seams for extra durability. You can also add grommets along the sides to help with ventilation – nobody wants a stuffy mattress! The best part? If you spill something on your canvas mattress, it’s much easier to clean than traditional mattress materials. Just spot clean or toss the cover in the washing machine, and you’re good to go. Plus, the neutral color of canvas means it’ll match any bedroom decor.
Kapok Fiber Sleeping Pad
Deep within the tropical rainforests grows the ceiba tree, which produces kapok fiber – a sustainable and luxuriously soft material perfect for creating comfortable sleeping pads. If you’re looking for an eco-friendly DIY mattress option, kapok fiber might be your new best friend.
To create your own kapok sleeping pad, you’ll need about 5-7 pounds of kapok fiber, a sturdy cotton or canvas cover, and basic sewing supplies. The fiber is naturally water-resistant and incredibly lightweight, making it ideal for a portable sleeping solution.
Start by creating a simple rectangular cover with your fabric, leaving one end open. Gently pull apart the kapok fiber to remove any clumps, then stuff it into your cover in even layers. The key is to distribute the fiber uniformly to prevent lumps. As you work, periodically pat down the surface to maintain consistent thickness.
Once you’ve achieved your desired thickness (usually 3-4 inches), sew the open end closed. You can add tufting buttons every 6-8 inches to keep the filling in place. Your kapok sleeping pad will provide natural comfort while being completely biodegradable when its life cycle ends.
Minimalist Hemp Mattress
Natural fibers continue to revolutionize DIY mattress-making, and hemp stands as another remarkable option for creating sustainable sleeping surfaces. If you’re looking for an eco-friendly mattress solution, hemp’s naturally antimicrobial and hypoallergenic properties make it an excellent choice for your DIY project.
To create your minimalist hemp mattress, you’ll need hemp batting or loose hemp fiber, a breathable cotton or hemp canvas cover, and basic sewing supplies. Start by laying out your cover material and creating a simple envelope-style case. Layer the hemp batting evenly, making sure to maintain consistent thickness throughout. You can adjust the firmness by adding or removing layers until you find your perfect comfort level.
One of the best things about hemp mattresses is their durability – they can last for years with proper care. Plus, hemp naturally resists mold and mildew, so you won’t have to worry about unwanted moisture issues. To maintain your mattress, simply air it out regularly and give it a good sun-bath every few months. The natural fibers will compress over time, but you can easily rejuvenate your mattress by adding more hemp batting when needed.
Coconut Coir Platform Bed
Looking for an innovative way to repurpose agricultural byproducts into a comfortable sleeping surface? A coconut coir platform bed might be just what you’re looking for. This eco-friendly option uses the fibrous material found between the hard shell and outer coating of coconuts to create a supportive sleeping surface.
To create your own coconut coir platform bed, you’ll need several compressed coir mats, which you can find at garden supply stores or online retailers. Start by building a simple wooden platform frame that’s slightly larger than your desired mattress size. Layer the coir mats on top of the platform, securing them with natural twine or cotton rope. You can add more layers until you reach your preferred thickness.
For extra comfort, top your coir bed with a natural latex pad or organic cotton futon. The beauty of this DIY project is that it’s completely customizable – you can adjust the firmness by adding or removing layers. Plus, coconut coir is naturally resistant to mold and dust mites, making it an excellent choice for allergy sufferers. When properly maintained, your coir platform bed can last several years while providing a sustainable sleeping solution.
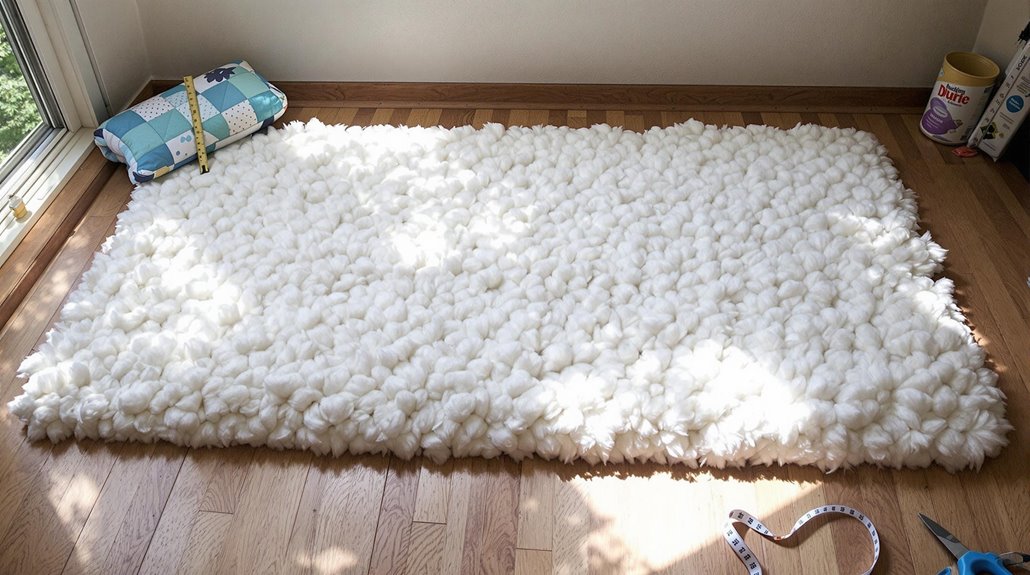
Wool Batting Layer System
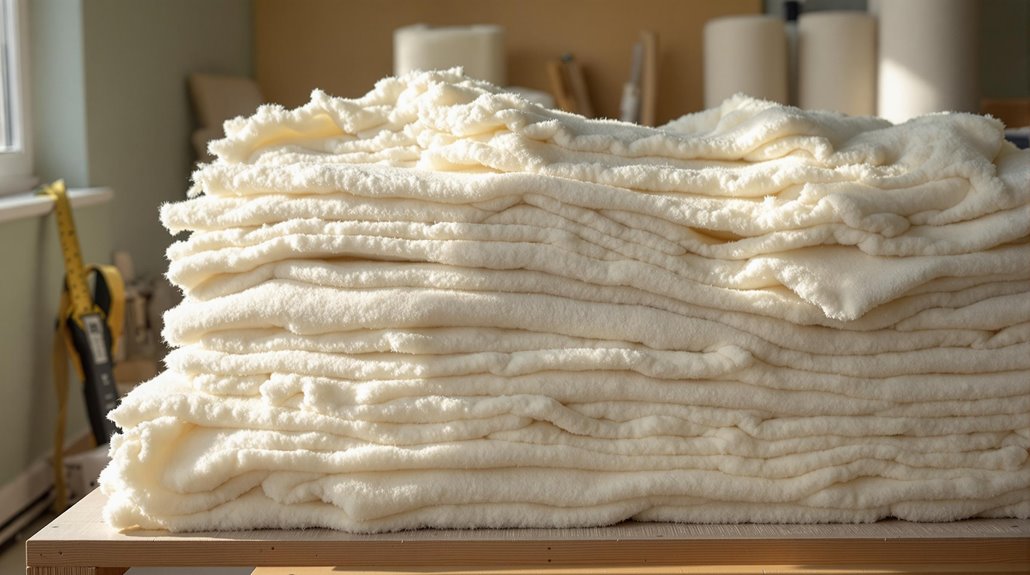
Wool batting enthusiasts have discovered a remarkably adaptable mattress solution that combines comfort with sustainability. By layering multiple sheets of wool batting, you can create a customized sleeping surface that’s both natural and adjustable to your preferred firmness level. The beauty of this system lies in its simplicity – you’ll only need wool batting sheets, a sturdy cotton cover, and basic sewing supplies.
To build your wool mattress, start by laying out 6-8 layers of wool batting, each about 1 inch thick. You can adjust the number of layers based on your comfort preference. The wool naturally compresses over time, so don’t worry if it seems too lofty at first. As you stack each layer, spray a light mist of water to help the fibers bond together.
Once you’ve reached your desired thickness, wrap the entire stack in a pre-sewn cotton cover with a zipper closure. The zippered design lets you add or remove layers as needed, and the wool’s natural moisture-wicking properties help regulate your body temperature while you sleep. Plus, wool is naturally dust mite resistant and fire retardant, making it an excellent choice for a DIY mattress.
Shredded Foam Mattress
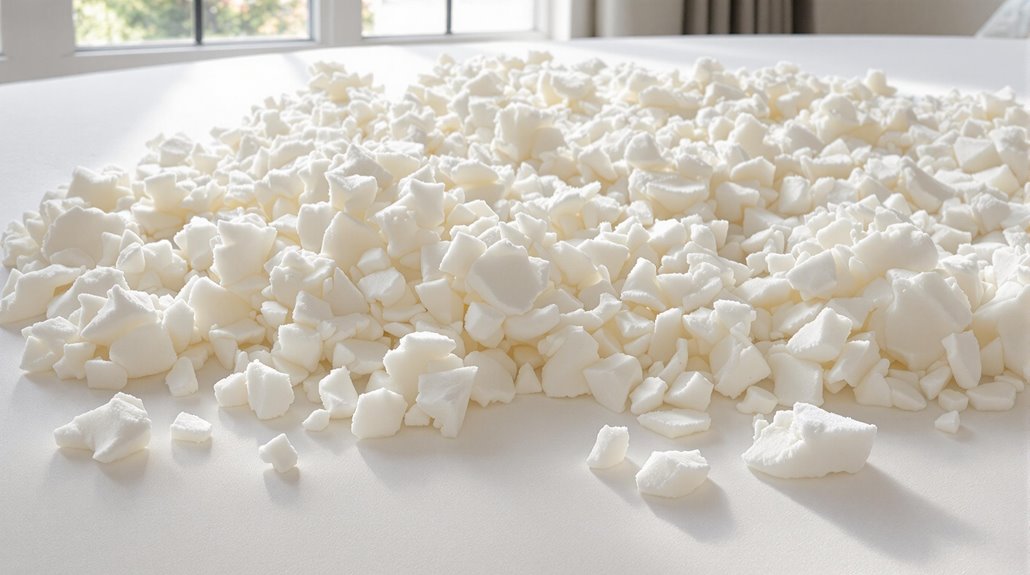
Another highly adaptable DIY mattress option comes in the form of shredded foam construction. This approach lets you create a customized sleeping surface by filling a sturdy mattress cover with shredded memory foam, latex foam, or a combination of both. You can easily adjust the firmness by adding or removing foam pieces until you find your perfect comfort level.
To get started, you’ll need to source shredded foam, which you can buy new or create yourself by cutting up old memory foam pillows or mattress toppers. Make sure to use a high-quality mattress cover with a sturdy zipper – this will keep your foam contained and protected. You can even create different zones by mixing foam densities, putting firmer pieces in areas where you need more support.
One of the best things about a shredded foam mattress is that it’s easy to refresh. If some areas become compressed over time, you can simply unzip the cover, fluff up the foam, and redistribute it. Plus, if you’re not happy with how it feels, you can always adjust the filling until it’s just right for you.
Natural Rubber Sleep Surface
Natural rubber mattresses represent an eco-friendly alternative for DIY enthusiasts seeking a chemical-free sleep surface. You’ll find that natural rubber, also known as latex, comes from the sap of rubber trees and offers excellent durability and natural resistance to dust mites and mold.
To create your own natural rubber mattress, you can purchase latex sheets in various thicknesses and stack them to achieve your desired comfort level. You might want to start with a 6-inch base layer of firm rubber, topped with a 2-inch layer of softer rubber for cushioning. Remember to wrap each layer in organic cotton or wool batting to prevent them from sticking together.
One of the best things about making your own rubber mattress is that you can customize the firmness zones. Want extra support for your lower back? Simply use a firmer rubber sheet in that section. While natural rubber can be pricier than synthetic materials, your DIY mattress will likely last 15-20 years, making it a smart long-term investment. Plus, you’ll sleep better knowing you’re resting on pure, natural materials that are good for both you and the planet.
Straw Tick Mattress
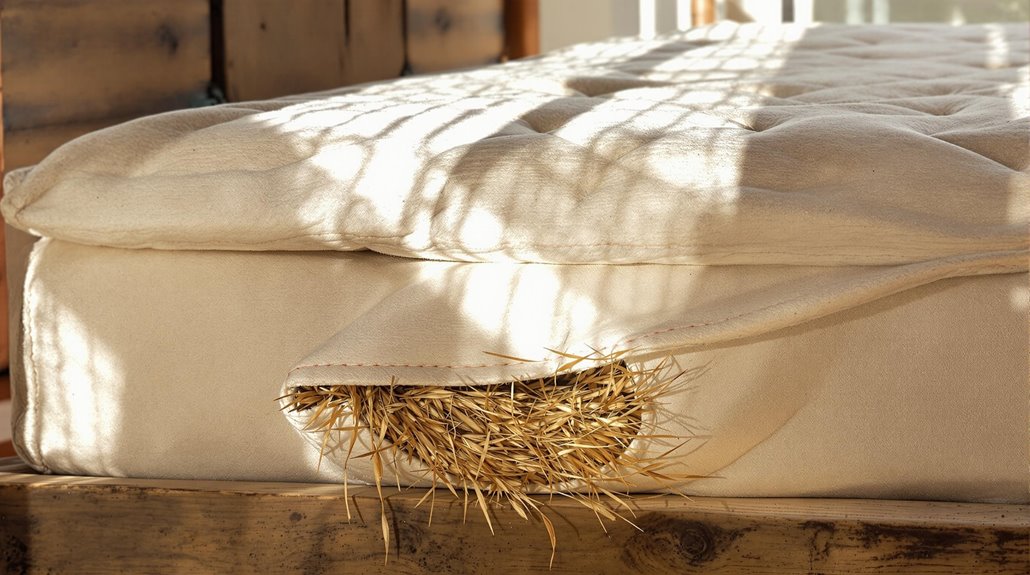
Creating a straw tick mattress offers one of the most historically authentic and sustainable DIY bedding options available. This traditional sleeping surface uses clean, dry straw enclosed in a sturdy fabric casing, just like our ancestors used for centuries before modern mattresses came along.
To make your own straw tick mattress, you’ll need two main components: a durable cotton or canvas tick (the outer casing) and clean straw. Start by sewing a large, rectangular case with sturdy seams, leaving one end open. You’ll want to make it slightly larger than your intended mattress size since the straw will compress over time.
Fill the tick with fresh, dry straw until it’s fully stuffed but not bursting. The key is finding the right balance – too much straw makes it uncomfortably firm, while too little won’t provide enough support. Once filled, sew the open end closed. Your mattress will need occasional “fluffing” to redistribute the straw, and you should replace the filling every few months. While it may sound rustic, many people find straw tick mattresses surprisingly comfortable and appreciate their natural, chemical-free composition.
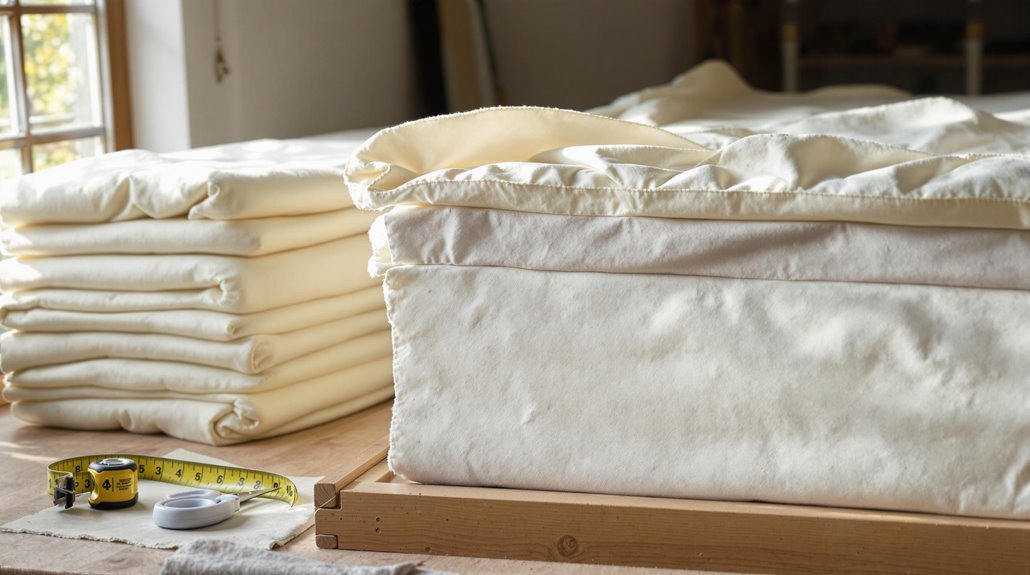
Organic Cotton Camping Pad

The organic cotton camping pad presents a lightweight, portable alternative to traditional sleeping mats. You can create this eco-friendly sleeping solution using organic cotton batting, a durable cotton cover, and basic sewing skills. It’s perfect for camping trips, guest beds, or temporary sleeping arrangements.
To make your own, you’ll need several layers of organic cotton batting, which you can find at most craft stores or natural fabric suppliers. Start by measuring your desired dimensions – most people prefer 72 inches long by 24-30 inches wide. Layer the batting until you achieve your preferred thickness, usually about 2-3 inches for comfort.
Next, create a simple envelope-style cover using sturdy organic cotton canvas or duck cloth. Make sure to pre-wash your fabric to prevent shrinkage later. You can add ties or buttons along the sides to keep the batting in place and make it easy to remove the cover for washing. For extra durability, quilt through all layers using a simple straight-line pattern. When you’re done, you’ll have a chemical-free, portable sleeping pad that rolls up easily for storage and transport.
Air Chamber Design
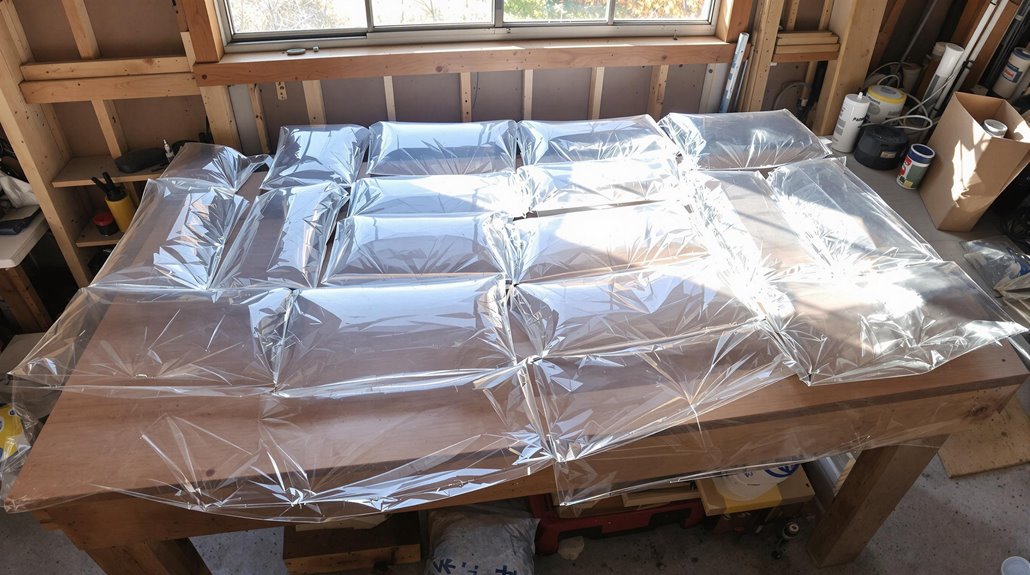
Modern air chamber mattresses offer a customizable sleeping experience through a system of individual air compartments. You can easily recreate this concept at home using heavy-duty air mattress material or thick vinyl sheeting. The key is creating separate chambers that can be individually inflated.
To make your own air chamber mattress, you’ll need to create a grid of connected but separate pockets. Think of it like making a giant bubble wrap, but with larger sections. You can use a heat sealer or strong adhesive to join the material, forming 6-8 inch wide chambers that run the length of your mattress.
Each chamber needs its own valve for inflation control. You can find these valves at camping supply stores or online. By adjusting the air pressure in different sections, you’ll be able to customize the firmness exactly where you need it. For example, you might want softer support for your shoulders but firmer support for your lower back.
Remember to double-seal all edges and test each chamber for leaks before assembling the final mattress. Add a foam topper for extra comfort and protection.
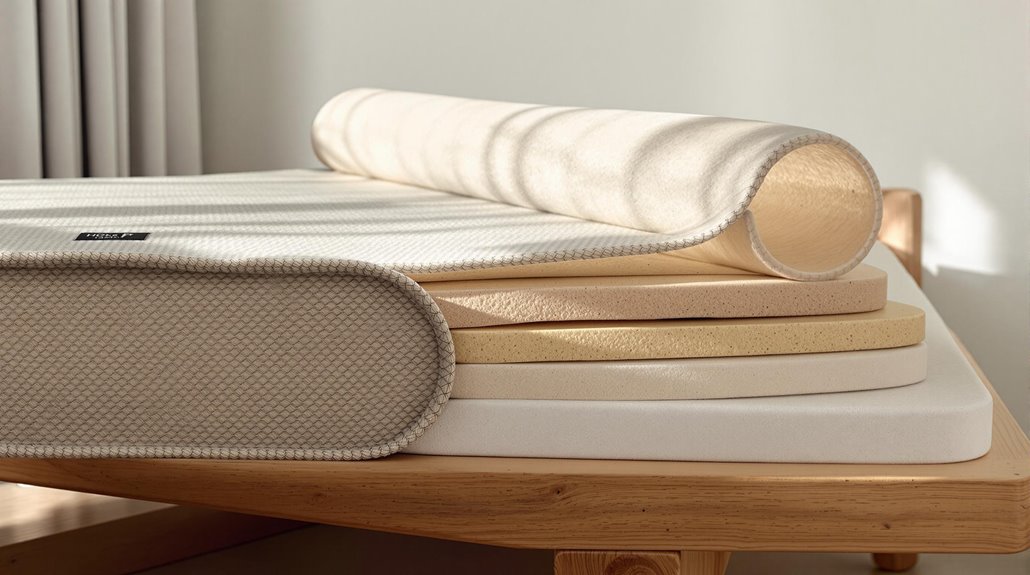
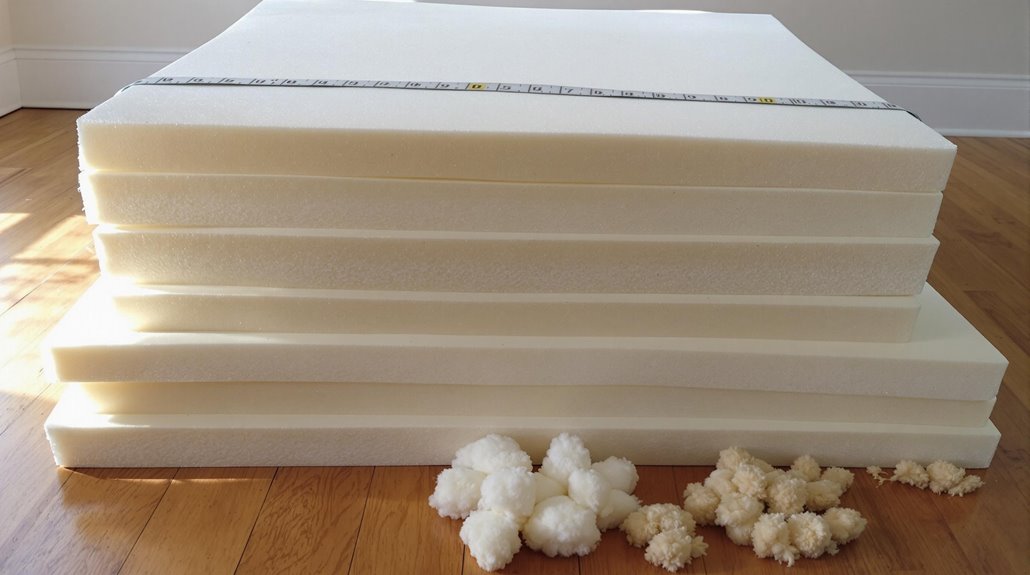
Multi-Layer Foam Construction
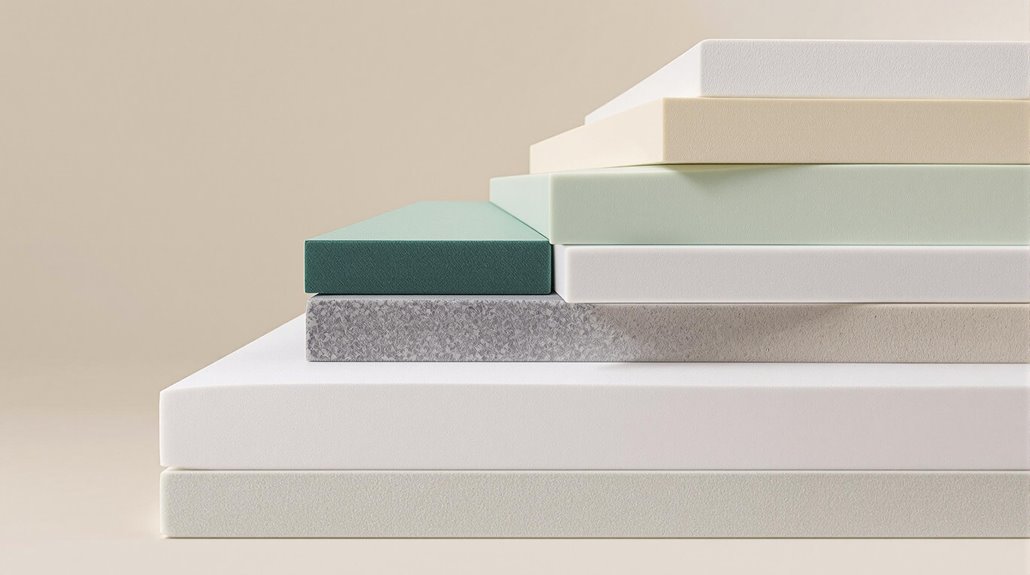
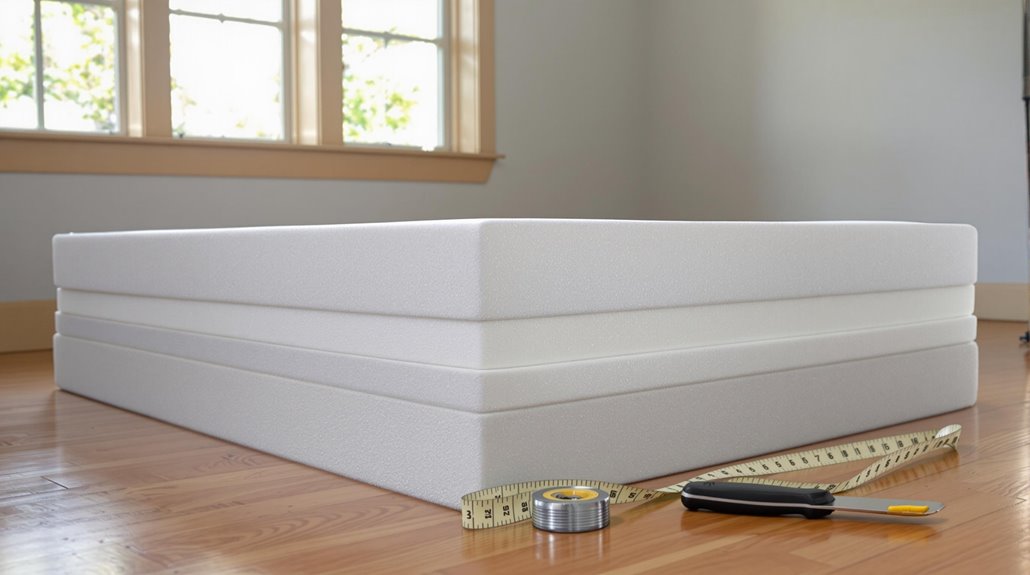
Building a multi-layer foam mattress allows you to combine different densities and materials for ideal comfort and support. You’ll want to start with a firm base layer of high-density foam, typically 4-6 inches thick, to provide essential support for your spine and prevent sagging over time.
For the middle layer, consider using memory foam or latex foam that’s about 2-3 inches thick. This layer acts as your comfort zone, conforming to your body’s curves while helping distribute pressure evenly. The top layer should be soft and breathable – maybe a 1-2 inch piece of gel-infused foam or natural latex to help keep you cool at night.
Remember to wrap each layer in breathable fabric before stacking them together. You can secure the layers using non-toxic spray adhesive, but don’t worry – they’ll mostly stay in place thanks to friction and your mattress cover. The best part? If one layer wears out or isn’t working for you, you can simply replace that section instead of buying a whole new mattress. Plus, you can adjust the firmness by swapping layers until you find your perfect combination.
Recycled Material Sleep System
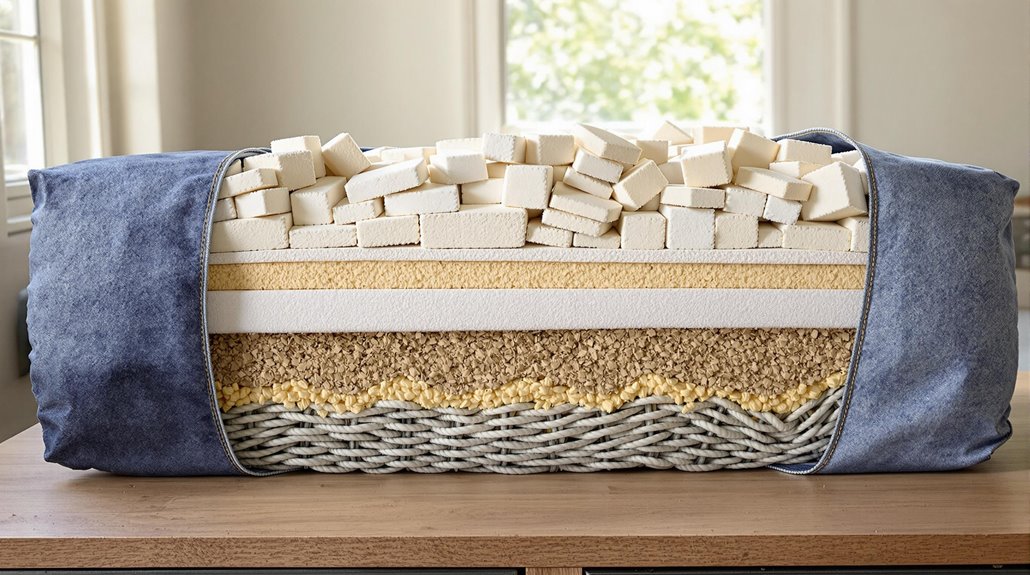
While custom foam layers offer one approach to DIY mattresses, creating a sleep system from recycled materials presents an eco-friendly and cost-effective alternative. You can transform clean, gently used materials like cotton clothing, denim, or wool blankets into comfortable mattress filling by cutting them into small pieces and organizing them by texture.
Start by creating a sturdy base layer using tightly packed cotton materials, which will provide essential support. Next, add a middle layer of softer fabrics like old sweaters or blankets for cushioning. For the top layer, you’ll want the softest materials, such as cotton t-shirts or flannel pieces, to guarantee maximum comfort against your body.
To keep everything in place, you’ll need a durable cover – an old duvet cover or heavy-duty fabric works perfectly. Sew internal dividers to create sections, preventing the filling from shifting around. Think of it as making a giant, structured pillow! Remember to wash all materials thoroughly before use and replace the filling every couple of years to maintain hygiene. This recycled approach not only saves money but also keeps textiles out of landfills.
Frequently Asked Questions
How Long Do DIY Mattresses Typically Last Before Needing Replacement?
While you might worry about durability, DIY mattresses can actually last 5-7 years with proper care – similar to many store-bought options. Your mattress’s lifespan depends on the materials used and construction quality. Natural materials like wool or latex typically hold up better than synthetic foams. Regular rotation and good maintenance, like using a quality mattress protector, can help extend its life considerably.
Can DIY Mattresses Support People With Back Problems and Medical Conditions?
DIY mattresses can potentially support those with back problems, but it’s risky. While you can customize firmness and materials, homemade mattresses often lack the precise engineering and support zones found in medical-grade options. If you have specific medical conditions or chronic back pain, it’s safer to invest in a professionally made mattress that’s designed to provide proper spinal alignment and pressure relief.
What Tools and Equipment Are Necessary for Making a Mattress?
“Measure twice, cut once” is especially true when crafting your own mattress. You’ll need basic tools like fabric scissors, a heavy-duty sewing machine, upholstery needles, and measuring tape. For assembly, gather a staple gun, electric carving knife (for foam cutting), straight pins, and quilting needles. Don’t forget essential safety items like protective gloves and a dust mask when handling materials. A large, clean workspace is also vital.
Are DIY Mattresses Safe for Infants and Young Children?
DIY mattresses are not recommended for infants or young children due to safety concerns. Babies and toddlers need firm, properly tested mattresses that meet strict safety standards to prevent suffocation risks and guarantee proper support for their developing bodies. Store-bought crib and children’s mattresses undergo rigorous safety testing and must comply with specific regulations. It’s best to invest in certified mattresses designed specifically for young children.
How Do DIY Mattresses Compare to Store-Bought Ones in Terms of Durability?
Studies show that quality store-bought mattresses typically last 7-10 years, while DIY mattresses often need replacement within 2-4 years. While you might save money initially with a DIY mattress, you’ll likely find yourself replacing it more frequently. Store-bought mattresses benefit from professional construction methods, specialized machinery, and tested materials that help maintain their shape and support over time. Plus, they usually come with warranties that DIY versions can’t match.
