
Did you know that the pages of discarded books can be transformed into heirloom-quality roses that look remarkably like their natural counterparts? I’ve spent years perfecting the technique of crafting these intricate paper flowers, and I’ve discovered that the key lies in the careful manipulation of each petal’s curl. While most paper rose tutorials focus on rigid, formal designs, I’ll show you how to create soft, realistic blooms that capture the organic movement of real garden roses. If you’re ready to elevate your paper crafting skills, there’s an art to this process that I’m excited to share.
The Magic of Book Roses
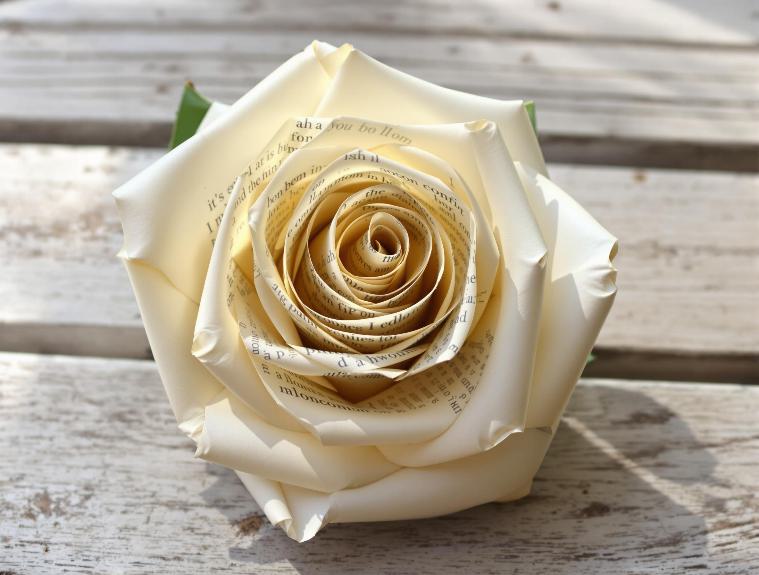
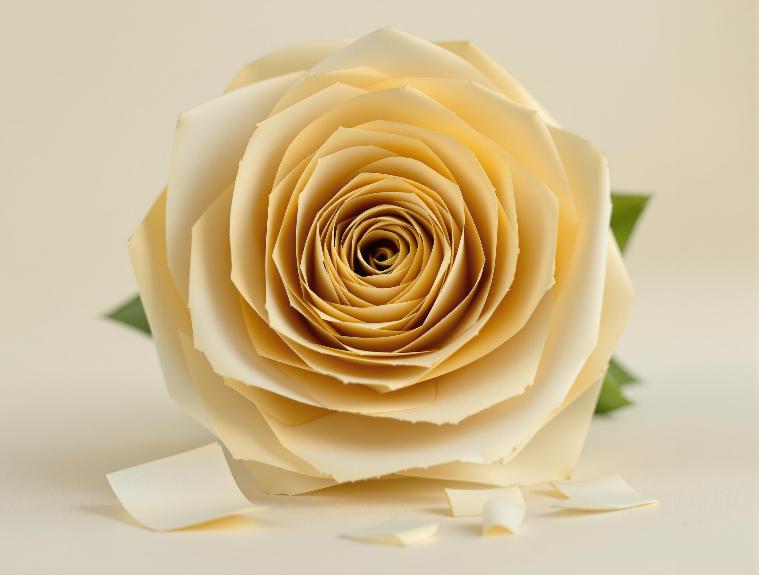
Book page roses transform ordinary paper into enchanting works of art that never wilt or fade. I’ve discovered that creating these beautiful flowers isn’t just crafting – it’s like performing a bit of paper alchemy. With just a few simple tools and some old book pages, you can turn words into petals that’ll last forever.
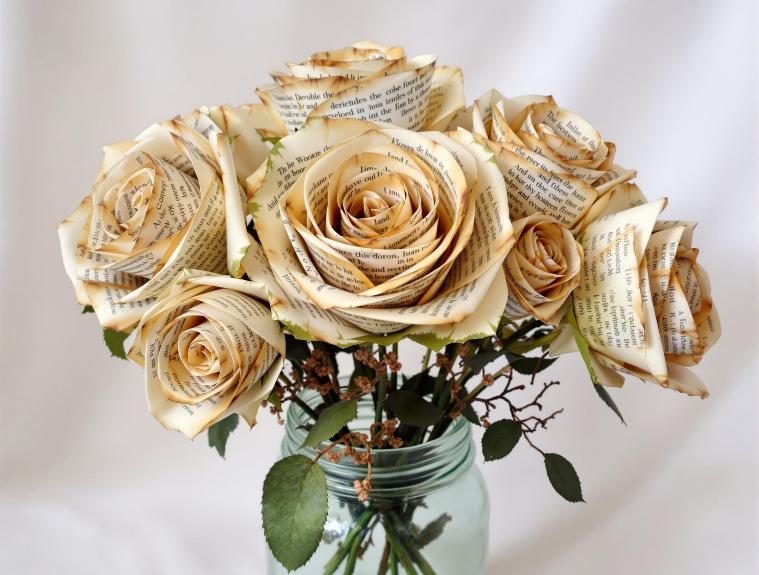
Like the roses that appear throughout literature to symbolize eternal beauty, these paper creations carry deep meaning in their delicate folds. What I love most about making book roses is how versatile they are. You can use classic yellowed pages for a vintage look, or get creative with sheet music or atlas pages for something truly unique.
I’ve found that each rose takes on its own personality as you curl the petals and layer them together. Sometimes I’ll even add a touch of color with markers or ink to make them pop.
The best part? These aren’t your typical paper flowers that look flat and lifeless. When you carefully fold, cut, and curl each petal, you’re creating something with real dimension and character.
Whether they’re decorating your home, serving as wedding centerpieces, or brightening someone’s day as a gift, these roses carry a special charm that mass-produced decorations just can’t match.
Gathering Your Supplies
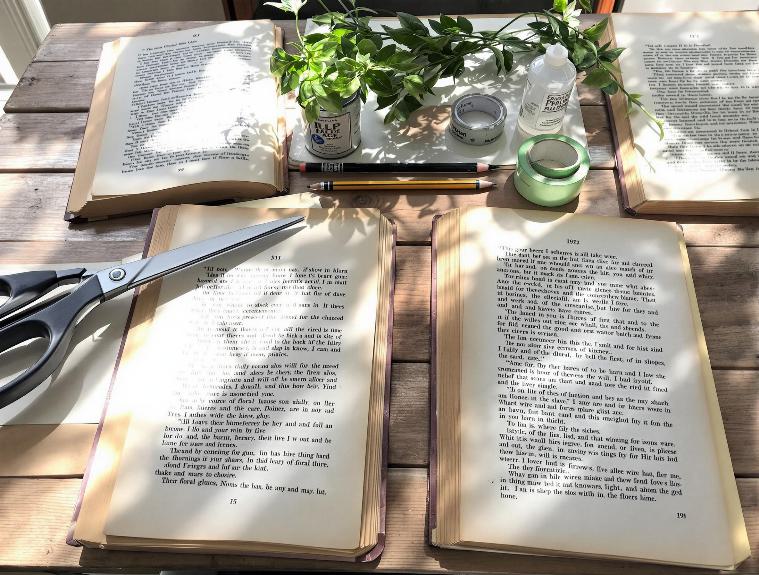
Before diving into this project, I’ve gathered two categories of supplies: the essentials and some optional items that can enhance your roses.
The must-haves include book pages (I recommend starting with 5″ squares), sharp scissors, glue, a ruler, and something for the stem – I usually grab a BBQ skewer or floral wire. A glue gun hot is ideal for secure assembly.
Don’t worry if you’re working with different page sizes; they’ll just give you different-sized roses!
For the crafters who want to take their roses up a notch, I’ve got some fun extras that make the process even smoother:
- A wide-mouth mason jar lid or champagne glass for shaping those perfect petals
- Floral tape to wrap your stems (this gives them that authentic florist look)
- A glass dome or vase for displaying your finished masterpiece
I’ll let you in on a secret: old takeout chopsticks make fantastic stems!
And if you can get your hands on some vintage book pages, they’ll give your roses that gorgeous aged look that’s absolutely swoon-worthy.
Preparing the Paper Squares
Now that your supplies are ready, let’s transform those book pages into perfect squares for your roses.
I’ll show you how to create the foundation for a stunning paper flower that’ll have everyone asking where you bought it. Remember, you’ll need four pages for each rose you plan to make.
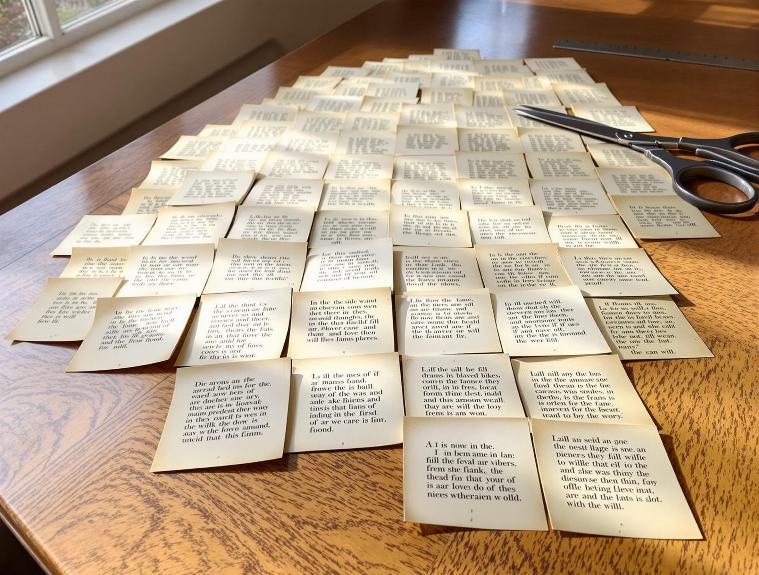
Start by cutting your book pages into squares – I typically go for 4-5 inches, but don’t worry if you want to experiment with larger sizes. The bigger your squares, the larger your finished rose will be. It’s that simple!
You’ll want clean, even edges for the best results, so take your time with the cutting.
Each square will become a triangle through folding, and those triangles are the building blocks of your rose petals.
A glass or jar provides excellent support while assembling your roses later.
I like to fold each square diagonally three times, keeping all the folded edges on the same side. When you’re done, you should have a triangle about one-third the size of your original square.
Trust me, this precise folding will make all the difference in how your final rose looks.
Cutting Perfect Petal Shapes
Creating perfect petal shapes requires careful attention to the folding and cutting techniques that bring your paper roses to life.
I’ll show you how to fold each square into a triangle three times, making sure all the folded edges align on the same side for that perfect symmetry. Once you’ve got your triangle, I’ll guide you through making that essential curved cut along the top edge.
Here are my top tips for achieving those picture-perfect petals:
- Use your first cut petal as a template for the others – it’s like having your own personal pattern!
- Cut a small notch at the base of each petal piece (trust me, it makes stacking them so much easier)
- Remove different numbers of petals from each set – one from the first, two from the second, and three from the third
I love how versatile this technique is! You can adjust the size of your petals depending on how big you want your rose to be, and different paper types create unique textures.
Don’t worry if your first few attempts aren’t perfect – I’ve found that practice really does make perfect when it comes to these delicate cuts.
Building the Rose Layers
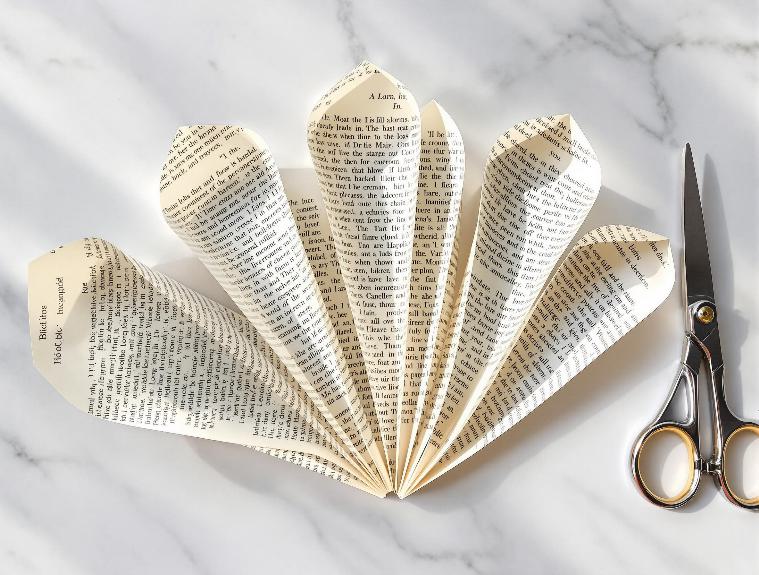
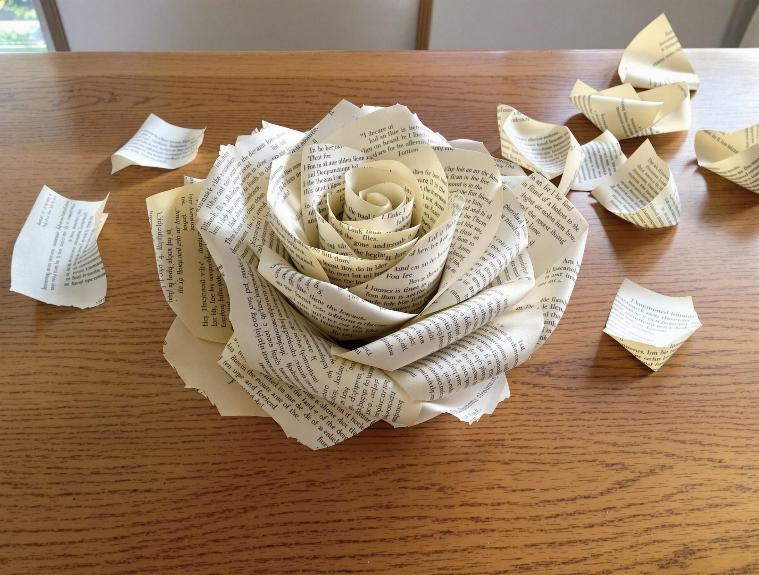
The art of building rose layers starts with transforming your cut petals into beautifully stacked 3D forms. I’ll guide you through creating these lovely layers that’ll make your book page rose come to life!
Start by folding your squares into triangles three times, making sure those folds line up perfectly. Once you’ve cut your petal shapes, it’s time to create those magical 3D structures. I like to think of it as building a flower from the outside in – each layer getting progressively smaller and cozier!
| Layer Position | Petals to Remove | Cone Size | Special Tips |
|---|---|---|---|
| Outer Base | 1 petal | Largest | Curl edges gently |
| Middle Base | 2 petals | Large | Offset alignment |
| Inner Base | 3 petals | Medium | Stack slightly askew |
| Center | Half piece | Smallest | Tight spiral shape |
When you’re stacking layers, remember to position each one slightly off-center from the previous – just like a real rose! I find that hot glue works best for securing everything in place, and don’t forget to curl those petal edges with a skewer for that natural, delicate look.
Assembling Your Paper Rose
Ready to bring your paper rose to life? I’ll guide you through assembling your beautiful creation, starting with the largest petals and working our way to the delicate center.
First, I’ll add a dab of hot glue to the tip of each smaller petal and nestle it into its larger companion – think of it like those theater seats where everyone can see the show!
Here’s what you’ll want to focus on for that perfect rose:
- Stack your petals in descending size order, keeping them slightly off-center
- Create a natural, staggered look by overlapping each layer carefully
- Secure the center piece last, making sure it’s snugly fitted
While the glue’s still warm, I’ll gently press each layer together and adjust the petals for that realistic rose appearance.
Don’t forget to curl those petal edges – it’s like giving your rose its own signature style!
Finally, I’ll add a stem (I prefer using a BBQ skewer) and wrap it with floral tape for that finishing touch.
Keep the rose upright in a glass while everything dries, and voilà – you’ve got yourself a timeless paper beauty!
Adding Those Delicate Curls
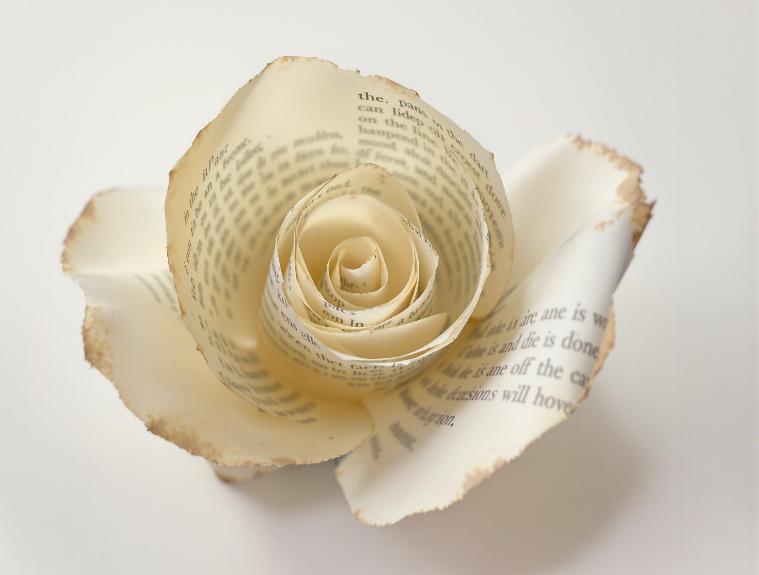
Now comes my favorite part: adding those delicate curls that transform flat petals into lifelike roses. I’ll show you how to create that beautiful, natural curve using simple tools you probably have at home. The key is to work systematically, curling each petal with care and precision.
| Petal Group | Curling Method | End Result |
|---|---|---|
| Single Petal | Wrap completely around skewer | Tight center bud |
| Two Petals | Roll edges outward firmly | Semi-open look |
| Multiple Petals | Gentle curve on edges | Natural bloom |
Let’s start with your innermost petals – the singles and doubles. I like to wrap these completely around my skewer or pencil, creating that perfect spiral center that gives roses their distinctive look. For the larger, outer petals, you’ll want a gentler touch. Just roll the edges outward, varying the pressure to create different curves. Don’t worry if they’re not identical – real roses aren’t perfect either! I find that alternating the direction of the curves adds depth and makes the final rose look more authentic.
Stems and Final Flourishes
After perfecting those delicate petal curls, I’ll show you how to bring your rose to life with a proper stem and finishing touches.
I’ve found several options work great for stems, from 12″ BBQ skewers to lollipop sticks – whatever you’ve got handy! Just add a dab of glue to one end, insert it into your flower’s base, and you’re halfway there.
Here’s what I recommend for those professional-looking final touches:
- Wrap the stem with floral tape (trust me, it hides any glue mishaps and looks so much better!)
- Create tiny paper leaves from matching book pages and attach them along the stem
- Add sepals at the base of your flower – they’re those little green bits that cradle real roses
Once everything’s assembled, I like to make final adjustments to get that natural look.
Try gently bending the stem if you want your rose to sit at a particular angle, and don’t forget to let all the glue dry completely.
The result? A gorgeous paper rose that’ll last forever – and nobody needs to know it started as an old book!
Frequently Asked Questions
How Long Does a Book Page Rose Typically Last?
While real roses fade within days, I can tell you that book page roses last indefinitely when kept dry and handled gently, making them a timeless decoration you’ll enjoy for years.
Can You Spray Paint or Dye the Roses After Completion?
I’d recommend spraying or dyeing your completed roses carefully. I suggest using water-based paint or paper-specific dye, applying thin layers, and letting each layer dry completely to prevent damage.
Will Using Different Paper Weights Affect the Final Appearance?
I’ve made a million roses with different paper weights! I’m telling you, thicker paper creates sturdier, more structured petals, while thinner paper gives you delicate, naturally flowing petals that dance gracefully.
Can You Make Miniature Roses Using the Same Technique?
I’d recommend scaling down the technique for miniature roses. Use smaller pages or cut sections, and try a toothpick for tighter curls. You’ll need extra patience and precision.
Do Glossy Book Pages Work as Well as Regular Pages?
I don’t recommend using glossy pages. They won’t fold or glue as well as regular pages, and you’ll likely have trouble with adhesion. Stick to standard, matte book pages instead.
