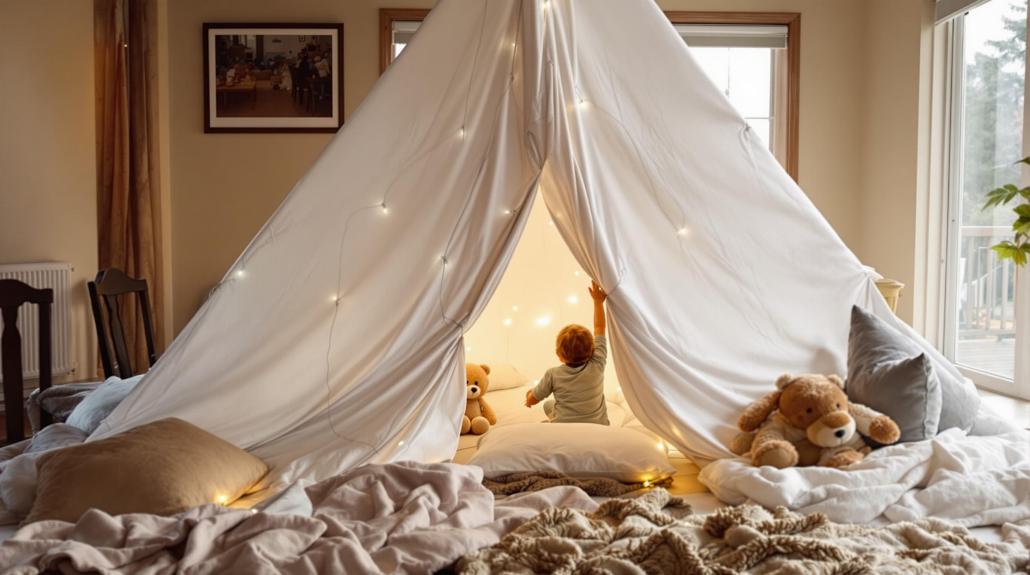
I’ll help you create an awesome indoor fort that’ll become your favorite hangout spot! Start by choosing a quiet corner near a window and gather lightweight blankets, chairs, and sturdy furniture for support. Use clothespins or clips to secure sheets between anchor points, and add pillows for comfort and stability. Create different zones for activities like reading or art, and enhance the atmosphere with battery-operated lights or glow sticks. Don’t forget to test the structure’s stability and lay down a thick blanket for the floor. There’s so much more to explore in making your fort truly epic!
Planning Your Fort Space
A successful indoor fort starts with choosing the perfect location in your home. I recommend finding a spot near a window for some natural light, but don’t place it where direct sunlight will turn your cozy hideaway into a sauna. Make sure to clear all hazards from your chosen fort area.
You’ll also want to stay clear of high-traffic areas – nobody wants their fort knocked over by a rushing sibling or pet!
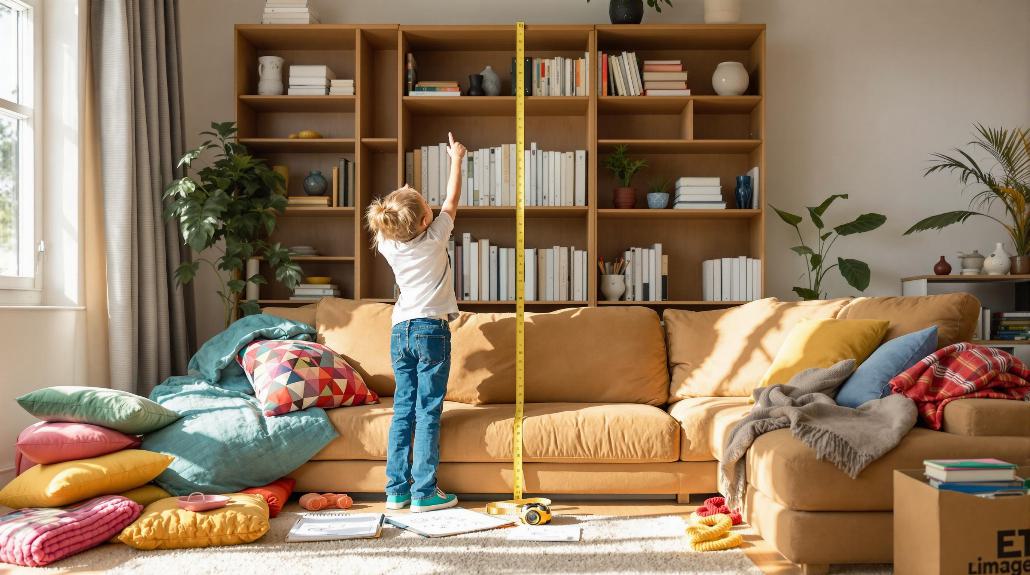
Before you start building, let’s think about size and layout. I always sketch a quick blueprint to help visualize the space. Consider how many friends will join you and what activities you’re planning.
Want a reading nook? You’ll need good lighting and comfy cushions. Planning an epic gaming session? Make sure there’s room for your devices and snacks.
I like to create different zones within my forts – maybe a sleeping area with pillows and blankets, plus a separate spot for activities.
Just remember to keep the entrance easily accessible and include some ventilation (trust me, it can get stuffy in there!).
Think about adding some fun touches like battery-operated fairy lights or a special spot to store your favorite books and games.
Essential Materials and Tools
Once you’ve mapped out your fort’s layout, gathering the right supplies makes all the difference between a flimsy shelter and a sturdy hideout.
I’ll help you assemble everything you’ll need for an awesome indoor fortress.
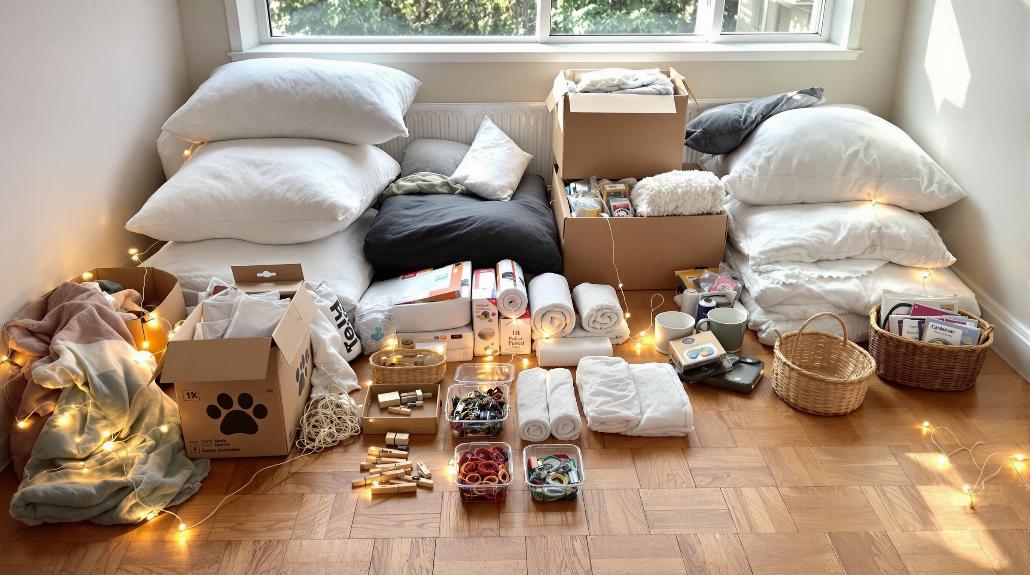
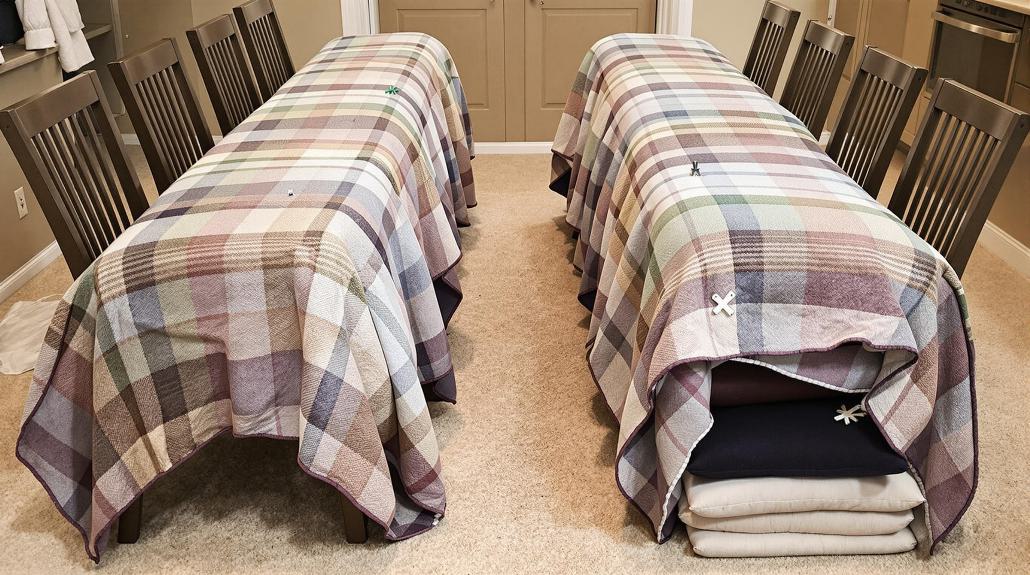
Start with your basic building materials: lightweight blankets and sheets are your best friends here. You’ll want to grab some furniture too – chairs, tables, and couch cushions will form your fort’s foundation. Your stuffed animals can serve as perfect fort companions.
Don’t forget pillows; they’re perfect for stabilizing walls and making your space super cozy.
To keep everything in place, I recommend clothes pins, chip clips, or rubber bands. These little heroes will hold your sheets tight and prevent cave-ins (trust me, I’ve learned this the hard way).
For extra stability, grab some clamps or even a clothes line to create a solid framework.
Want to make your fort extra special? I love adding string lights or fairy lights for that magical touch.
Consider tossing in a bed tray for snacks or an air mattress for supreme comfort.
Just remember to keep safety in mind – avoid heavy objects overhead and always secure everything properly.
Building a Strong Foundation
Building up from a solid foundation will make or break your indoor fort’s success. I’ll show you how to create a base that’s both sturdy and comfortable, ensuring your fort won’t come tumbling down during your adventures.
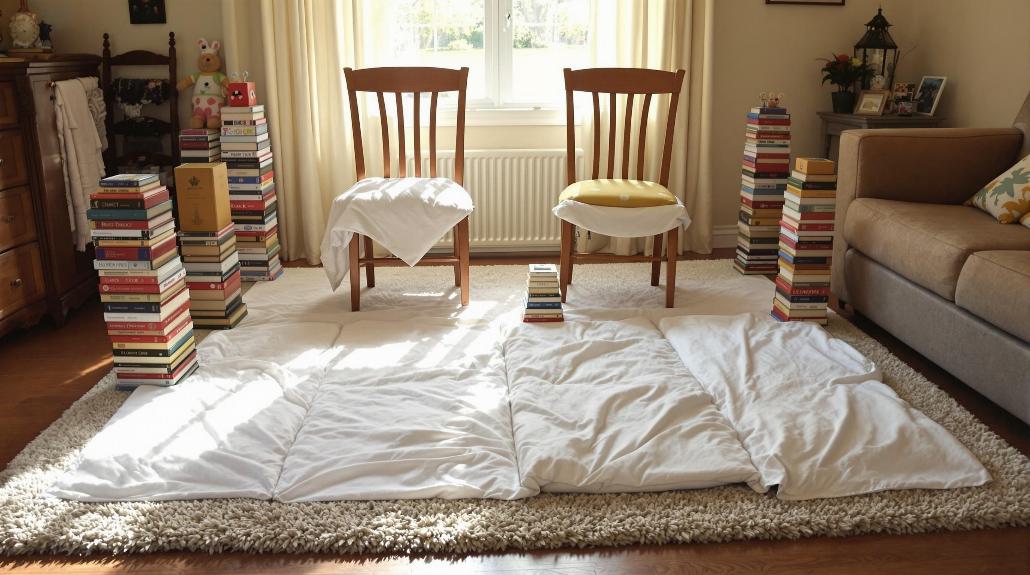
First, I recommend setting up in a corner where you’ll have two solid walls for support. Clear away any obstacles that might get in your way, and gather some sturdy furniture like chairs or a table to serve as your anchor points. Make sure to choose a spot with natural light if you’re planning daytime activities.
If you’re working with a table, that’s perfect – it’ll give you a ready-made roof!
Now, let’s make it cozy. I always start by laying down a thick blanket or comforter as the floor – trust me, your back will thank you later.
Position chairs or heavy books at each corner to keep your base blanket from sliding around. Here’s a pro tip: if you’re building on hardwood floors, try placing non-slip shelf liner under your base blanket.
Don’t forget to test your foundation’s stability by giving it a gentle shake. If anything wobbles, now’s the time to fix it!
Securing Your Fort Walls
Strong walls transform a simple blanket pile into an impressive fortress, and I’ll show you several proven methods to keep them secure.
I’ve found that everyday furniture makes excellent support – chairs, tables, and even your couch can create a sturdy framework. Don’t forget to grab some cushions and pillows to add extra stability where needed!
For connecting your materials, I rely on trusty clothespins and clamps to keep sheets and blankets firmly in place. If you’re in a pinch, chip clips work surprisingly well too! I always keep some rubber bands handy for creating taut walls that won’t sag.
Here’s a pro tip: avoid using heavy blankets for your walls, as they’ll likely cave in. Instead, I recommend lighter materials and even weight distribution.
I always test the stability by giving the fort a gentle shake – it’s better to catch weak spots early! When securing corners, I use books or other weights to keep everything anchored.
Remember to double-check your fort’s stability regularly, and don’t forget to create a safe entrance. With these methods, you’ll have walls that stand strong for hours of fun!
Creating the Perfect Roof
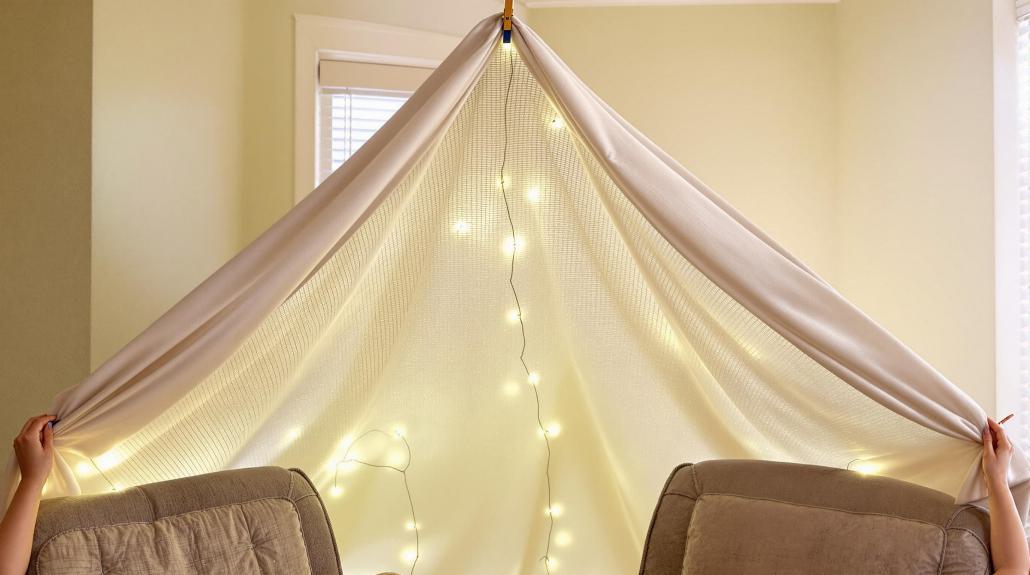
The perfect fort roof protects and delights while keeping the magic inside. I’ll show you how to create one that’s both sturdy and easy to adjust. Start by choosing lightweight materials like sheets or blankets – they won’t overheat your fort or collapse under their own weight.
I always recommend securing your roof with reliable anchor points. Clothes lines tied to curtain rods or door hinges work wonderfully, and you can add clothes pins, chip clips, or rubber bands for extra stability.
For a more structured approach, try creating a framework with PVC pipes – they’re perfect for permanent fort installations!
When you’re attaching the roof, make sure it’s evenly distributed to prevent sagging. I like to use a combination of clothes pins and clamps to secure the edges, adding support in the middle with strategically placed books or pillows. A teepee-style structure can add both stability and style to your design.
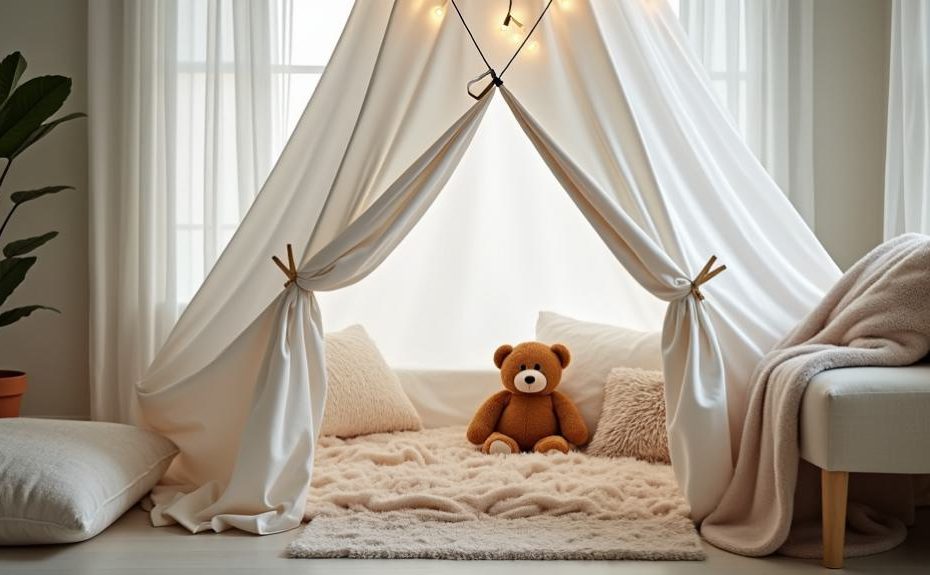
Don’t forget the finishing touches! String lights create an enchanting atmosphere, and adding a decorative canopy can transform your fort into a magical hideaway.
Just remember to keep the roof height comfortable for moving around inside.
Adding Comfort and Coziness
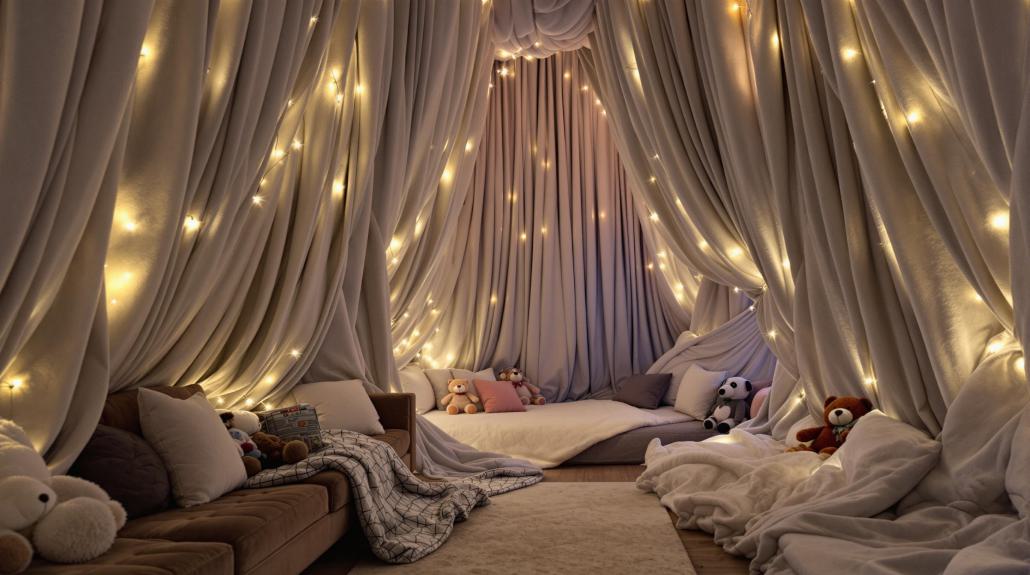
Comfort transforms a simple sheet fort into a cozy sanctuary worth spending hours inside. I’ll show you how to create the ultimate comfort zone that you won’t want to leave!
Start by laying down heavy blankets as your base layer, then add sleeping bags or air mattresses for extra cushioning. You’ll want to line the walls with plenty of pillows and cushions – they’re not just decorative, they’ll keep you comfy while you lean back and relax.
I like to create a multi-level seating arrangement using couch cushions, which gives everyone their perfect spot.
Don’t forget the cozy additions that make your fort extra special. String lights clipped to the walls create magical ambiance, while a bed tray keeps snacks and drinks within easy reach.
I always include some entertainment options like books, laptops, or even a small TV if you’re feeling fancy.
For the finishing touch, scatter some small pillows around and bring in your favorite blankets. Now you’ve got a perfect hideaway where you can curl up with a good book, watch movies, or just chat with friends in ultimate comfort.
Lighting Up Your Fort
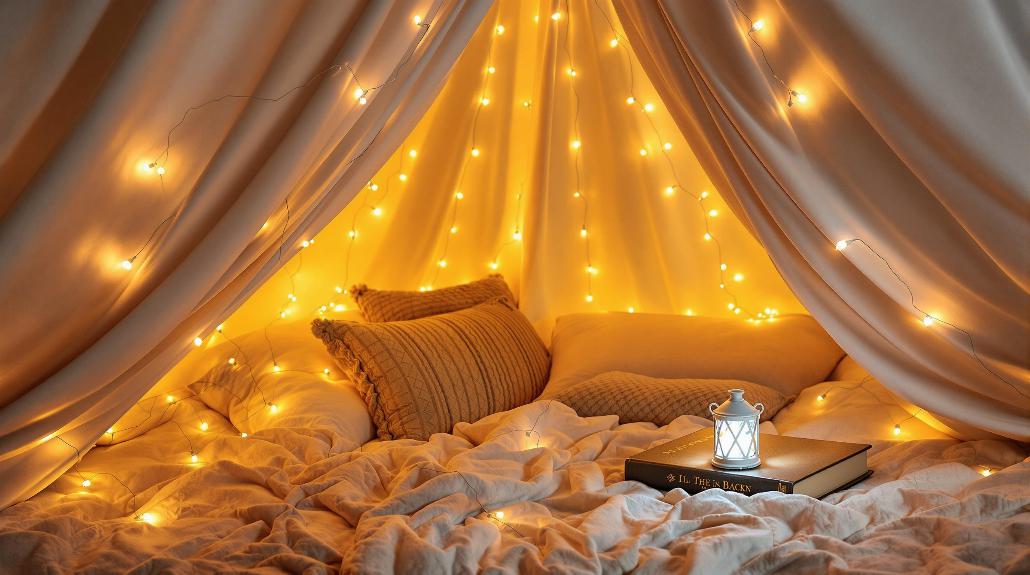
Proper lighting can transform your indoor fort from a simple shelter into an enchanting hideaway. I love using string lights to create a magical atmosphere – they’re safe, versatile, and perfect for draping across the ceiling or wrapping around support structures. You can even arrange them to mimic constellations for an astronomical touch!
For a cozy reading nook, I recommend battery-operated candles or lanterns. They’ll give you that warm, flickering glow without any safety concerns. Plus, lanterns can instantly turn your fort into an explorer’s base camp or a medieval castle tower.
Don’t forget about flashlights – they’re perfect for shadow puppetry on the fort walls and creating special effects. I’ve found that pointing a flashlight through a piece of cardboard with punched holes creates an amazing starry night effect.
For extra fun, grab some glow sticks to add splashes of color throughout your space.
Want to get really creative? Try making a cardboard control panel with blinking lights for a spaceship theme, or use your lighting to set the mood for spooky storytelling sessions. The possibilities are endless!
Fun Activities Inside
Now that your fort’s aglow with enchanting lights, let’s fill it with amazing activities that’ll make every moment memorable!
I’ve found that the best fort experiences combine creativity, learning, and pure fun. Set up a cozy art station where you can draw, paint, or craft to your heart’s content. Don’t forget to create a reading nook with pillows and your favorite books!
Want to boost the educational value? Transform your fort into a mini-classroom where you can solve puzzles, conduct simple science experiments, or explore world geography.
I love setting up math games with cards and dice – they’re surprisingly fun when you’re in a fort!
For sensory adventures, I recommend creating texture stations with materials like rice or beans. Add some glow sticks for light experiments, and don’t forget to include musical instruments for an impromptu jam session.
You can even set up sensory bins filled with water beads or kinetic sand.
Finally, invite friends over for collaborative activities. Work together on building projects, solve puzzles as a team, or stage puppet shows.
Board games are twice as fun when played in a fort!
Frequently Asked Questions
How Long Does a Blanket Fort Typically Last Before Needing Repairs?
I’ve found that a typical blanket fort lasts about 1-2 weeks before needing some touch-ups, though it really depends on how much you’re using it.
If you’re crawling in and out daily, you’ll probably need to fix loose blankets or adjust supports within 3-4 days.
I’ve seen my forts last up to a month when I’m careful and make small repairs right away.
Can I Build a Fort That’s Safe for Toddlers Under 3?
You know, while I’d love to suggest building a three-story fortress with drawbridges and moats, for toddlers under 3, let’s keep it simple and safe!
I recommend creating a ground-level fort using soft pillows as walls, lightweight blankets for the roof, and ensuring clear entrances.
I always use child-safe furniture like small chairs, maintain constant supervision, and keep the structure simple with lots of cushioning all around.
What’s the Maximum Weight the Roof Can Hold Without Collapsing?
I recommend keeping your fort’s roof weight under 15 pounds to stay safe.
That’s about the weight of a medium-sized pillow fort top. If you’re using blankets, they’re usually perfect since they’re lightweight.
For added stability, I suggest spreading the weight evenly across your support points.
How Do I Prevent My Pets From Destroying the Fort?
I’ve seen pets demolish forts faster than a tornado through a paper town!
To protect your creation, I’d start by using pet gates to block access to the fort area.
Spray pet deterrent on the outside of blankets and furniture, and create a cozy alternative space nearby with their favorite bed and toys.
Keep them busy with interactive toys and regular exercise to reduce their interest in fort destruction.
Is It Safe to Use Space Heaters Inside Blanket Forts?
I strongly advise against using space heaters inside blanket forts.
They’re one of the leading causes of house fires, especially when near flammable materials like blankets and sheets.
While I know you want to stay cozy, it’s just not worth the risk.
Instead, I’d recommend using warm blankets, pillows, or wearing comfy sweaters.
If you really need heat, keep the space heater at least three feet away from your fort’s structure.
