I’ll help you create a gorgeous DIY wedding arch that’ll wow your guests. Start by choosing your style – whether it’s traditional, rustic, bohemian, or modern – and gather essential materials like fabric, flowers, and construction tools. You’ll need a sturdy base (I recommend the cement-filled bucket method for stability), plus weather-resistant materials if you’re planning an outdoor ceremony. Layer your decorations starting with draped fabric, then add greenery, statement flowers, and lighting elements. Don’t forget to secure everything with cable ties and fishing line! There’s so much more to explore about making your perfect ceremony backdrop.
Choosing Your Wedding Arch Style
A wedding arch sets the tone for your entire ceremony, serving as both a stunning backdrop and a meaningful symbol of your union. These beautiful structures create unforgettable photo moments for couples to cherish.
I’ll help you explore four popular styles that’ll make your special day even more memorable.
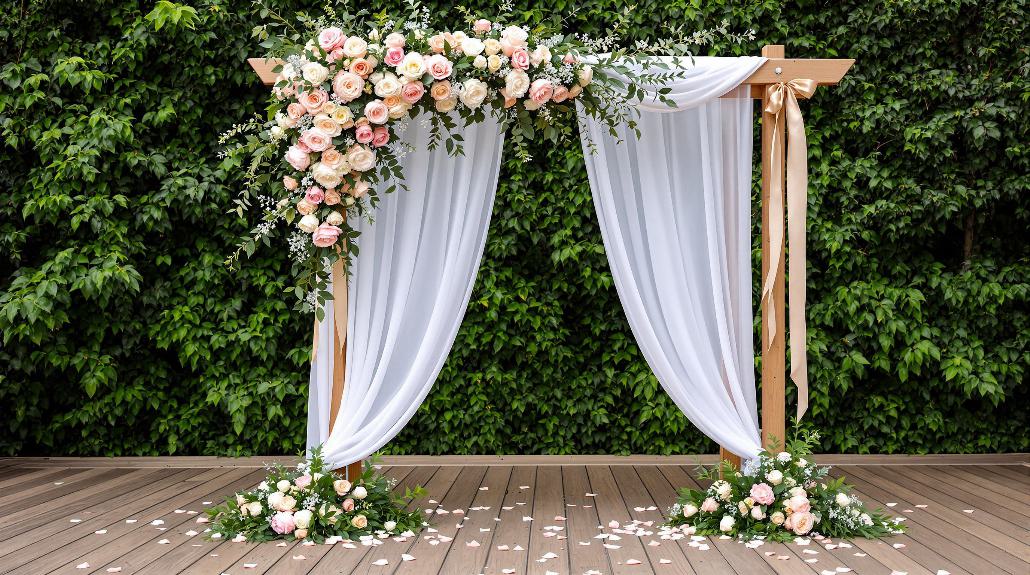
If you’re dreaming of a classic celebration, I’d recommend a traditional arch with elegant white draping and symmetrical floral arrangements.
It’s perfect for formal indoor venues and creates that timeless, sophisticated look you’ll love forever.
For my rustic-loving couples, consider a wooden arch with a weathered finish.
Add some burlap, twine, and wildflowers to capture that charming countryside feel.
This style works beautifully in barn venues or outdoor settings.
Feeling free-spirited? A bohemian arch might be your perfect match.
I love incorporating macramé, dreamcatchers, and vibrant blooms to create that effortlessly cool vibe.
It’s especially stunning for outdoor ceremonies.
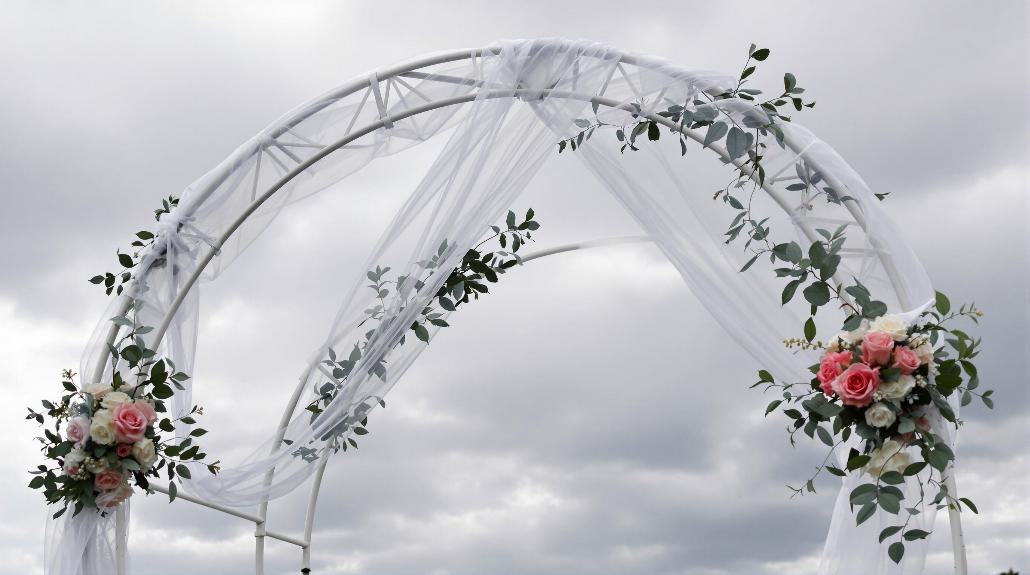
For my modern couples, let’s talk geometric shapes and clean lines.
Think sleek metal frames, perhaps with asymmetrical designs or bold color choices.
Add some LED lights or minimal florals, and you’ll have a contemporary masterpiece that’ll wow your guests.
Essential Tools and Materials
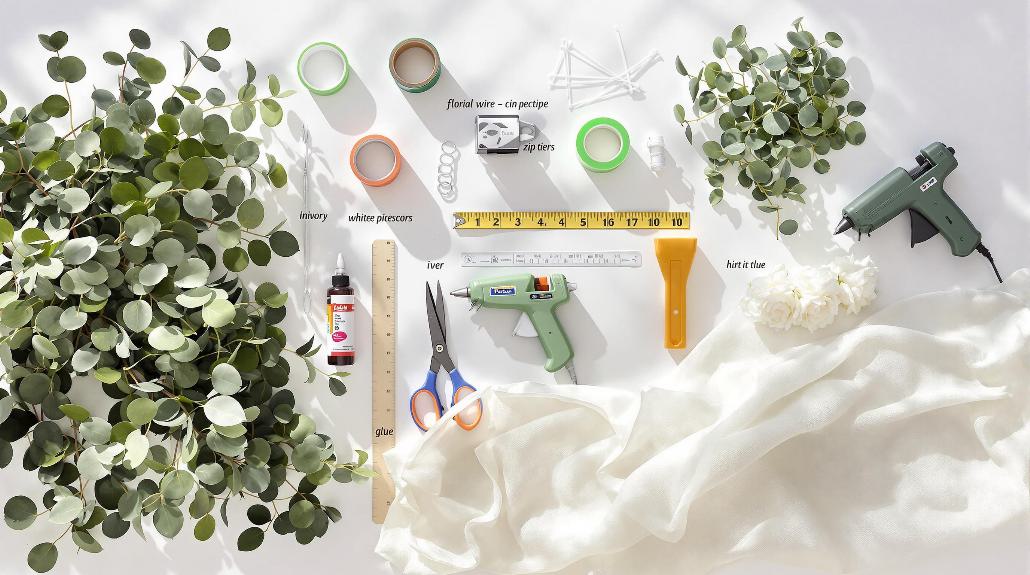
Before diving into your arch decoration project, gathering the right materials and tools will set you up for success. I’ll help you create a shopping list that covers all the essentials you’ll need to bring your vision to life.
Let’s start with fabrics – you’ll want to choose from chiffon, tulle, organza, satin, or lace as your base. I love using ombre sheer drapes or mixing two shades of the same color for added dimension. Your decor will require 6ft garlands made of willow and eucalyptus leaves.
For the florals, you’ll need both statement flowers and fillers, plus some lovely greenery like eucalyptus and willow. Trust me, pampas grass can add that perfect boho touch!
Don’t forget the nuts and bolts of the operation – you’ll need wire mesh, pliers, cable ties, and scissors to put everything together securely. I always make sure to have extra cable ties on hand (they’re lifesavers, really).
For that magical finishing touch, consider adding string lights for evening celebrations or candleholders beneath the arch. If you’re planning a beach wedding, I’d suggest incorporating seashells and driftwood to really capture that coastal vibe.
Planning Your Color Scheme
Choosing your wedding arch’s color scheme lays the foundation for its entire visual impact. I’ll help you navigate the color wheel to create a stunning combination that perfectly matches your vision.
Start by considering your wedding’s season and time of day. If you’re planning a summer celebration, I’d suggest vibrant hues like sunny yellows paired with bold purples. For winter weddings, I love working with deep, moody tones complemented by metallic accents – think burgundy with gold touches.
Here’s a pro tip: don’t feel pressured to stick with just one approach. You can mix color schemes like analogous colors (neighbors on the color wheel) with a metallic accent for depth. I often recommend starting with a base color you love, then building around it.
For a foolproof combination, try a monochromatic scheme using different shades of the same color – it’s elegant and timeless.
Remember to balance your choices. If you’re drawn to bold colors (and who doesn’t love a stunning peacock blue?), I suggest grounding them with neutral tones to keep your arch from overwhelming your photos.
Create a quick mood board to visualize your combinations before making final decisions.
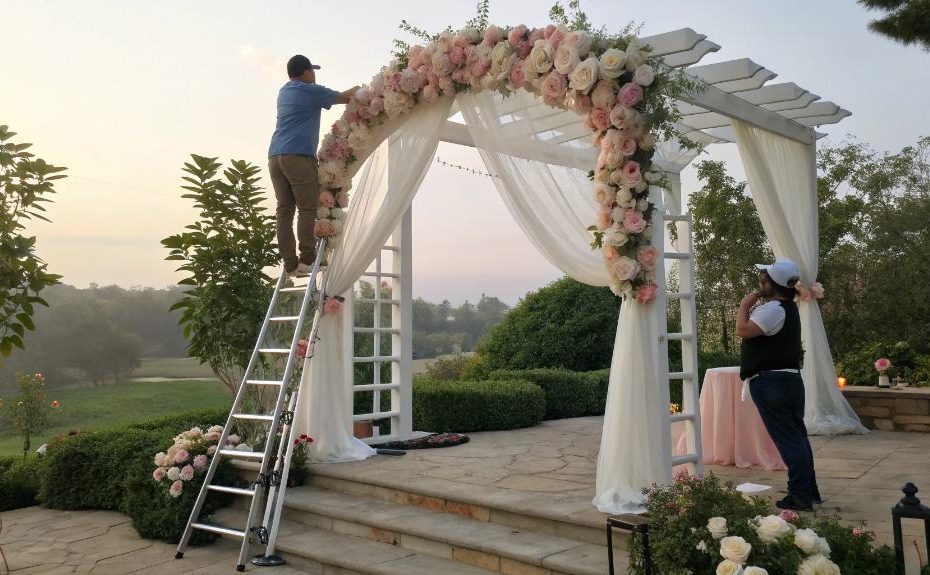
Creating the Base Structure
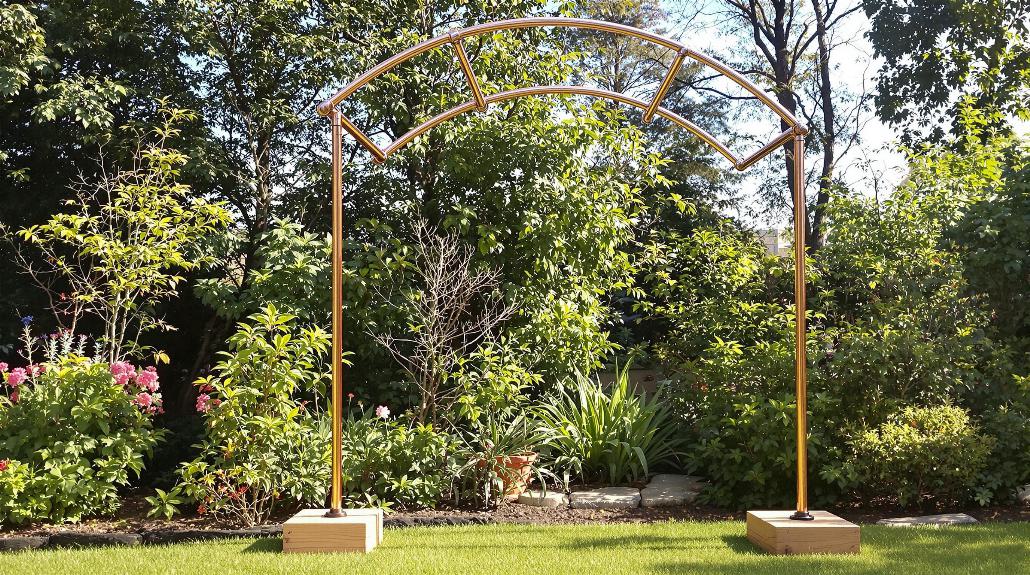
When building a wedding arch that will stand strong throughout your ceremony, starting with a stable base structure is absolutely essential. I’ve found that choosing the right foundation makes all the difference between a stunning centerpiece and a wobbly disaster waiting to happen (trust me, I’ve seen both!).
You’ve got several reliable options for creating your base structure. I recommend these three proven methods:
- Fill decorative metal buckets with cement and insert PVC pipes for the arch stands – it’s heavy but rock-solid.
- Use large flower pots filled with a mixture of soil, stones, and sand – perfect for garden-themed weddings.
- Create a rustic base using logs with pre-drilled holes, secured with cement – ideal for outdoor ceremonies.
For extra stability, I always suggest adding weights or sandbags, especially if you’re planning an outdoor ceremony. You can easily disguise these under fabric or greenery.
If you’re setting up on grass, don’t forget to use ground anchors – they’re a lifesaver when those unexpected gusts of wind come along.
Whatever base you choose, make sure to test its stability before adding any decorations.
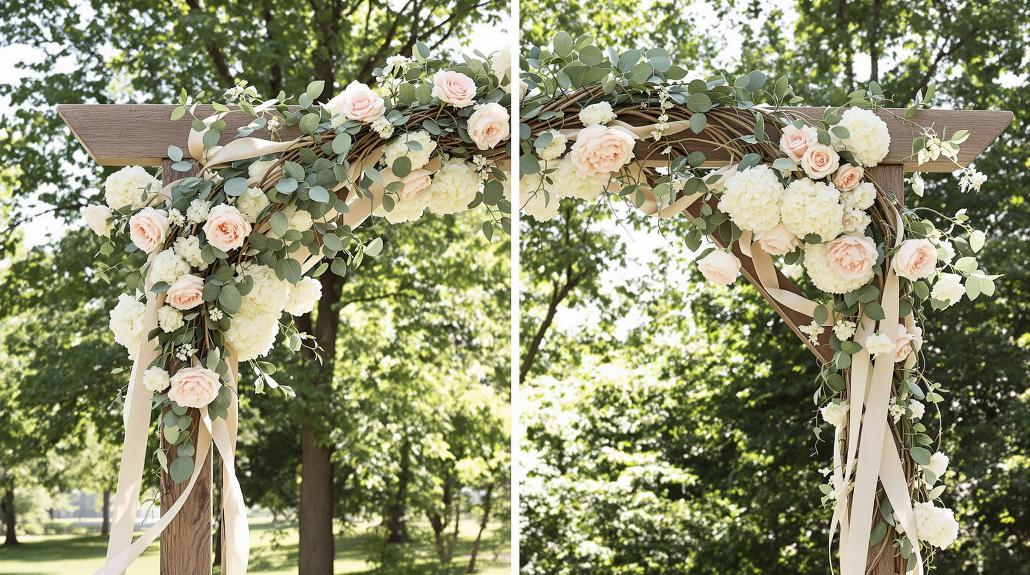
Floral Design and Arrangement
The magic of a wedding arch truly comes alive with its floral design and arrangement. I’ll guide you through creating a stunning floral display that’ll make your arch absolutely breathtaking.
Let’s start with flower selection – I always recommend choosing in-season blooms for the freshest, most vibrant look. You’ll want to soak your floral foam overnight (trust me, this step’s essential!), and while that’s happening, sort your flowers by size. I like to think of it as gathering my floral army before the battle of beauty begins.
Now for the fun part: I start by creating a lush foundation with greenery – it’s like painting the background of a masterpiece. Then, I’ll add those show-stopping focal flowers at varying heights.
Here’s a pro tip: step back every few minutes to check your work. You’d be surprised how different things look from a distance!
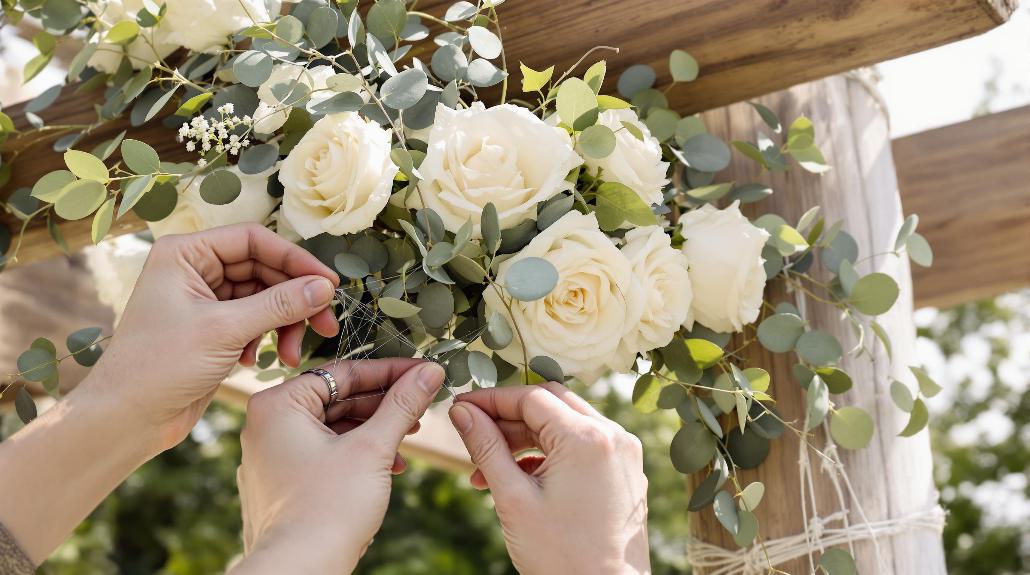
For security (because nobody wants flowers falling during the ceremony!), I always use floral foam cages zip-tied to the arch. Once everything’s secure, I’ll add those final magical touches – maybe a cascading ribbon or some delicate baby’s breath – to make your arch truly unforgettable.
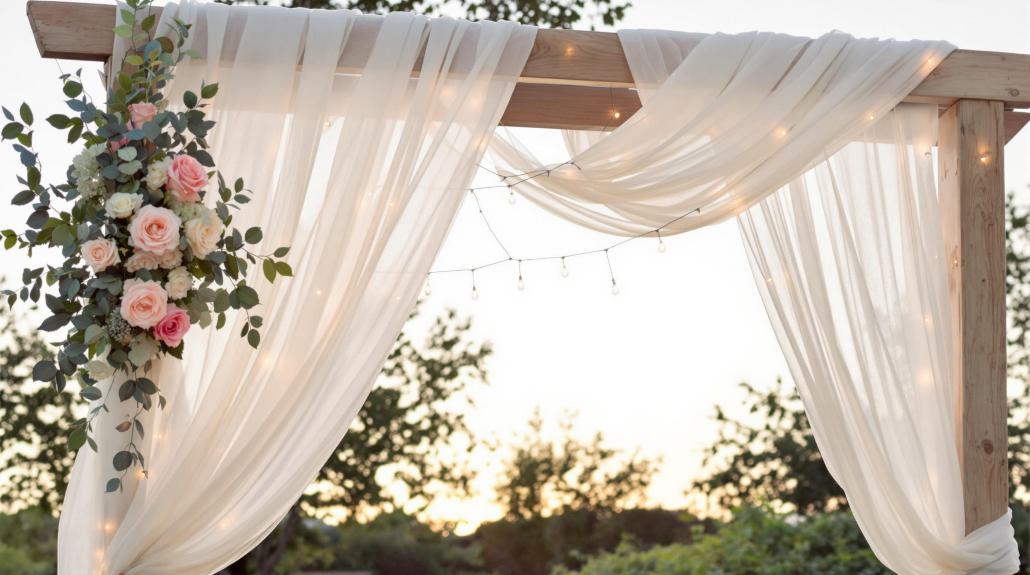
Draping Fabric With Grace
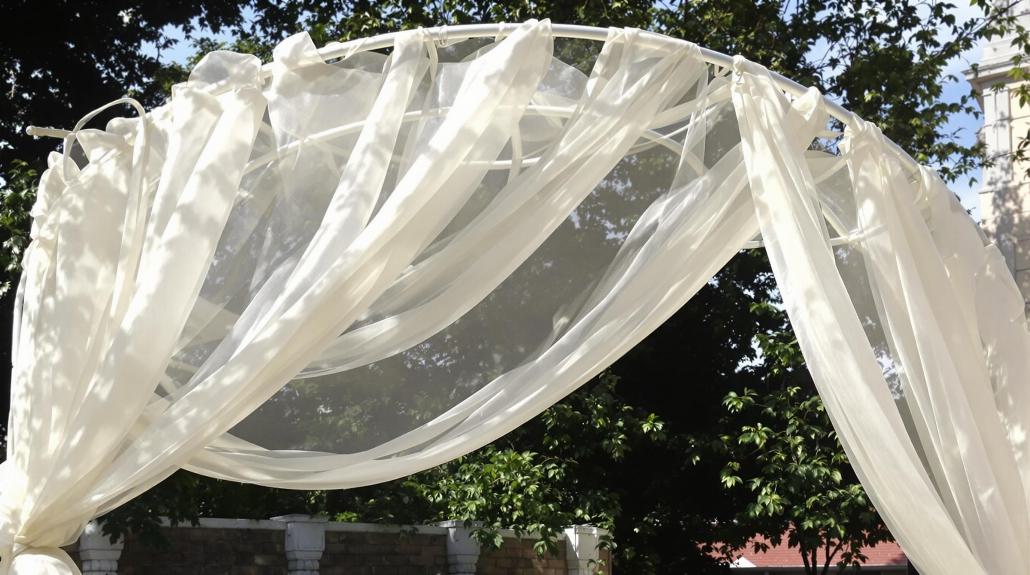
Draping fabric transforms a simple wedding arch into an ethereal masterpiece. I’ll show you how to create that dreamy, flowing look using lightweight fabrics like chiffon or organza.
When I’m working with couples, I always recommend measuring the arch first and cutting panels that are two to three times longer than the structure itself – this gives us plenty of material to work with!
Here’s my tried-and-true draping process:
- Start at the top center of your arch, secure your fabric with hidden zip ties, and let it cascade naturally down both sides.
- Create gentle loops and swoops as you work your way down, pinning strategically behind floral arrangements.
- Add asymmetrical touches by letting one side drape lower than the other – trust me, it looks more organic this way!
I love mixing different fabric colors or textures to add visual interest.
Don’t forget to secure everything thoroughly – there’s nothing worse than a gust of wind undoing your hard work! For a finishing touch, I’ll often tuck in some string lights or weave in ribbon accents to complement the wedding’s color scheme.
Adding Lights and Accents
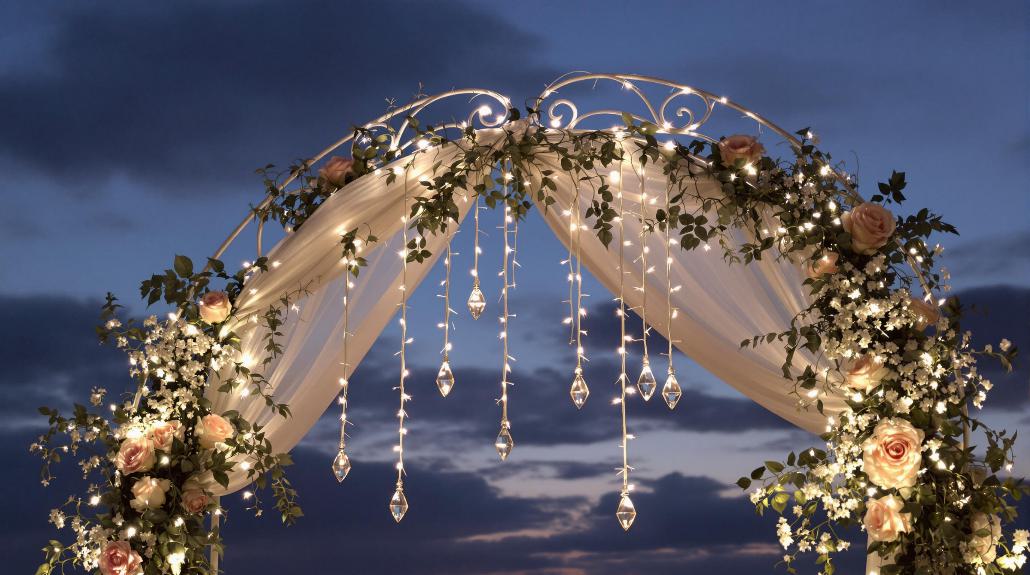
Lighting’s transformative power can elevate your wedding arch from beautiful to breathtaking. I’ll show you how to create that magical glow you’ve been dreaming of.
Start by choosing your light sources wisely – I’m a big fan of combining string lights with delicate fairy lights for varied texture. You’ll want to weave them through your arch’s framework, making sure to space them evenly.
Don’t forget to test your setup before the big day!
For added dimension, I recommend incorporating lanterns or LED candles at different heights. You can nestle them among greenery or hang them from decorative branches.
If you’re working with an outdoor arch, try cascading lights from above – it creates the most romantic starlit effect!
Safety’s essential, so I always suggest using battery-operated lights when possible. They’ll eliminate tripping hazards from cords, and you won’t need to worry about finding power sources.
Remember to secure all elements tightly, and opt for shatterproof options if you’re concerned about wind.
When you layer lights with fabric and greenery, you’ll create a stunning focal point that’ll have your guests swooning!
Securing Everything in Place
Now that your arch glows with enchanting lights, proper securing techniques will keep your decorative elements safe and stable throughout the ceremony.
I’ll show you how to create a rock-solid foundation that’ll withstand everything from enthusiastic flower girls to unexpected gusts of wind.
Start with the base – it’s your arch’s backbone! For outdoor setups, I recommend using a metal bucket filled with cement for maximum stability. If you’re working with a wooden arch, drill a center hole and secure it with cement.
For indoor ceremonies, I’ve found that strategically placed sandbags work wonders without being too obvious.
Here are my tried-and-true steps for securing decorative elements:
- Attach heavier items first, using floral wire or zip ties, working from the bottom up
- Weave delicate pieces through sturdy elements, securing endpoints with clear fishing line
- Double-check all attachment points, giving each a gentle tug test
Don’t forget to test the overall stability before your big day.
I always perform a final safety check by gently shaking the arch – if anything wobbles, it needs another round of securing.
Weather Preparation Tips
Mother Nature can be an unpredictable guest at outdoor weddings, so proper weather preparation is essential when decorating your arch. I’ll help you guarantee your beautiful decorations stay secure and stunning, rain or shine.
First, I recommend checking the weather forecast regularly in the days leading up to your wedding. If there’s even a slight chance of rain, you’ll want to waterproof your arch decorations. I suggest using weather-resistant materials and clear sealants on any paper or fabric elements.
You might also consider having a backup indoor location where you can quickly relocate your arch if needed.
For windy conditions, I’ve found that using extra-strength fishing line to secure flowers and ribbons works wonders. Don’t forget to weigh down the base of your arch with sandbags or decorative weights – they’re lifesavers on breezy days!
You can disguise them with fabric or florals to maintain that picture-perfect look.
Remember to have a small emergency kit nearby with items like clear zip ties, weather-resistant tape, and extra floral wire. Trust me, you’ll feel much more relaxed knowing you’re prepared for whatever Mother Nature throws your way!
Frequently Asked Questions
How Early Should I Start Assembling the Wedding Arch Before the Ceremony?
Time waits for no wedding, so I’d recommend starting your arch assembly at least 3-4 hours before the ceremony.
I’ve found this gives you plenty of breathing room for unexpected hiccups while keeping flowers fresh.
If you’re using artificial flowers, you can start earlier – even the night before.
I always suggest doing a practice run beforehand so you’ll know exactly how much time you’ll need on the big day.
Can I Preserve and Reuse the Floral Arrangements After the Wedding?
I’d definitely recommend preserving your floral arrangements!
You’ve got several options: pressing, air drying, or using silica solution. I personally love freeze drying for the best color retention.
Once preserved, you can transform them into beautiful framed artwork, ornaments, or table decorations.
If you’re planning to reuse them during the reception, consider relocating the arch to serve as a photo booth backdrop!
What Backup Options Should I Have if Certain Flowers Aren’t Available?
When flowers play hide and seek with your wedding plans, I’ve got your back!
I recommend keeping a list of seasonal alternatives that match your color scheme, while having non-floral options ready too.
Silk flowers, fabric drapes, or natural elements like pampas grass can save the day.
I’d also suggest working closely with your florist to identify similar blooms that’ll be available during your wedding season.
How Much Does a DIY Wedding Arch Typically Cost Compared to Professional Services?
I’ve found that DIY wedding arches typically cost between $100-150, while professional services can run you $200-500 or more.
You’ll save about 50-75% by going the DIY route!
When I factor in materials and flowers, my DIY projects usually land around $150 total, though you could spend as little as $50 for something simple or up to $700 if you’re going all out.
Should I Create a Mock-Up Arch Before the Wedding Day?
I absolutely recommend creating a mock-up arch before your big day.
It’s like having a dress rehearsal – you’ll catch any potential issues and perfect your design without the wedding day pressure.
I’ve found that mock-ups help you nail down exact measurements, test material compatibility, and boost your confidence in the final setup.
Plus, you can show it to your partner or family for feedback and make adjustments while there’s still time.
