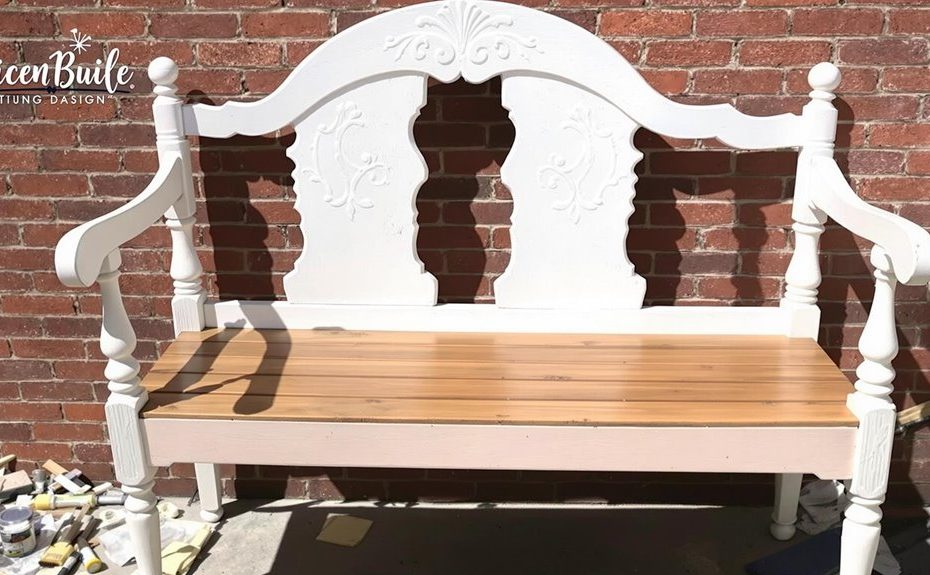
Transform your old headboard into a charming bench with some basic tools and materials. Start by cleaning and prepping your headboard, then build a sturdy seat frame using 2×4 lumber. Add support legs at each corner, and create a seat base with plywood. Layer high-density foam for comfort, wrap it in batting, and cover with your chosen upholstery fabric. Secure everything tightly with screws and a staple gun. Add your personal touch with paint or stain, then style with throw pillows and blankets. With just a weekend of work, you’ll discover how simple it is to create this beautiful piece of furniture.
Required Tools and Materials
Creating a bench from an old headboard requires a specific set of tools and materials to guarantee a successful transformation. You’ll need basic tools like a power drill, screwdriver set, measuring tape, pencil, and safety equipment including protective goggles and work gloves. Don’t forget your trusty sandpaper in various grits to smooth out those rough edges!
For materials, start with your chosen headboard – whether it’s wood, metal, or a combination of both. You’ll also need lumber for the bench seat and legs (2x4s work great), wood screws in different sizes, and sturdy brackets for support. If you’re planning to add comfort, grab some foam padding, batting, and your favorite fabric for upholstery. Remember to pick up some wood glue, finishing nails, and paint or stain to match your home’s decor.
I always suggest getting a few extra screws and brackets, just in case – nothing’s worse than having to pause your project for a hardware store run! Also, if you’re working with an older headboard, you might want some wood filler to patch up any dings or scratches.
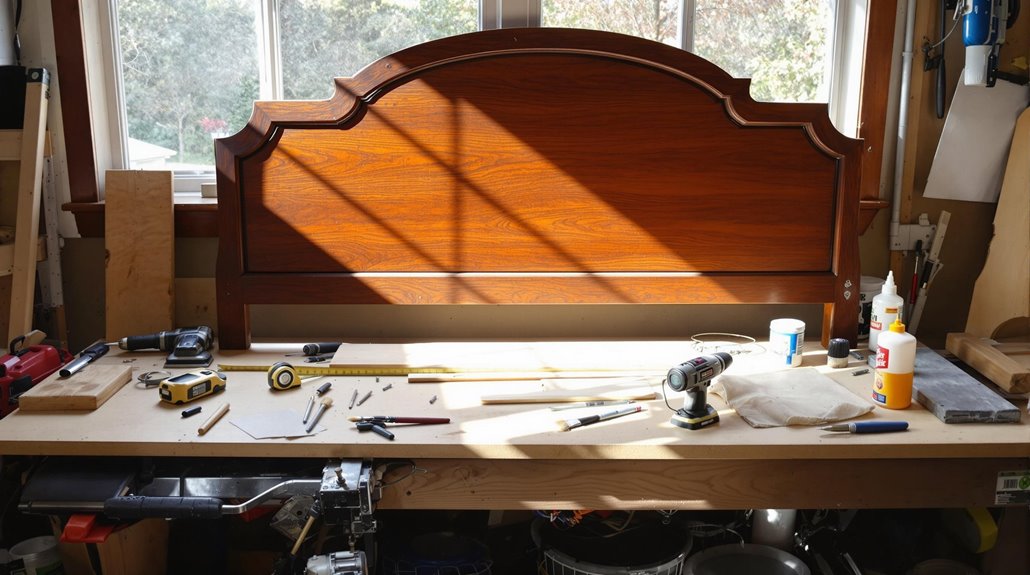
Preparing Your Headboard
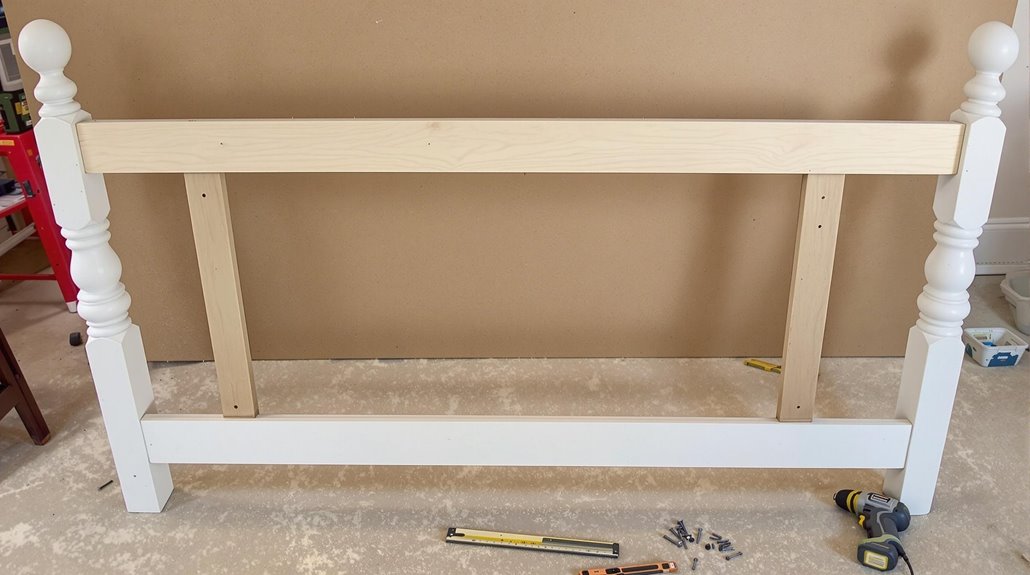
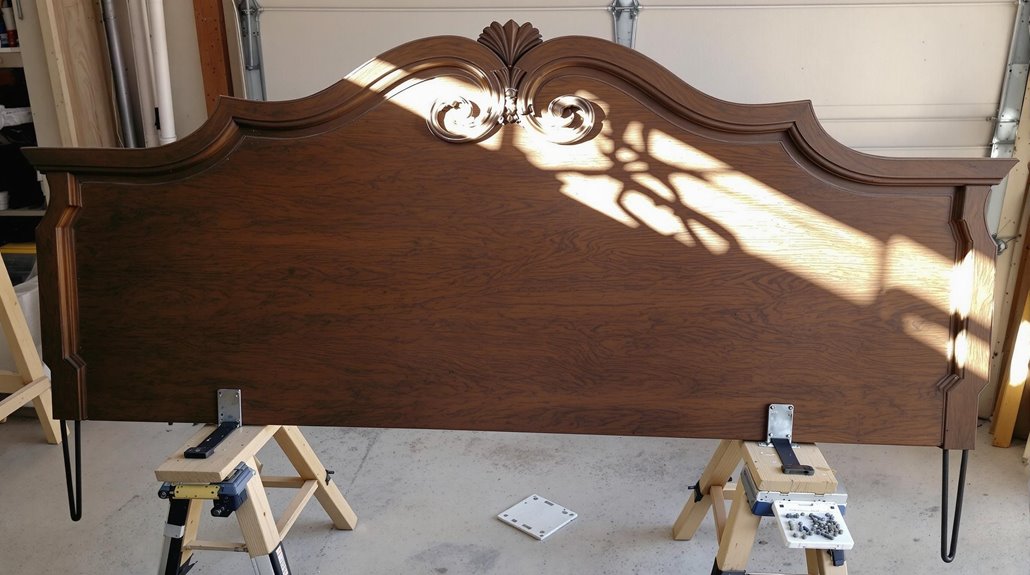
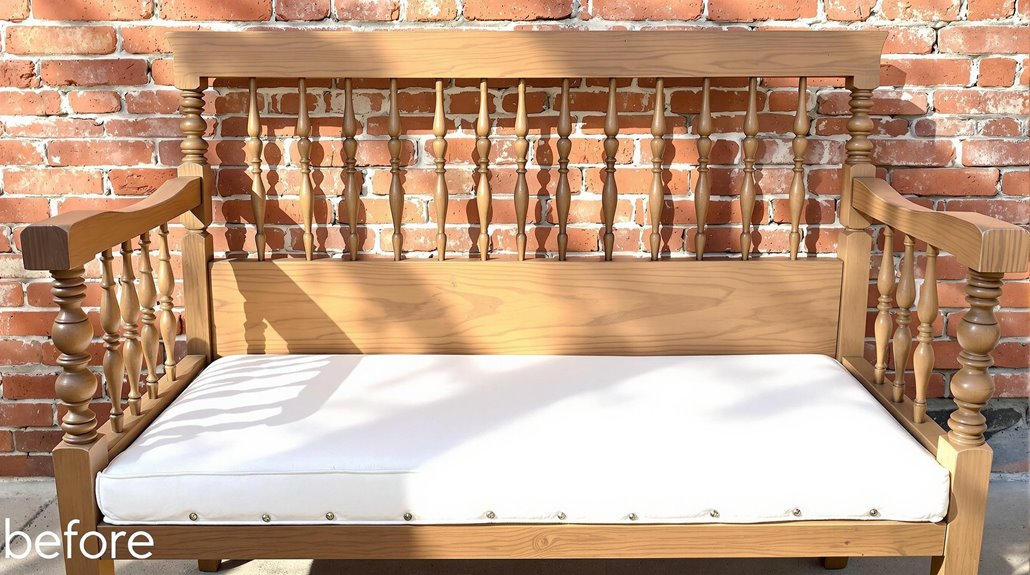
Before diving into the transformation process, proper preparation of your headboard is essential for achieving a sturdy and attractive bench. Start by thoroughly cleaning your headboard with warm, soapy water to remove any dirt, dust, or grime that’s built up over time. Once it’s dry, inspect it carefully for any loose parts, wobbly joints, or damage that needs attention.
If your headboard has a glossy finish, you’ll want to sand it lightly to help the new paint or stain adhere better. Don’t worry if you’ve never sanded before – just use medium-grit sandpaper and work in the direction of the wood grain. After sanding, wipe away all the dust with a tack cloth.
Next, remove any decorative elements you don’t want on your finished bench, like medallions or ornate trim pieces. If there are holes left behind, fill them with wood putty and let it dry completely. This is also the time to tighten any loose screws or reinforce weak spots with wood glue. Trust me, taking these preparation steps now will save you headaches later and guarantee your bench turns out beautifully.
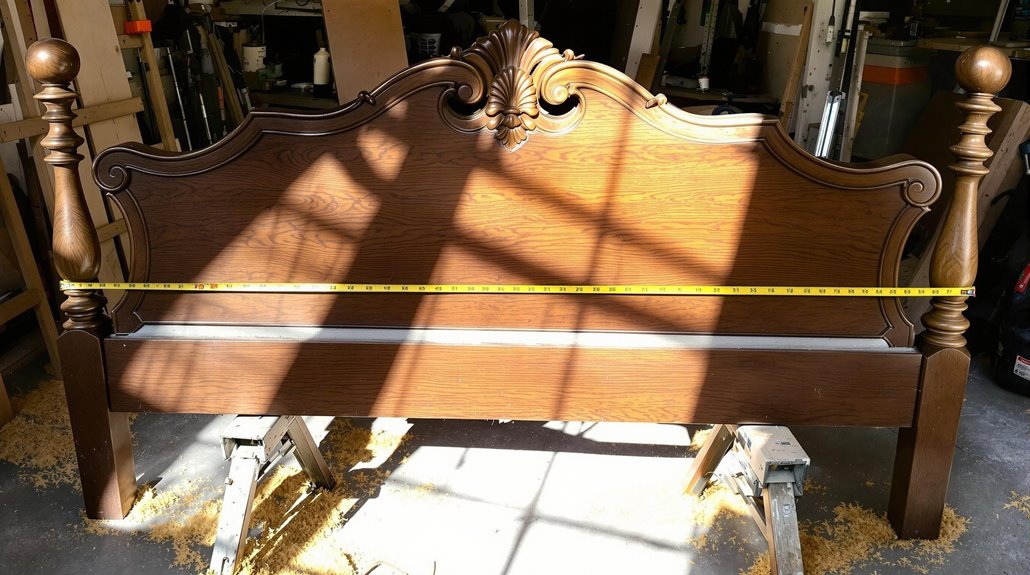
Measuring and Planning
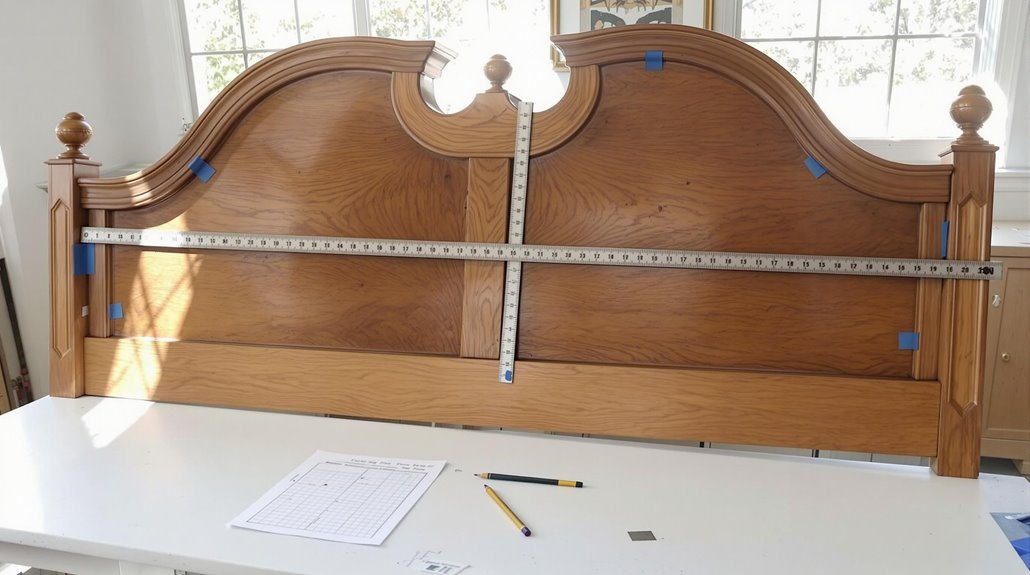
With careful measurements and planning, transforming your headboard into a functional bench requires strategic thinking regarding the final dimensions and design. You’ll want to reflect on the height of your bench for comfortable seating, typically between 17-20 inches from the ground. Think about the depth of the seat, which should be around 15-18 inches for ideal comfort. Take measurements of your headboard’s width to determine your bench’s final length.
Before cutting any wood or making permanent changes, grab your measuring tape and notepad to sketch out your vision. This will help you visualize the finished product and create a materials list for the project.
- Picture your headboard standing upright like a soldier, ready to be transformed into its new life as a cozy bench
- Imagine the completed bench nestled perfectly in your entryway, welcoming guests with open arms
- Visualize yourself sitting comfortably on your creation, admiring your handiwork
- See the finished bench with its fresh coat of paint, perfectly matching your home’s decor
Once you’ve got your measurements and vision mapped out, you’re ready to move forward with confidence.
Building the Seat Frame
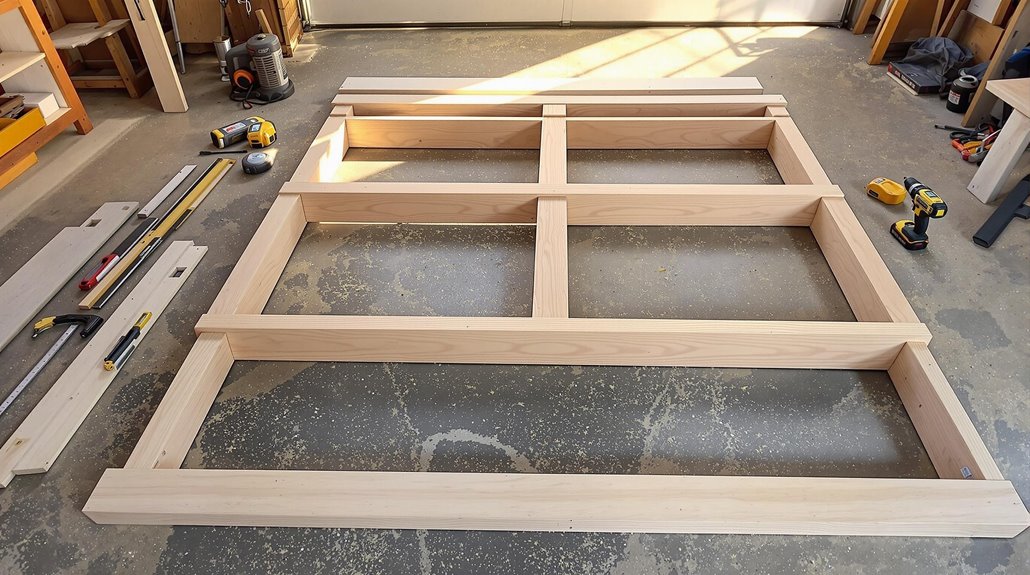
The seat frame forms the structural backbone of your bench project, transforming your measurements into reality. You’ll need 2×4 lumber to create a sturdy rectangular frame that will support both the seat and anyone who sits on it. Start by cutting your lumber to the dimensions you planned earlier – two longer pieces for the sides and two shorter pieces for the front and back.
Lay out your pieces on a flat surface and check that your corners are perfectly square. Now’s the time to pre-drill your holes to prevent the wood from splitting. Use 3-inch wood screws to connect the corners, making sure everything stays level as you work. For extra stability, you might want to add a center support beam running from front to back.
Once your basic frame is assembled, double-check that it’s sturdy by giving it a gentle shake. If anything feels wobbly, add a few more screws or adjustments. Remember, this frame will be carrying all the weight, so it’s better to make it too strong than not strong enough. You’ll thank yourself later when your bench stands up to years of use!
Attaching Support Legs
Now that your seat frame is complete, proper leg support becomes essential for the bench’s stability and functionality. I recommend using sturdy wooden legs that are at least 2×2 inches thick and 16-18 inches tall. You’ll want to position them at each corner of your seat frame, making sure they’re perfectly vertical for ideal weight distribution.
Before attaching the legs, lay out your bench frame upside down on a flat surface. This will make it easier to work with and guarantee everything stays level. Pre-drill your holes to prevent the wood from splitting, then secure each leg with heavy-duty wood screws and angle brackets for extra stability.
- Picture yourself sitting comfortably on your bench while the legs hold firm, without any wobbling or creaking
- Imagine running your hand along the smooth connection points where the legs meet the frame
- Visualize the perfect 90-degree angles of each leg, standing proud and strong
- Think about how your bench will look when you flip it right-side up, ready to support years of happy sitting
Creating the Seat Base
After securing the legs firmly in place, your next step focuses on building a solid seat base that will provide both comfort and durability. You’ll need a piece of 3/4-inch plywood cut to match the width of your headboard and extend about 18 inches from front to back. This will serve as your foundation for a comfy seating area.
Position the plywood on top of your support structure, making sure it’s centered and even on all sides. You can use a pencil to mark where you’ll need to drill your pilot holes for securing the base. I recommend placing screws every 6-8 inches around the perimeter and a few through the middle for extra stability. Before you start drilling, double-check that everything is square and level – nobody wants a wobbly bench!
Once you’ve got your pilot holes marked, grab your drill and 2-inch wood screws. Drive the screws through the plywood and into your support frame, being careful not to over-tighten them. When you’re done, give your seat base a little test – it should feel rock-solid and ready for the next step.
Adding Cushioning and Upholstery
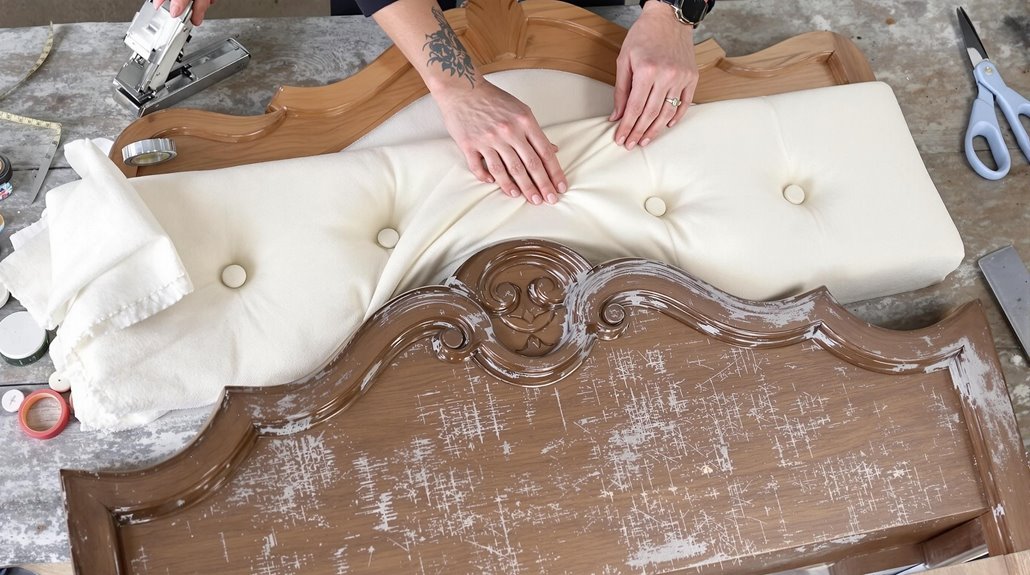
With your seat base securely attached, it’s time to transform your bench into a comfortable seating area using foam padding and upholstery fabric. Choose a high-density foam that’s at least 2 inches thick for maximum comfort. You’ll want to cut the foam slightly larger than your seat base, allowing for a snug fit when you wrap the fabric around it. Before securing the foam, wrap it in a layer of batting to guarantee smooth edges and prevent the foam from showing through your fabric.
Select an upholstery fabric that matches your home’s decor and is durable enough for regular use. Remember to add about 6 inches of extra fabric on all sides for proper wrapping and securing.
- Picture yourself sinking into plush, cloud-like cushioning that makes you want to curl up with a good book
- Imagine running your hand across smooth, perfectly wrapped corners without a single wrinkle in sight
- Envision the satisfying look of crisp, professional pleats along the edges of your bench
- Visualize the transformed piece fitting perfectly in your entryway, catching compliments from every visitor
Use a staple gun to secure the fabric underneath the seat base, working from the center outward to prevent wrinkles and maintain even tension.
Final Assembly Steps
The final moments of your DIY bench project bring all the elements together into a cohesive piece of furniture. At this stage, you’ll want to double-check that your headboard is securely attached to the bench base and that all screws are tight. Take a moment to verify the legs are level and sturdy – no one wants a wobbly bench!
Now’s the time to add those finishing touches that make your bench truly special. If you’ve chosen to upholster your piece, secure any loose fabric edges with a staple gun, making sure to fold the corners neatly. For painted benches, touch up any spots that might need an extra coat. Don’t forget to add furniture pads to the bottom of the legs to protect your floors.
Give your bench a final wipe-down to remove any dust or fingerprints. If you’re using wood, now’s the perfect time to apply a protective finish or wax. Step back and admire your handiwork – you’ve just transformed an old headboard into a beautiful, functional bench that’s ready to welcome family and friends!
Paint and Finish Options
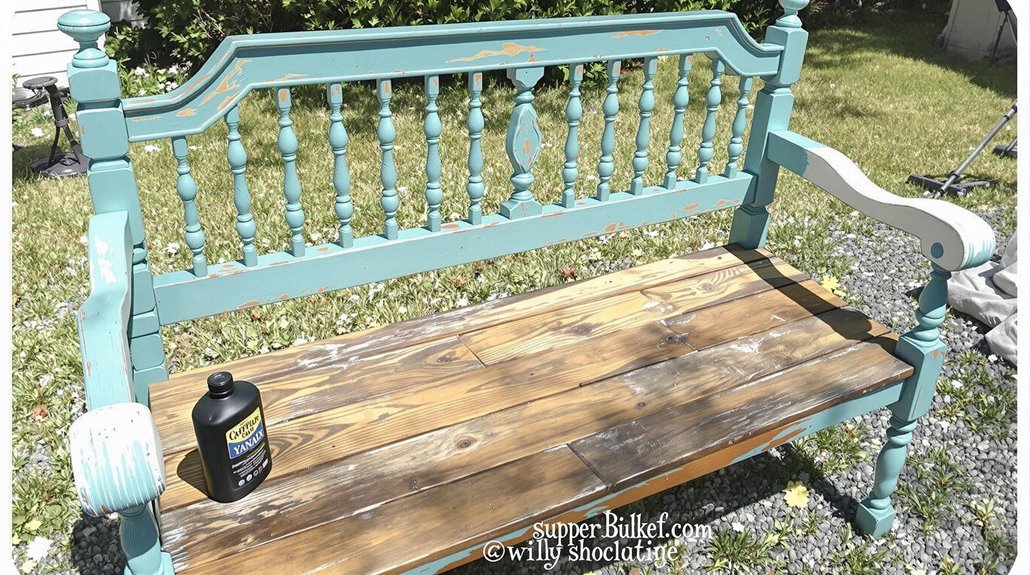
Selecting the right paint or finish can dramatically transform your headboard bench and protect it for years to come. Whether you’re going for a rustic farmhouse look or a sleek modern style, the finishing touch will make all the difference. Start by thoroughly sanding your piece and wiping away all dust before applying your chosen finish. Remember that different woods may require different preparation methods, so take time to understand your material.
Consider these popular finish options for your headboard bench:
- Chalk paint for a vintage, matte appearance with excellent coverage and no priming needed
- Milk paint to achieve an authentic antique look with natural, non-toxic ingredients
- Weather-resistant exterior paint if you’re planning to use your bench outdoors
- Clear polyurethane coating to preserve the natural wood grain while adding protection
You’ll want to apply at least two coats of your chosen finish, sanding lightly between each layer. Don’t rush this final step – proper drying time between coats will guarantee a beautiful, long-lasting result. For extra protection, especially for outdoor pieces, consider adding a clear topcoat after your paint has fully cured.
Styling Your New Bench
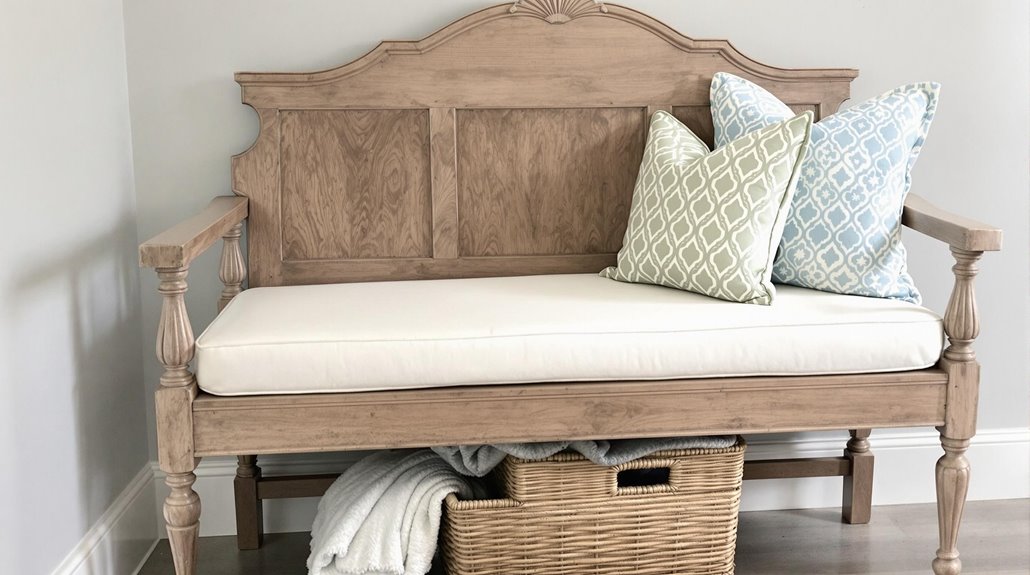
Now that your bench has its perfect finish, bringing your vision to life through thoughtful styling will make it a standout piece in your home. Your new bench can serve multiple purposes, from a cozy reading nook to an elegant entryway statement piece.
For a welcoming entryway look, add a few plush throw pillows in colors that complement your home’s palette. A soft throw blanket casually draped over one corner adds warmth and texture. You might want to place a small basket underneath for storing shoes or seasonal items like umbrellas and gloves.
If you’re using your bench in a bedroom, style it with coordinating bedding colors and perhaps add a small accent pillow with an inspiring quote. For a living room setting, try mixing patterns and textures with your pillows while keeping the color scheme cohesive.
Don’t forget the space around your bench! A potted plant or two, some favorite books stacked nearby, or a coordinating piece of wall art above can help create a complete, intentional look. Remember, less is often more – you want your beautiful DIY bench to remain the star of the show.
Frequently Asked Questions
Can I Use a Metal Headboard Instead of a Wooden One?
Absolutely, you can transform a metal headboard into a stunning bench! While metal requires different tools and techniques than wood, it can actually create an even more durable and weather-resistant piece. You’ll need to weld or bolt the supporting legs and seat frame, rather than using wood screws. Just guarantee your metal headboard is sturdy enough to support weight and consider adding cushioning for comfort.
How Long Will This DIY Project Typically Take to Complete?
The typical time to complete this project ranges from 4-6 hours, depending on your experience level and the tools you have on hand. You’ll spend about an hour planning and gathering materials, 2-3 hours on construction and assembly, and another hour or so on finishing touches like sanding and painting. If you’re new to DIY projects, you might want to spread the work across a weekend.
What’s the Average Cost to Make a Headboard Bench?
Did you know that repurposed furniture projects can save you up to 70% compared to buying new pieces? The average cost to make a headboard bench typically ranges from $50 to $150, depending on your material choices. If you already have an old headboard, you’ll mainly need lumber ($20-30), paint or stain ($15-25), screws and hardware ($10-15), and cushioning materials ($20-80) if desired for added comfort.
Will the Bench Be Sturdy Enough for Outdoor Use?
While a headboard bench can be sturdy, it’s not ideal for outdoor use unless you take extra precautions. Most headboards are made from materials that aren’t weather-resistant and can warp, rot, or rust when exposed to rain and sun. If you really want to use it outdoors, you’ll need to weatherproof it with marine-grade sealant and store it under cover when not in use.
Should I Treat the Wood Differently if Placing the Bench in Bathroom?
While a bathroom might seem like a cozy spot for your bench, moisture is its worst enemy. You’ll need special protection to prevent warping and mold. Start by thoroughly sealing the wood with a marine-grade waterproof sealant. Apply 2-3 coats of moisture-resistant polyurethane, paying extra attention to the bottom edges that might contact wet floors. Consider adding rubber feet to elevate the bench and protect it from standing water.
