I’ll show you how to transform wrapping paper into a custom gift bag in just a few simple steps. Start with a piece of medium-weight wrapping paper (14 inches by 8 inches), fold the sides toward the center, and secure with double-sided tape for clean seams. Create the bag’s structure by folding and creasing the sides, then form a sturdy base by folding the bottom end up and securing it firmly. Add handles by punching holes at the top and threading ribbon through them. For extra stability with heavier gifts, reinforce the bottom with cardboard. The real magic happens when you start adding your personal creative touches.
Materials You Will Need
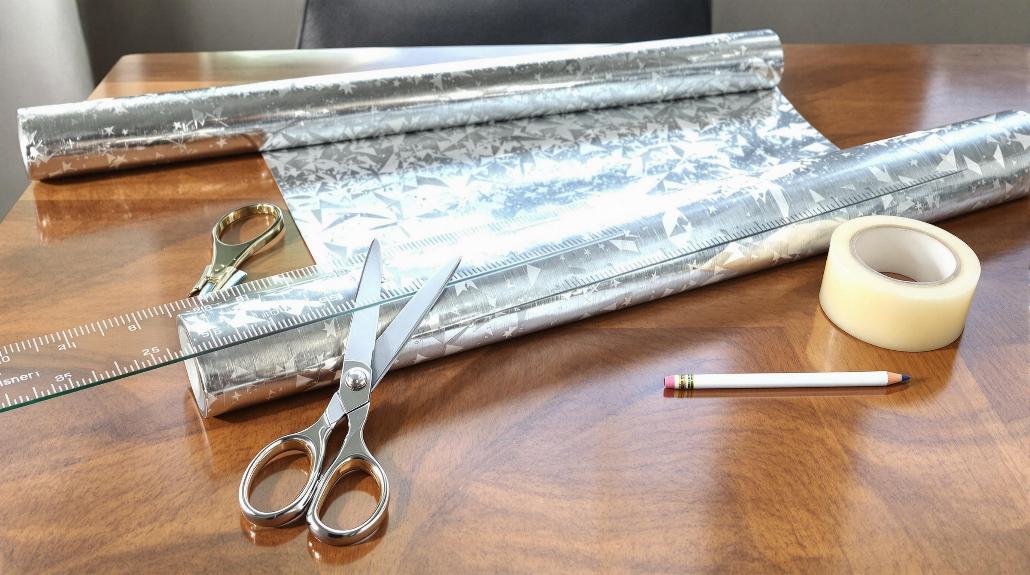
A well-stocked crafting station is essential for creating your DIY gift bag. I’ll help you gather everything you’ll need to make a beautiful, personalized creation that’ll wow your gift recipient.
First, let’s cover the absolute must-haves: you’ll want wrapping paper (the sturdier, the better), a reliable pair of scissors, and tape – both regular and double-sided if you’re feeling fancy. A glue stick can come in handy too! Using a bone folder tool will help create perfect, crisp creases in your paper.
Now, if you’re ready to take your gift bag game to the next level, I’ve got some fun optional additions. Grab a hole puncher and ribbon to create a professional-looking handle.
Want to add some pizzazz? Stock up on stickers, washi tape, and gift tags. You can even personalize it with photos or letters! For those extra-special occasions, I love adding a piece of candy as a decorative touch – just try not to eat it while crafting!
And here’s a pro tip: keep some cardboard handy for reinforcement if you’re wrapping something heavier. Trust me, it’s a lifesaver when you need that extra stability.
Measuring and Cutting
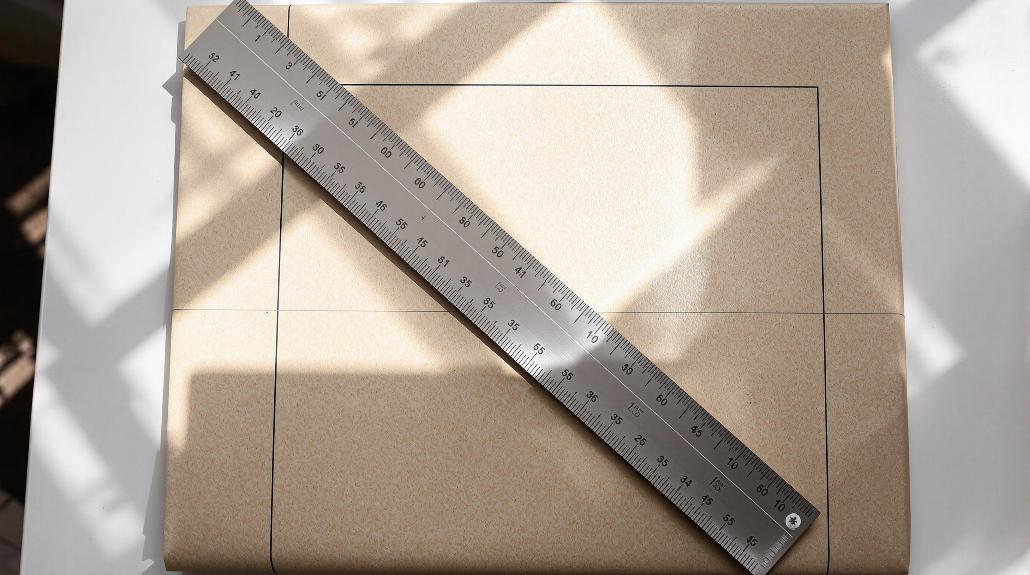
Now that you’ve gathered your materials, let’s begin the most important step of creating your gift bag – getting the measurements right. For a standard gift bag, I’ll suggest starting with a rectangle of wrapping paper that’s about 14 inches long and 8 inches wide. Trust me, these dimensions work like a charm for most small to medium-sized gifts.
I always recommend measuring twice and cutting once – it’s saved me from wasting plenty of beautiful paper! Use your ruler as a straight edge to create light creases where you’ll cut. These creases will help you utilize the grid lines on the wrapping paper for precise cutting.
Creating the Main Structure
Creating the main structure of your gift bag requires careful folding and securing. I’ll guide you through the process step by step, making sure your bag turns out sturdy and professional-looking.
Let’s start by folding both sides of your wrapping paper toward the center until they overlap slightly. I like to secure this overlap with double-sided tape – it’s neater than regular tape, though either will work! The standard size of 14×18 inches works perfectly for medium-sized gifts.
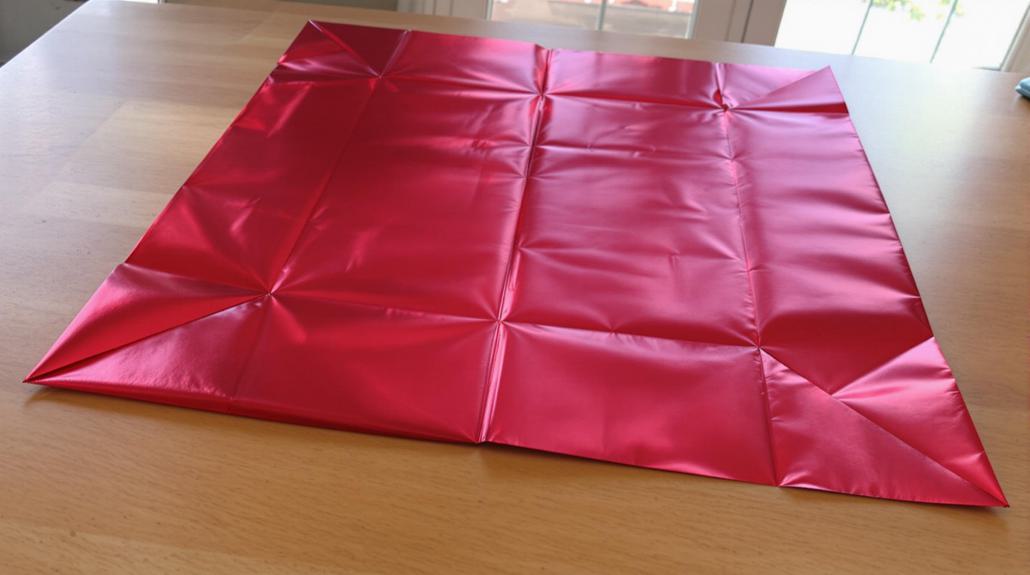
Next, you’ll need to fold the sides inward to create crisp creases, then gently unfold them to give your bag some volume. Don’t worry if it looks a bit wonky at first; we’ll shape it into a perfect rectangle.
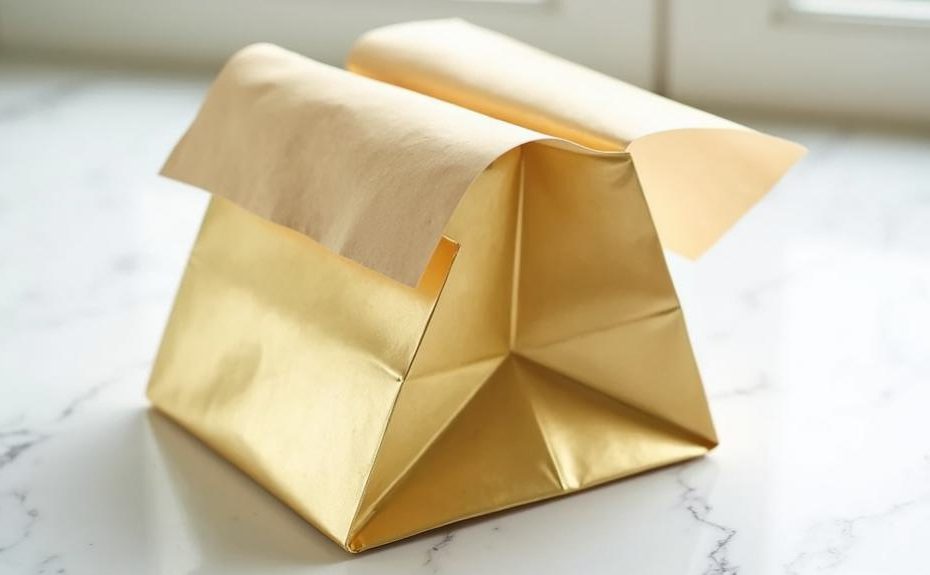
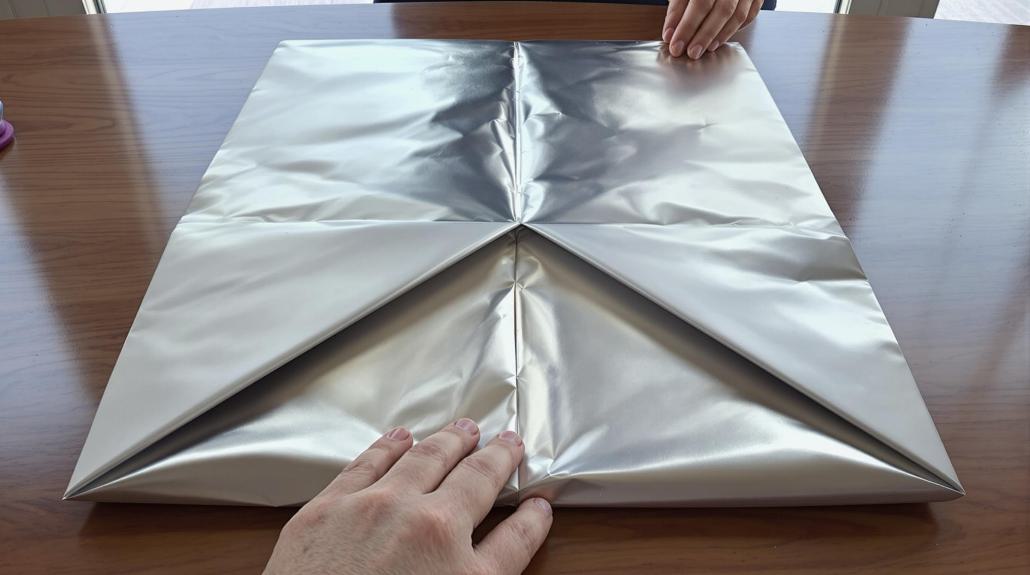
Now comes the fun part – forming the bag’s shape. With the pretty side down, fold and secure the base so the points meet. I find it helpful to open up the folded area and add extra tape inside for those heavier gifts (we’ve all had that one present that’s a bit too ambitious!).
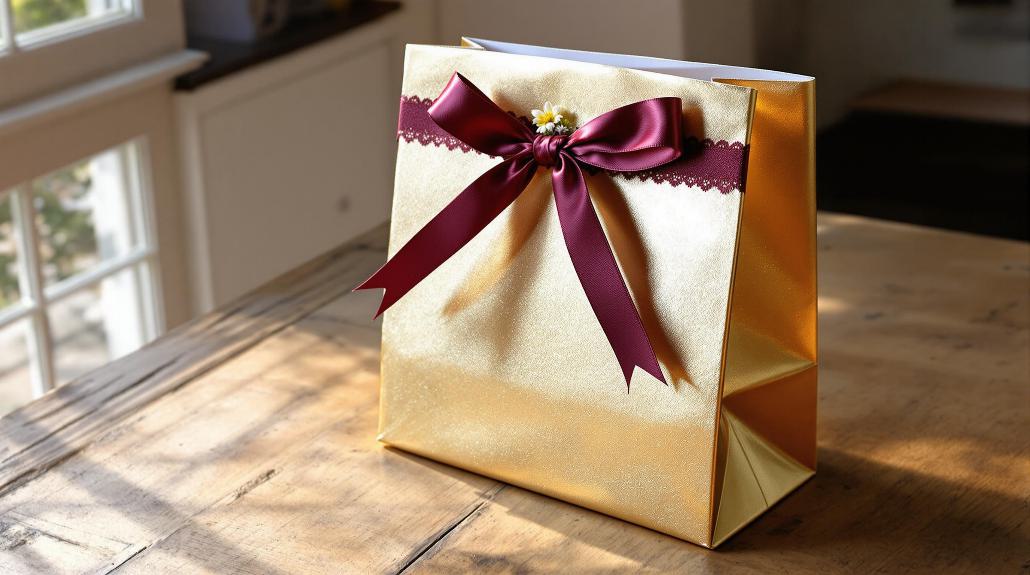
Finally, fold down the top twice, punch your holes, and thread your ribbon through. A quick knot or bow, and voilà – you’ve got yourself a custom gift bag!
Forming a Sturdy Base
Building a sturdy base is essential for your gift bag’s success. I’ll show you how to create a foundation that won’t collapse under your gift’s weight. Start by selecting medium-weight wrapping paper – it’s your best friend for this project!
First, I’ll have you fold the bottom end up and secure it firmly with tape. Trust me, don’t skimp on the tape here.
Next, let’s fold those left and right edges in to create your bag’s sides. I always make sure to keep my folds crisp and tight – it makes such a difference in the final product.
For extra stability (especially if you’re wrapping something heavy), I recommend sliding a piece of cardboard into the bottom. You won’t regret this step!
Once you’ve got your base assembled, flip it over and test its sturdiness. If it feels a bit wobbly, don’t worry – just add some reinforcement with double-sided tape or extra layers where needed.
Shaping Your Gift Bag
With your solid base in place, let’s shape your gift bag into something spectacular. I’ll guide you through creating those crisp, professional-looking sides that’ll make your homemade bag rival any store-bought version.
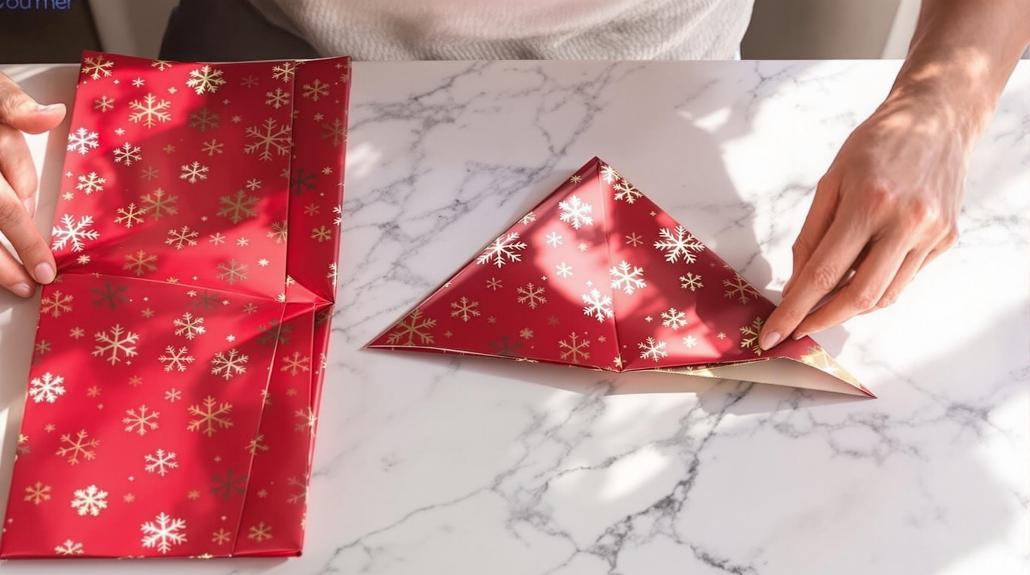
Start by folding each side of your bag inward, making neat creases that run from top to bottom. Think of it like you’re giving your bag perfect posture – these creases are its backbone!
Now, here’s where the magic happens: gently unfold those sides to help your bag stand proudly. I like to press firmly along each crease to make them extra sharp – it’s oddly satisfying, like pressing a perfect pleat in fabric.
Next, we’ll focus on the top section. Open it carefully, working the paper to create that classic rectangular shape we’re after. You’ll want to guarantee your sides are even and the opening is wide enough to slip your gift in easily.
As you shape the bag, you might notice it starting to take on that distinctive department store look – that’s exactly what we’re going for! Keep adjusting until your bag stands confidently on its own, ready for its starring role.
Adding Personal Touches
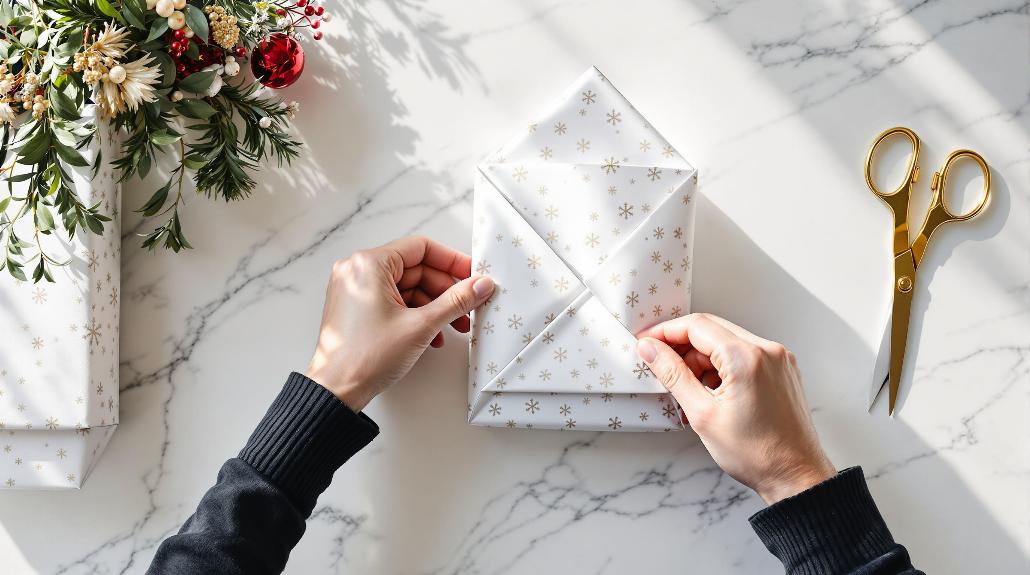
Personal touches transform your handmade gift bag into a one-of-a-kind creation. I love to start by crafting custom tags from leftover wrapping paper or scrapbook materials – they’re perfect for adding a thoughtful message or the recipient’s name. For a polished look, I’ll use a hole punch to create clean edges before attaching them.
Next, I’ll add decorative embellishments that make the bag sparkle with personality. Try using metallic stickers, mini ornaments, or even dried flowers for a natural touch. I find that layering different textures, like velvet ribbons with rustic twine, creates an eye-catching effect that’ll make anyone smile.
Don’t forget the finishing touches! I’ll thread a beautiful ribbon or twine through hole-punched openings to create sturdy handles. For extra flair, I’ll tuck in some coordinating tissue paper and maybe add a festive bauble or two.
Here’s a fun trick: create a simple Christmas tree design using graduated paper squares – it’s amazing how these little details can make your gift bag truly special!
Tips for Perfect Results
Creating flawless gift bags starts with selecting the right materials and following key techniques. I’ll share my top tips to help you achieve professional-looking results every time.
First, I recommend choosing medium to thick wrapping paper – those flimsy dollar store papers will only lead to frustration and tears (and not the good kind!).
When measuring your paper, I always add an extra inch or two for safety. Trust me, it’s better to trim excess than to come up short. I’ve found that keeping the pattern direction in mind makes a huge difference in the final look.
For stability, I make sure my bags are twice as tall as they’re wide, and I never skip reinforcing the bottom with a cardboard insert for heavier gifts.
Here’s a pro tip: double-sided tape is your best friend for clean seams. If you’re adding handles, I suggest reinforcing the punch holes with small circles of clear tape first.
And remember, when in doubt, add an extra piece of tape – nobody will see it, but they’ll definitely notice if the bag falls apart!
Frequently Asked Questions
Can I Reuse Old Wrapping Paper to Make Gift Bags?
Did you know that Americans spend over $7 billion on wrapping paper each year?
I’m happy to tell you that you can definitely reuse old wrapping paper to create gift bags.
I’ve found that medium-weight paper works best – just fold it around a small box for shape, secure with tape, and add a ribbon handle through punched holes.
It’s a clever way to save money and reduce waste!
How Do I Prevent the Paper From Tearing at the Corners?
I recommend starting with thick, sturdy wrapping paper and scoring your fold lines with a ruler before creasing.
When you’re folding corners, I’ve found that making gentle, precise creases and using double-stick tape for reinforcement works wonders.
I always fold edges inward to create triangle-shaped reinforcement points, and I make sure not to overfill the bag, which can strain those tricky corners.
What’s the Largest Size Gift Bag I Can Make?
While you might think bigger is always better, I’d recommend keeping your gift bag around 594mm x 840mm (A1 size) for best results.
I’ve found that using standard wrapping paper rolls, you can create a bag that’s perfect for large items like gaming consoles or small luggage.
Just remember to reinforce the corners and bottom with cardboard – trust me, I learned that lesson the hard way!
Will Metallic or Textured Wrapping Paper Work for Making Bags?
I’ve found that both metallic and textured papers can work for making bags, but they each need special handling.
Metallic paper is usually your better bet since it’s often sturdier and takes tape well.
If you’re using textured paper, I’d recommend choosing a thicker variety to prevent tearing.
I like to test the paper’s durability with a gentle fold first – if it creases cleanly without damage, you’re good to go!
How Long Can These Homemade Gift Bags Last in Storage?
I’ve found that homemade gift bags can last 1-2 years when stored properly.
I keep mine in a cool, dry closet away from sunlight, and they stay in great shape.
Just remember, it’s a bit like keeping your favorite clothes – don’t stack heavy things on top, and they’ll maintain their form.
The better quality wrapping paper you use, the longer they’ll stick around for future celebrations.
