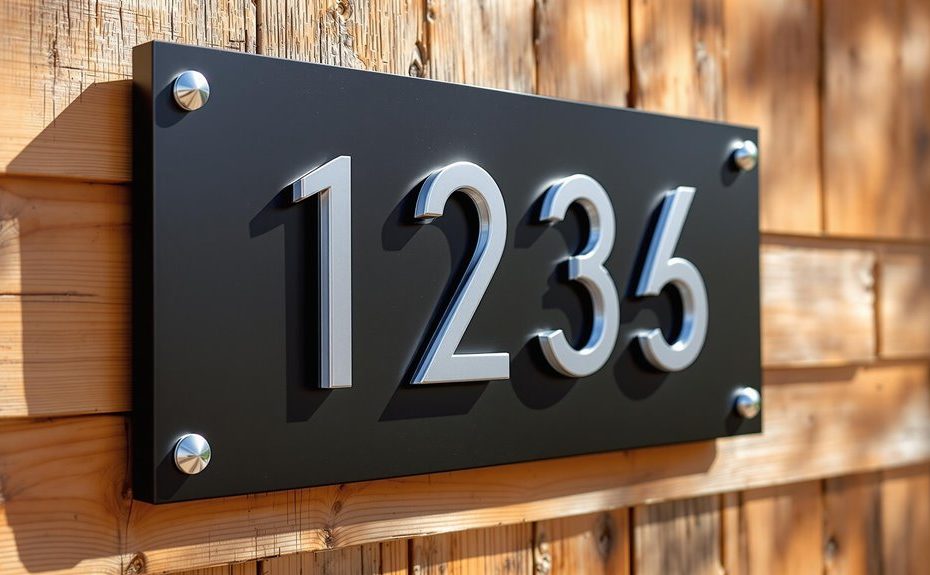
Creating a modern house number sign is simpler than you might think. Start by selecting 1/4" birch plywood or cedar as your base, then pick out some sleek floating numbers from your local hardware store. You'll need basic tools like a miter saw, drill, and brad nailer to put it all together. Cut your base to size, sand it smooth, and add a one-inch border trim with 45-degree miters for a professional look. After securing your numbers and applying a weather-resistant finish, you'll have a stylish address display. There's plenty more you can do to make your sign truly stand out.
Materials and Tools List
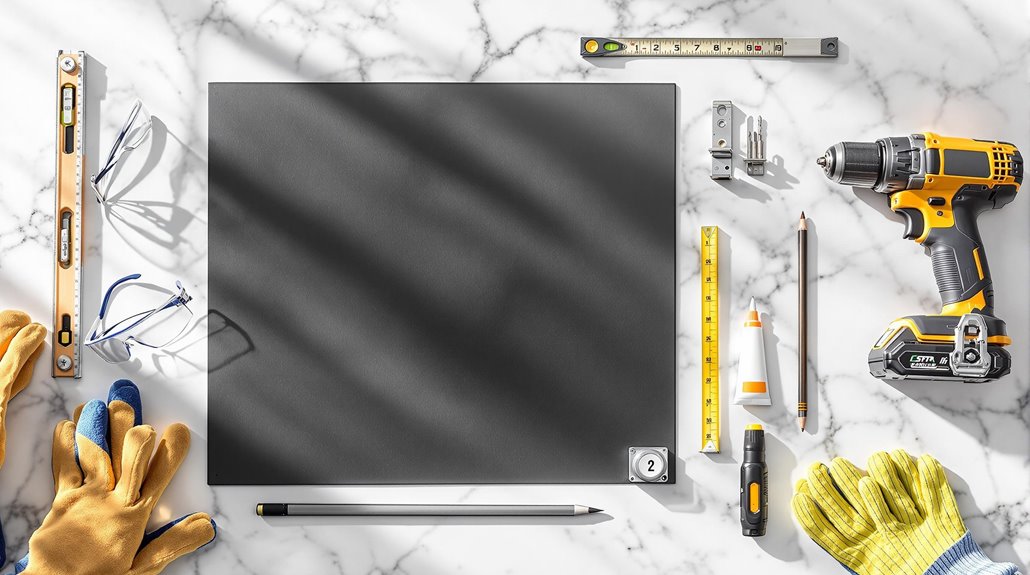
For creating a professional house number sign, you'll need several essential materials and tools. Your material types include 1/4" birch plywood, wood shims, floating mount numbers, and various trim pieces. For tool selection, gather a miter saw, drill, sander, and brad nailer as must-haves. Don't forget measuring tools and painting supplies to complete your project successfully. You should plan to use sandpaper for smoothing edges and surfaces before applying any finishes.
Planning Your Design
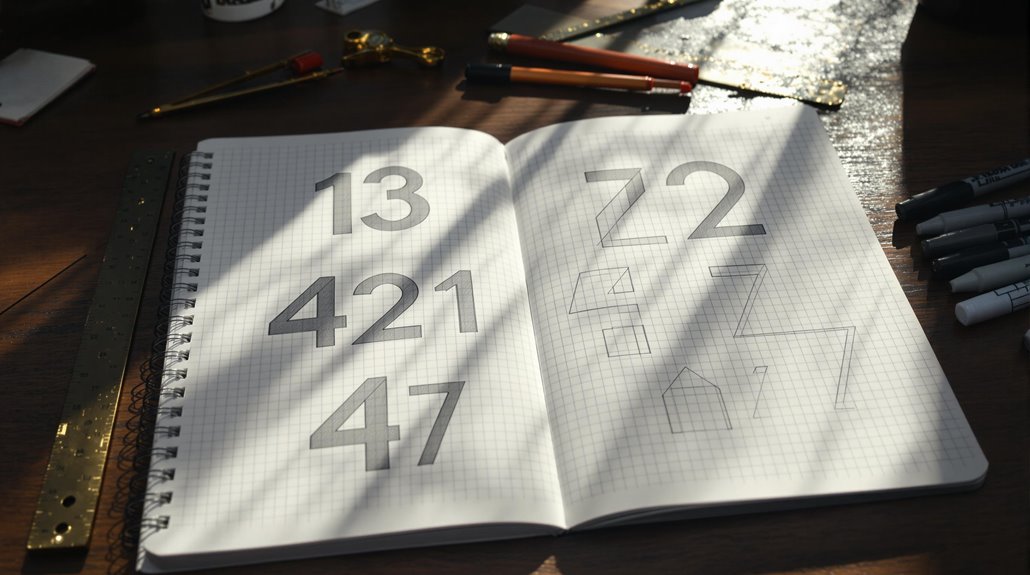
In creating a house number sign, careful planning of your design is essential for both functionality and aesthetics. When determining your design size, consider how far your house sits from the street—the greater the distance, the larger your numbers should be. Remember to account for visibility factors like contrast, lighting, and spacing between numbers. Don't forget to add a one-inch border for trim. Using modern style numbers from your local home improvement store will help achieve a contemporary look.
Choosing the Right Base
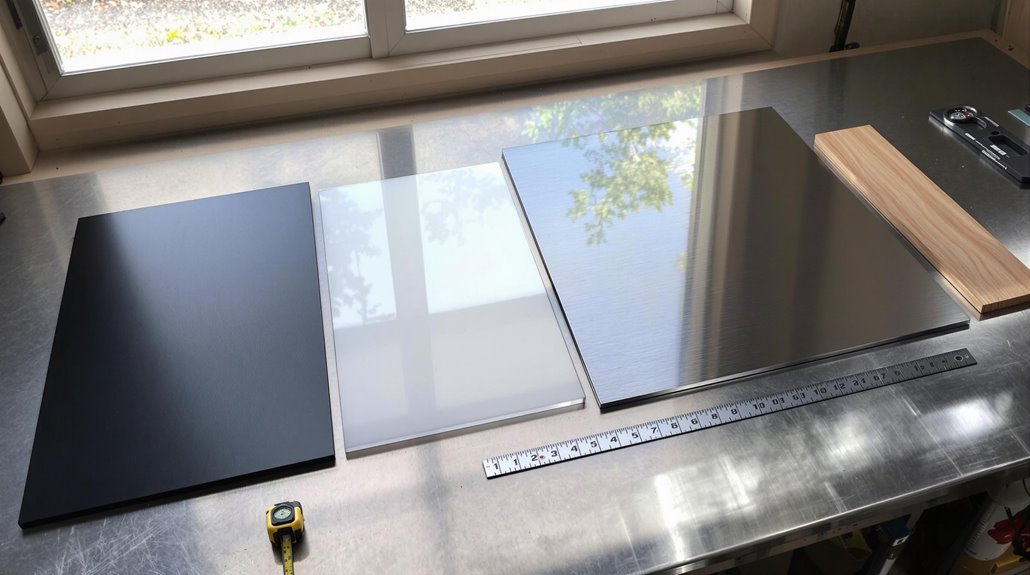
Selecting the right base material stands as one of the most essential decisions when creating a house number sign. From wood and steel to PVC trim, your base material options should balance design aesthetics with durability. When choosing your base, consider the size you'll need (typically 1" x 6" or 30" x 12"), and don't forget to factor in weather resistance and visibility from the street. Cedar wood planks provide an excellent foundation for house number signs when stained with contrasting finishes like Pecan and Provincial Minwax.
Prepping Wood for Assembly
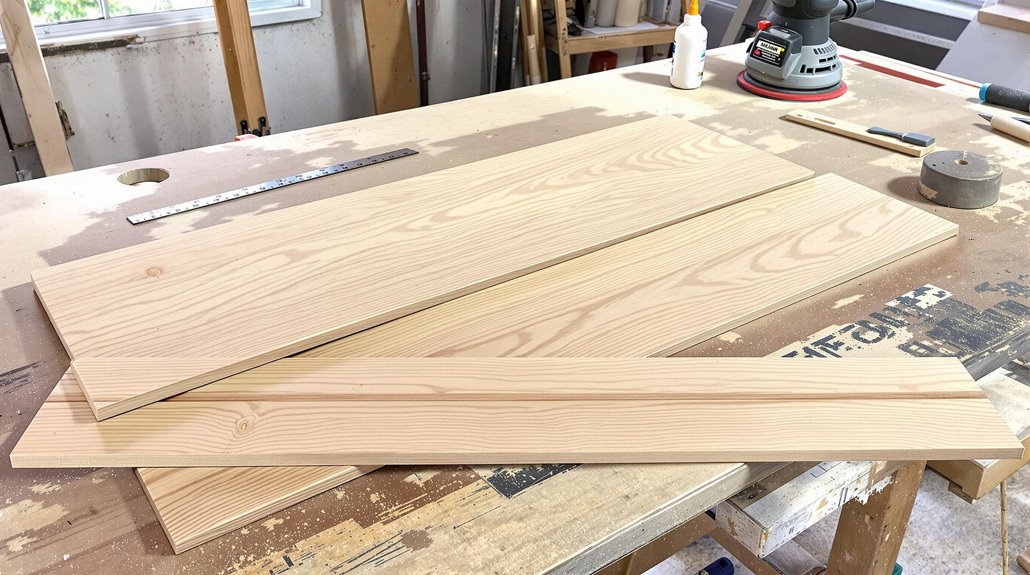
Proper wood preparation forms the foundation of a successful house number sign project. Using a 1×6 select pine board ensures optimal material quality for the base. Using essential wood treatment techniques, start by cutting your base and trim pieces with precise 45-degree miters. Sand all surfaces with 220-grit sandpaper, then apply wood conditioner. For best assembly tips, use wood glue and brad nails to secure borders, letting everything dry completely between steps.
Adding Decorative Elements
Decorative elements transform a basic house number sign into a personalized statement piece. You can mix stain and paint for a unique look, or add acrylic numbers for a modern touch. Consider installing decorative planters beneath your sign for extra flair. Velcro options make it easy to mount and adjust your creation, while dowel rods of varying sizes create appealing depth and dimension. Natural motifs and materials can be incorporated into the design to enhance its organic appeal.
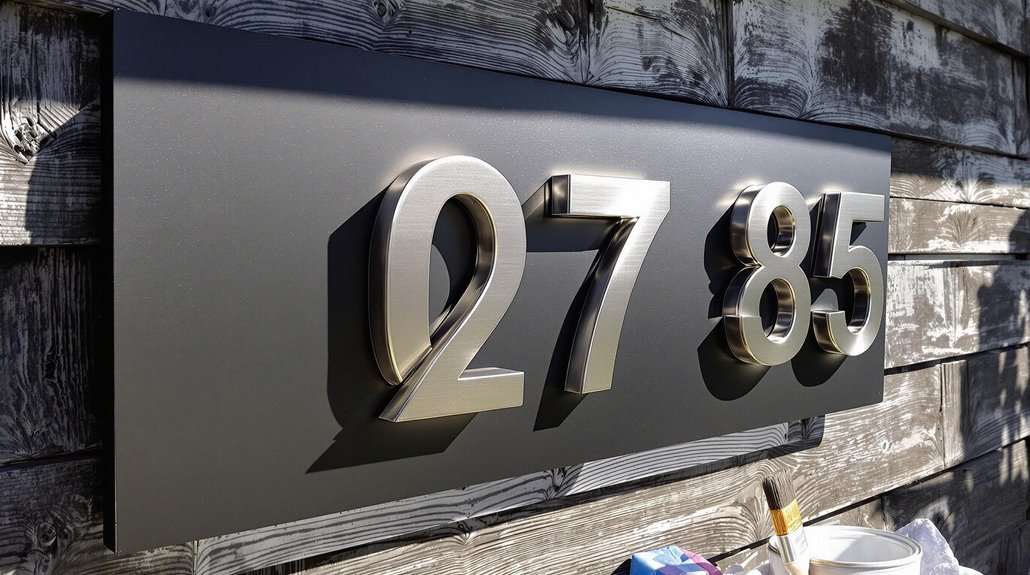
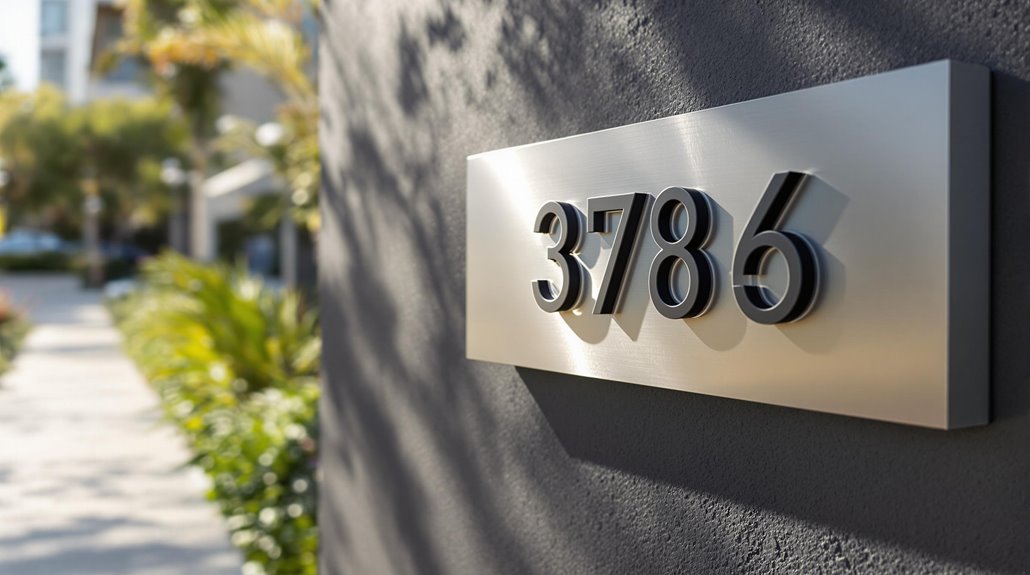
Selecting Modern House Numbers
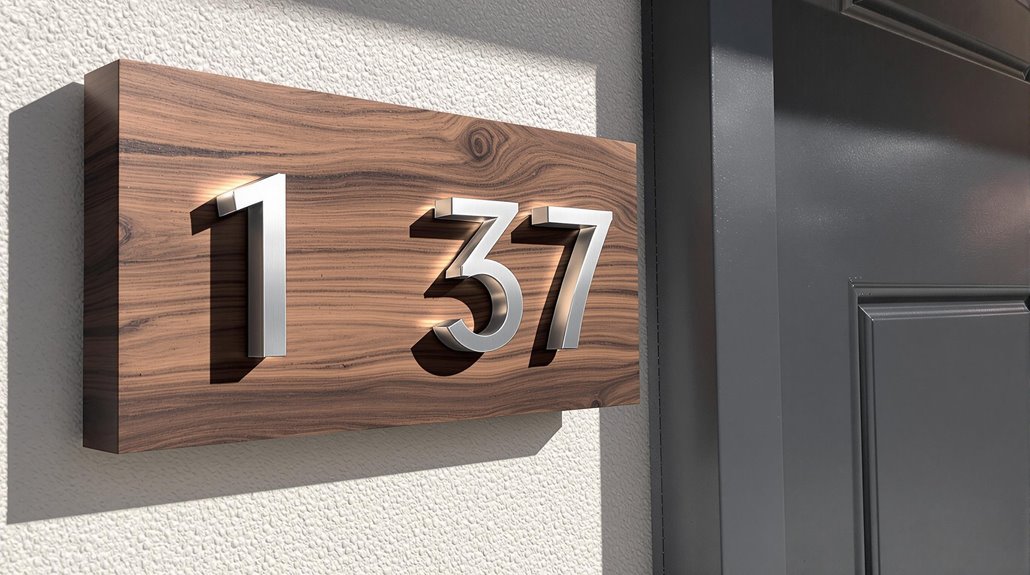
Modern house numbers serve as both functional identifiers and design elements that can dramatically enhance your home's curb appeal. When selecting modern materials, consider sleek options like brushed metal or acrylic for a contemporary look. Today's design trends favor clean lines and minimalist aesthetics, so opt for simple, bold numbers that complement your home's architecture while ensuring they're easily visible from the street.
Measuring and Cutting Guide
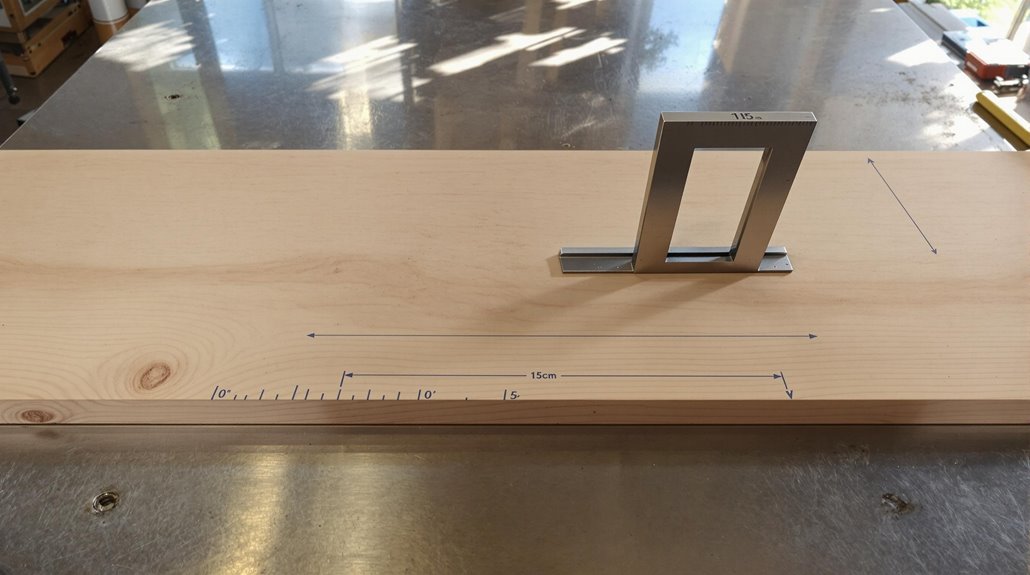
Before beginning construction of your house number sign, accurate measurements and precise cutting are essential for a professional-looking result. Start by measuring your space and deciding between vertical or horizontal orientation. Your measuring techniques should include adding a 1-inch border for trim. For cutting methods, use a cedar 1"x6" board, making sure to sand the edges smooth after cutting. Remember to cut your trim at 45-degree angles for clean corners.
Mounting Hardware Selection

Selecting the right mounting hardware sets the foundation for a secure and professional-looking house number installation. When choosing your mounting hardware types, you'll need sturdy drill bits (11/64" or 3/16" for masonry), appropriate screws, and optional standoffs for a floating look. Consider installation techniques like using epoxy for studs and spacers, and keep a rubber mallet handy for final adjustments.
Paint and Stain Tips
Achieving a professional finish on your house number sign requires careful attention to paint and stain application techniques. Start by selecting exterior-grade products that coordinate with your home's color scheme. Apply thin, even coats using proper tools like brushes or sprayers, allowing each layer to dry completely. For enhanced durability, consider using oil-based stains and protective clear coats.
Assembly Steps

A successful house number sign installation begins with careful assembly steps that create a durable and professional-looking result. Start by cutting your frame construction materials to size, then pre-drill holes according to your template. With your frame ready, focus on number alignment by carefully positioning each digit. Secure the numbers using studs and epoxy, ensuring everything is level before final wall mounting.
Weather Protection Methods
Proper weather protection is essential for ensuring your house number sign remains visible and functional throughout the seasons. Start by applying weather resistant coatings to shield your numbers from moisture and UV damage. Choose an elevated mounting position under an overhang, and regularly clean your sign to prevent dirt buildup. These simple steps will keep your house numbers looking fresh year-round.
Hanging Your Sign
Successfully mounting your house number sign requires careful preparation and the right tools for your specific surface material. Start by choosing the perfect spot and marking your drilling points with a level. Different hanging techniques work best for various surfaces – use lag bolts for masonry, toggle bolts for stucco, and standard screws for drywall. This guarantees ideal sign visibility and security.
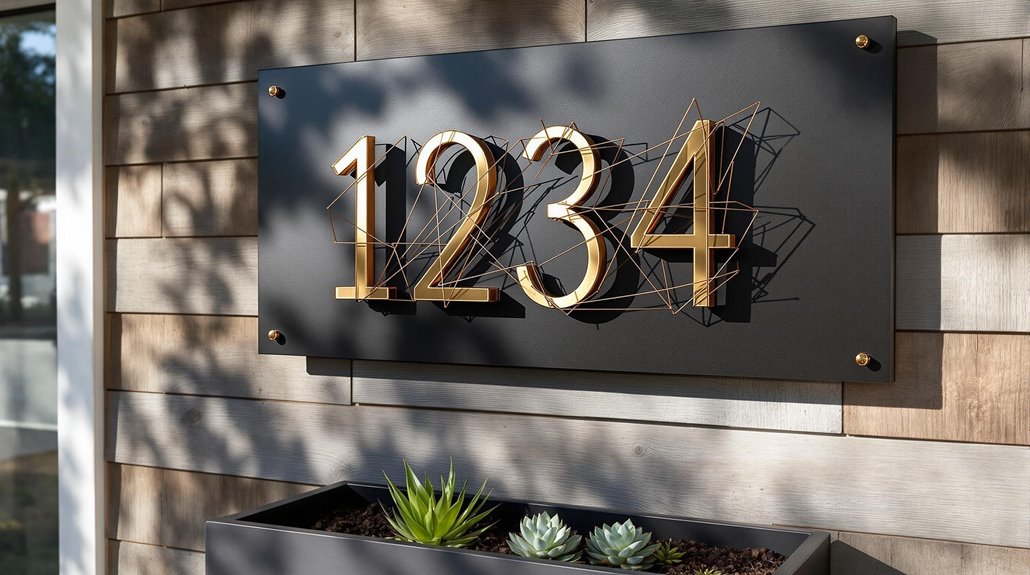
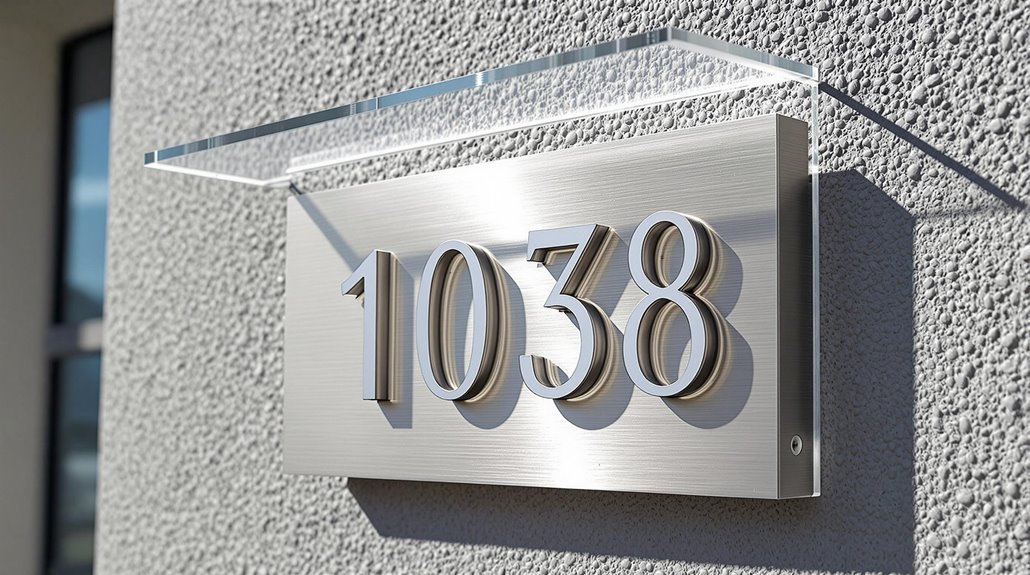
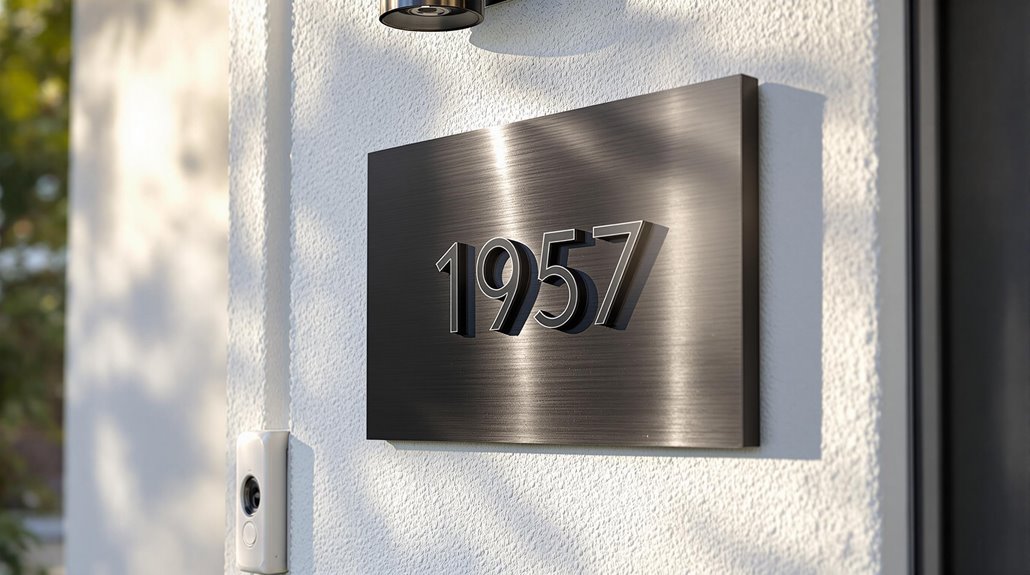
Modern Design Ideas
Modern house number signs have evolved beyond mere functionality to become striking architectural elements that enhance curb appeal. You can achieve minimalist aesthetics by combining sleek materials like brushed aluminum with floating mounts for a clean look. Try incorporating contemporary materials such as glass or metal trim with backlit features, creating an eye-catching display that's both sophisticated and practical.
Customization Options
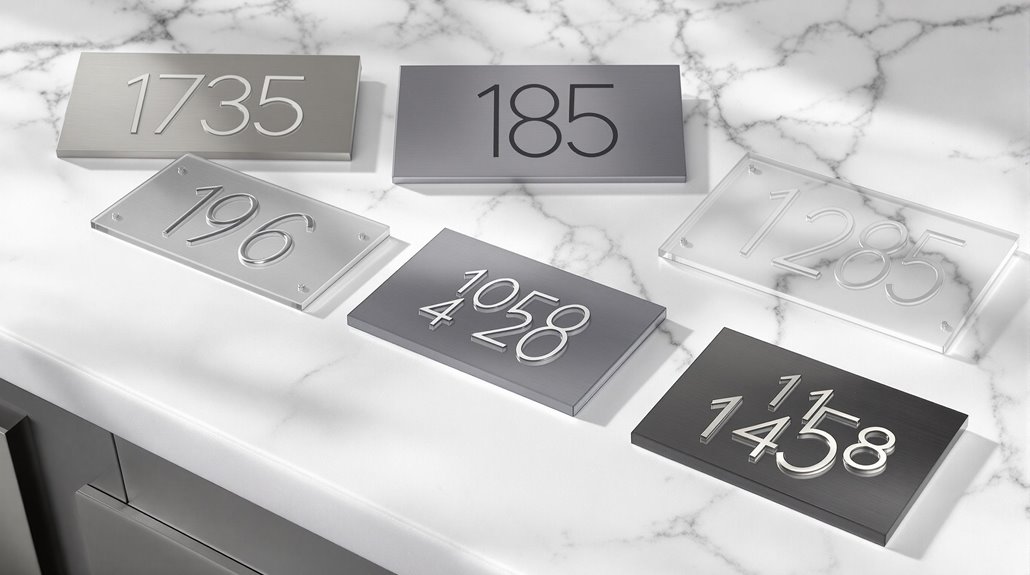
Creating your personalized house number sign begins with an array of customization options that build upon contemporary design principles. You can choose from custom font choices like Wasatch or Newport, and explore color combinations that make your numbers pop. Mix black, white, gray, or brown backdrops with brass, black, or silver numbers for a unique look that matches your home's style.
Safety and Maintenance Tips
Maintaining a well-kept house number sign goes beyond aesthetic appeal – it serves as a critical safety feature for your home. For emergency preparedness, clean your numbers regularly with mild soap and check mounting hardware monthly. Guarantee number visibility by installing subtle lighting and keeping signs clear of snow and debris. Apply protective sealants yearly to guard against weather damage.
Frequently Asked Questions
How Long Will My Modern House Number Sign Typically Last Outdoors?
Your modern house number sign's lifespan largely depends on durability factors and material choices. Signs made from aluminum composite, PVC, or powder-coated metal typically last 10-15 years, while wood signs might need replacement in 5-7 years. With proper maintenance and protection from harsh weather, you can extend your sign's life considerably. Premium materials like recycled aluminum can even last 20+ years with minimal care.
Can I Install This Type of Sign on a Rental Property?
Installing a house number sign on a rental property typically requires written permission from your landlord first. Check your rental agreements carefully, as they often have specific rules about property modifications. Once approved, guarantee you follow local regulations and choose installation methods that minimize damage. Remember, you may need to remove the sign and repair any holes when moving out, so document everything in writing beforehand.
What's the Ideal Viewing Distance for 5-Inch House Numbers?
Like a lighthouse guiding ships to shore, 5-inch house numbers are most effective at distances between 111-132 feet from the street's midpoint. When considering visibility factors, these numbers become hard to read beyond 175 feet. Design considerations suggest placing them at or above eye level, with proper lighting and high-contrast colors. For the best results, you'll want to use simple, sans-serif fonts and guarantee they're unobstructed by landscaping.
Will LED Backlighting Affect the Durability of the Materials?
LED backlighting won't compromise your materials when properly installed. Modern LED materials are designed to work safely with stainless steel and acrylic, producing minimal heat that won't cause damage. The key is using low-voltage (12V DC) power supplies and ensuring proper waterproofing. In fact, backlighting effects can actually extend your sign's visibility while the weather-resistant components maintain their durability for years to come.
How Often Should I Reapply Weather Sealant to Maintain the Sign?
The reapplication frequency depends on your weather sealant type. For wood signs, you'll want to reapply every 12-18 months to maintain protection. If you're using an acrylic-resin sealer, plan on resealing every 1-3 years. Polyurethane sealers last longer, typically 3-5 years. Keep an eye out for signs of wear like water absorption or discoloration – these are clear indicators it's time to reseal.
