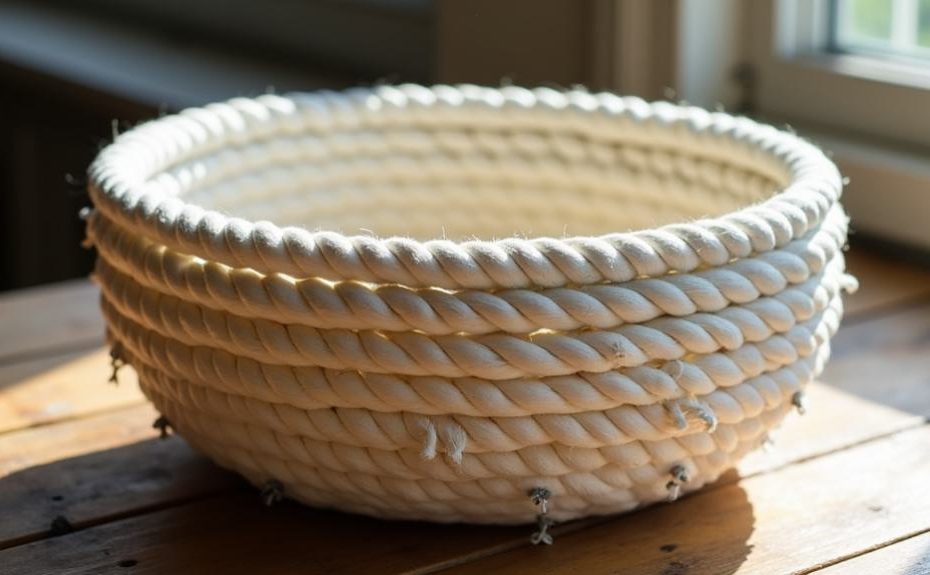
I’ll show you how to create beautiful no-sew rope baskets using just a few simple materials. You’ll need 10-15 yards of 3/8-inch cotton rope, a hot glue gun, scissors, and a bowl for shaping. Start by forming a tight coil for the base, securing it with hot glue as you go. Build up the walls by continuing to coil and glue the rope, maintaining even pressure for a sturdy shape. Add handles and decorative touches like ribbons or yarn for personalization. It’s a surprisingly easy project that transforms basic rope into a functional, stylish storage solution – and there’s so much more to discover about making these versatile baskets.
Essential Materials and Tools

A well-stocked craft station is essential for creating beautiful DIY rope baskets. I’ll help you gather everything you’ll need before we get started on this fun project.
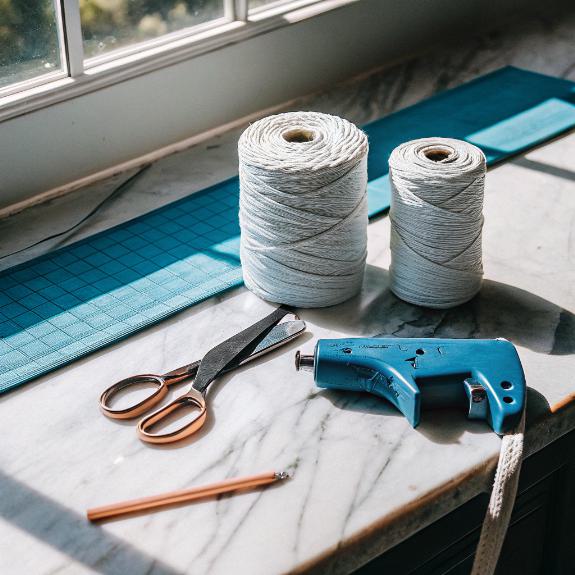
First, you’ll want to pick up some 3/8-inch thick natural cotton rope – I’ve found this thickness works perfectly for most basket sizes. For a small basket, grab 10-15 yards, or about 25 yards if you’re thinking bigger.
Next on your list should be a high-temperature hot glue gun with less-mess glue sticks. Trust me, they’re worth the extra dollar or two! Many crafters prefer using 8-inch glue sticks for longer working time between refills.
You’ll also need a vessel to shape your basket – I like using metal bowls or glass containers I already have at home. Don’t forget to grab some parchment paper to protect your work surface (I learned this one the hard way!).
For the basics, you’ll need sharp scissors to cut your rope cleanly. If you’re feeling fancy, pick up some fabric or leather strips for handles and decorative touches.
I’d also recommend clear tape to wrap the rope ends – it’s a simple trick that prevents annoying fraying while you work.
Preparing Your Workspace
Now that you’ve gathered your supplies, let’s get your workspace ready for basket-making success. I’ll help you create a safe and efficient crafting station where you can focus on making your beautiful rope basket.
First, I’ll cover my metal vessel with parchment paper to prevent the glue from sticking, and I recommend you do the same. Grab your 3/8 inch cotton piping and keep it within easy reach.
Here’s what you’ll need to set up before we start coiling:
- A clean, well-lit area with plenty of ventilation (those glue fumes aren’t exactly aromatherapy!)
- A protective covering for your work surface – an old tablecloth works perfectly
- Your materials organized within arm’s reach to avoid the dreaded mid-project scramble
- A stable, flat surface where your vessel can sit securely
Safety is my top priority when working with hot glue, so I always keep protective gloves nearby.
I’ll help you position your glue gun on a heat-safe surface away from any flammable materials, and we’ll make sure to have good lighting for precise glue application.
Building The Base
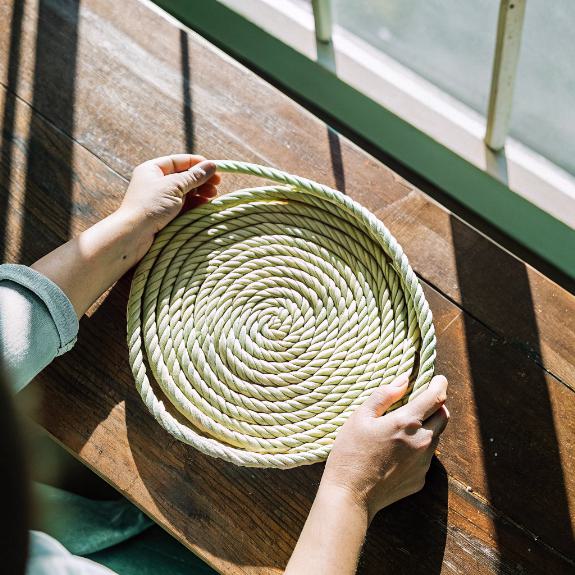
With your workspace ready, let’s begin creating the foundation of your rope basket. I’ll guide you through forming a sturdy base using cotton piping, which I’ve found works best for these no-sew projects.
I recommend choosing 3/8″ thick natural cotton cord – it’s pliable and takes to glue like a charm.
Start by making a tight coil with your rope. I know it might feel like you’re making the world’s tiniest rug at first, but trust me, this is essential for a solid foundation.
You’ll need approximately 12 yards of cord to complete a standard-sized basket.
Apply hot glue every inch as you work, and remember to press firmly. I like to work in small sections to keep everything neat and prevent any glue disasters (we’ve all been there with runaway hot glue!).
You might find it helpful to use a bucket or pail as a guide for shaping your base.
Keep coiling and gluing until you’ve reached your desired base size. Don’t forget to secure the end with both clear tape and an extra dab of glue – this double-duty approach guarantees nothing comes loose later.
Take your time here; a strong base means a sturdy basket.
Creating Sturdy Basket Walls
Building upward from your base requires careful attention to maintain the basket’s shape and stability.
I’ve found that creating sturdy walls is all about consistent tension and proper placement as you work your way up. Let me show you how to build walls that’ll keep your basket looking sharp and standing strong.
Similar to how geotextile placement prevents material from shifting in retaining walls, maintaining proper tension helps keep your basket’s shape intact.
As you weave upward, here’s what you’ll want to focus on:
- Keep the rope snug against the previous row, making sure there aren’t any gaps or loose sections
- Maintain even pressure as you wrap – too tight will cause bulging, too loose will make floppy walls
- Check your progress frequently by standing back and looking for any tilting or unevenness
- Use your thumbs to guide the rope into position, ensuring each row sits perfectly on top of the last
I like to work in sections of about 2-3 inches at a time, which gives me better control over the shape.
As you continue building up, you’ll notice the walls naturally want to curve inward slightly – don’t fight this! It’s exactly what we want for that classic basket shape.
Adding Final Details
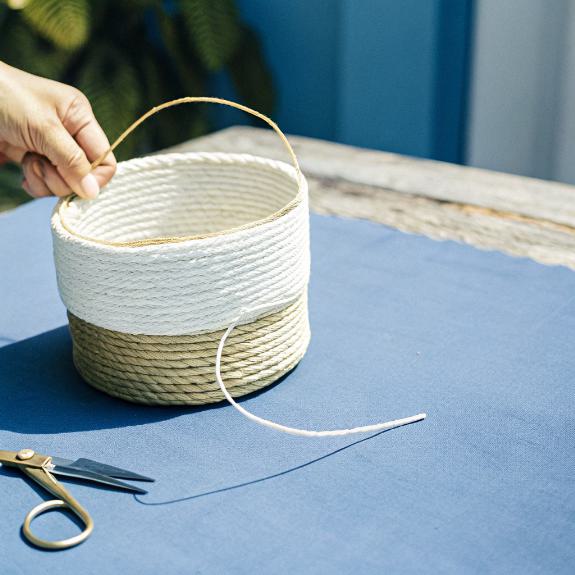
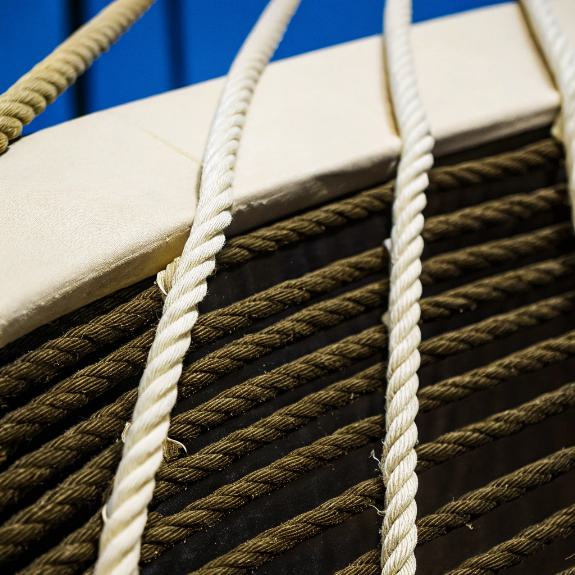
The finishing touches transform a simple rope basket into a polished, professional piece. I’ll show you how to secure those handles properly – you’ll want to reinforce them by coiling and gluing the rope, or create a wire handle wrapped in fabric for extra stability.
I always make sure to glue the handles firmly to the basket’s inside for that extra security we all need. Users have shared positive feedback about the durability of properly secured handles.
Now, let’s tackle those pesky loose ends! I’ll help you finish the basket edge by cutting the excess rope, leaving about an inch that you’ll glue down inside.
Don’t forget to tuck that end into the ridge – a dab of Super Glue works wonders here.
Want to add some personality? I love using yarn, mason line, or ribbon as accent colors. You’ll just pull your needle through the rope below to secure those yarn knots, and wrap it tightly as you go up.
Trust me, it’s easier than it sounds! Before calling it done, I always double-check for loose ends and weak spots. A quick reinforcement with glue here and there, and you’ve got yourself a beautiful, sturdy basket that’ll last for years.
Frequently Asked Questions
How Long Does the Entire Basket-Making Process Typically Take?
I’ve found that making a rope basket typically takes between 30 minutes to 2 hours, depending on your experience and the basket’s size.
When I’m crafting an 8×9 inch basket, I usually spend about 40 minutes on it.
I’ll tell you though, larger baskets or those with fancy handles take longer.
The type of glue makes a difference too – I can work faster with super glue than fabric glue.
Can I Use Natural Fiber Ropes Other Than Jute?
Did you know that manila rope, made from the abaca tree, can hold up to 3 times its weight?
I’d highly recommend trying manila, cotton, coir, sisal, or hemp as alternatives to jute for your basket.
I’ve found cotton’s particularly great for beginners due to its flexibility and softness, while manila’s ideal if you’re after something more durable.
These natural fibers each bring their own unique texture and character to your project.
How Much Weight Can These Rope Baskets Safely Hold?
I’d recommend limiting your rope basket to 2-3 pounds for everyday use.
While the weight capacity depends on factors like your rope thickness and glue quality, I’ve found that pushing beyond this limit risks compromising the structure.
For extra safety, I suggest distributing weight evenly and avoiding sharp or pointed items that could stress the basket’s coils or glue bonds.
Will the Basket Maintain Its Shape if It Gets Wet?
I recently left my rope basket out in the rain (not my brightest moment!), and I’ll be honest – it didn’t maintain its original shape perfectly.
Natural cotton rope tends to absorb water and swell, which can cause some warping.
While the basket will usually dry and regain most of its form, it won’t be exactly the same.
I’d recommend keeping your basket away from moisture to preserve its shape long-term.
Can I Create Different Shapes Besides Round Baskets?
You can definitely create various shapes beyond round baskets!
I’d recommend using different molds like metal pails for cylindrical shapes, glass vases for tall designs, or even cardboard templates for unique geometric forms.
The key is choosing the right rope – thicker ones work better for larger shapes, while softer ropes are perfect for delicate designs.
Just maintain consistent coiling, and you’ll be amazed at what you can create!
